Connect your custom email address
Use your existing support address like [email protected] while keeping every conversation inside SparrowDesk.
- Incoming → Your provider forwards mail into SparrowDesk.
- Outgoing → SparrowDesk is authorised to send on behalf of your domain.
Once both directions show Verified the address is live and agents can reply directly using this address in SparrowDesk.
Before you start
- Have access to your email provider’s settings (Gmail, Google Workspace, Outlook, etc.).
- Have access to your domain’s DNS (GoDaddy, Cloudflare, Namecheap…) or the SMTP username & password for the mailbox.
Setting up email can be little bit technical , connect with the technical person in your company if you need help.
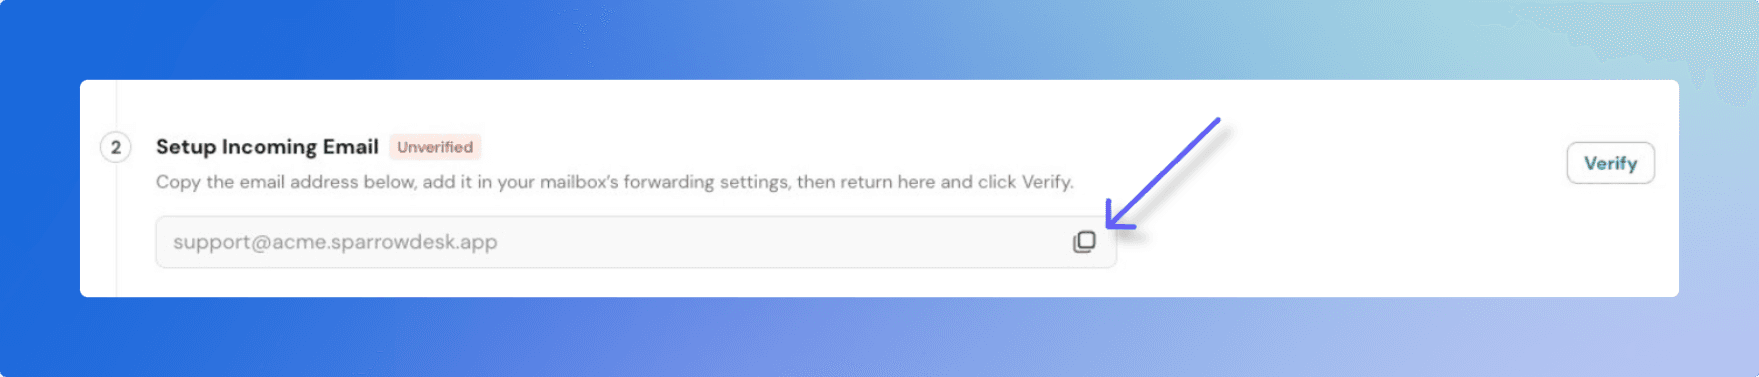
Part 1 – Incoming mail
Setup Email Forwarding
- Open forwarding settings in your email provider.
- Add a new forwarding address → paste your SparrowDesk address
support@<brand>.sparrowdesk.com. - Confirm the verification email sent by your provider (click the link).
- Back in SparrowDesk, press Verify Forwarding.
- Wait up to 2 minutes. When our testing email lands in SparrowDesk, the status changes to Verified
If it doesn’t verify, double‑check the forwarding rule, then hit Verify again to send a fresh test.
For Gmail / Google Workspace - See the guide
- Click the gear → See all settings.
- Open Forwarding & POP/IMAP.
- Click Add a forwarding address and enter
support@<brand>.sparrowdesk.com. - Confirm the email Google sends and choose Forward a copy of incoming mail to…. Save changes.
- Click the gear → Mail → Forwarding.
- Enable Forwarding and paste
support@<brand>.sparrowdesk.com. - Save. Confirm the verification email inside SparrowDesk.
For Other Email Providers
Below you will find guides that will help you integrate SparrowDesk with the other popular mail providers:
Part 2 – Outgoing mail
Adding DNS records
- In SparrowDesk, copy the three records we show (two TXT + one CNAME).
- In your domain host (GoDaddy, Cloudflare, etc.) add those records exactly as shown.
- Wait 10-20 minutes for propagation.
- Click Verify in SparrowDesk. When all three turn green, you’re set.
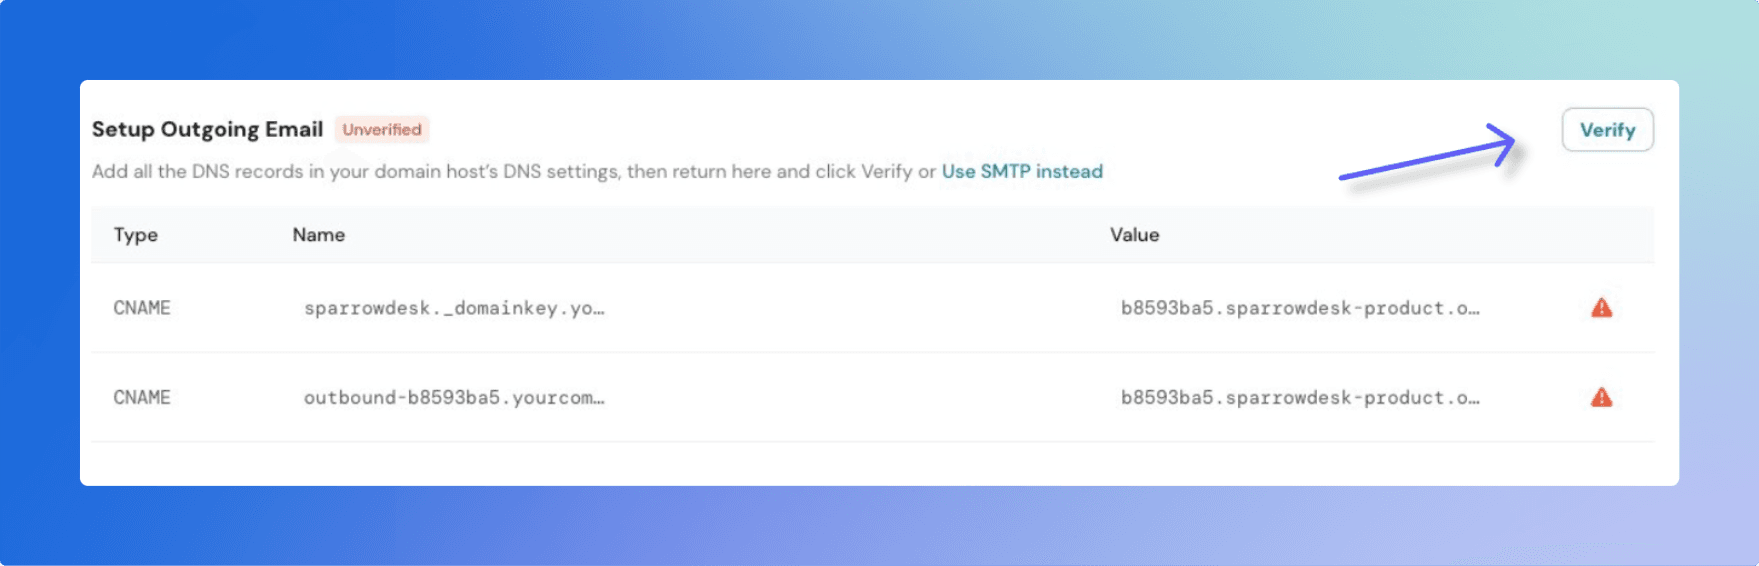
These records:
- Prove you own the domain.
- Authorise SparrowDesk’s mail servers (SPF + DKIM).
- Improve deliverability and keep you out of spam.
If you’re using an address like [email protected] or personal/free email domains you can’t touch DNS , so use SMTP instead ,
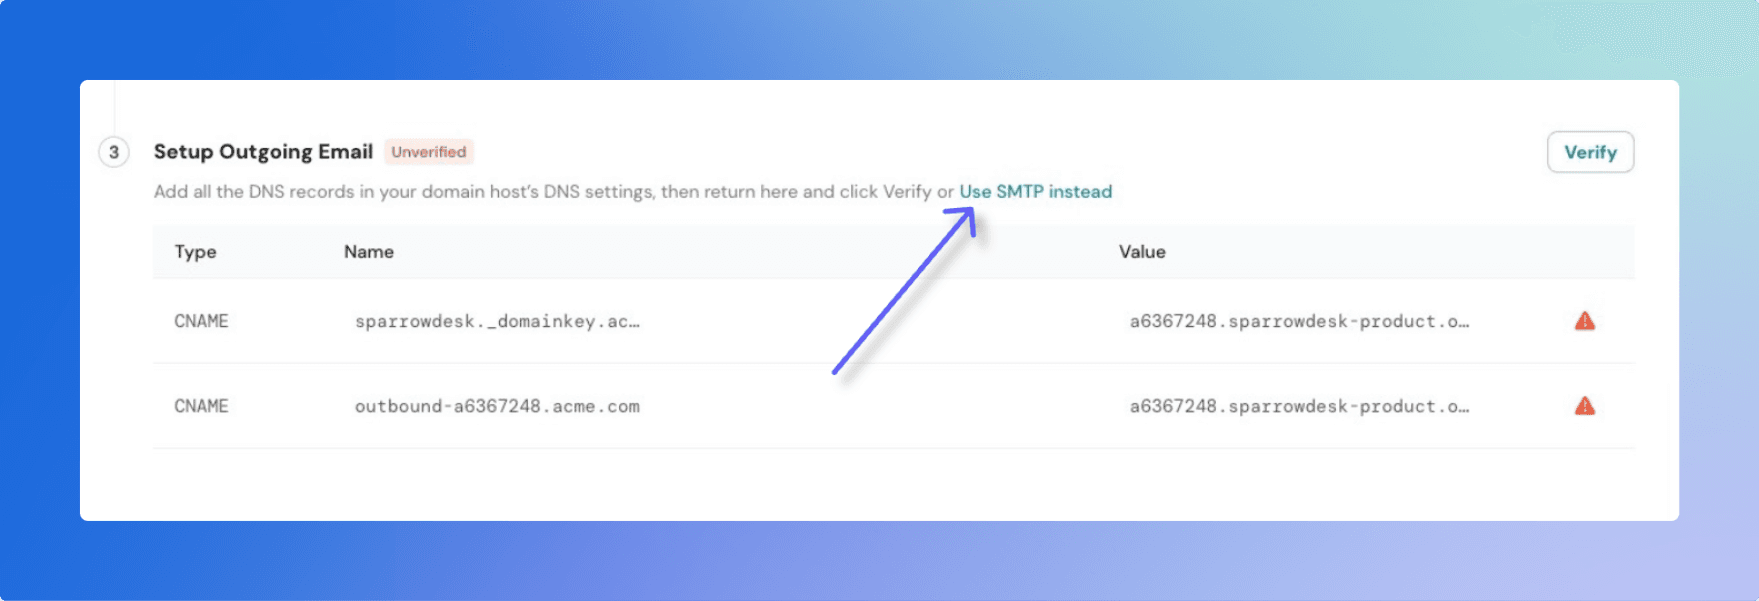
- Choose Connect via SMTP.
- Enter SMTP host (e.g.
smtp.gmail.com) - Port (465 TLS or 587 STARTTLS)
- Username (full email address)
- Password or App Password
- Click Verify.
- SparrowDesk will send a test email and confirm.
Gmail & Outlook often require an App Password or the ‘Allow less‑secure apps’ toggle.See the detailed article here
Troubleshooting
Incoming
- Verify button keeps failing → Make sure forwarding goes to the exact SparrowDesk address. Re‑check spelling, then click Verify again.
Outgoing
- Record not verified → Typos are the #1 culprit. Copy‑paste again and wait a bit longer; some hosts take up to an hour.
Outgoing using SMTP
- Authentication failed → Wrong password or 2‑factor protection. Generate a new App Password.
- Port blocked → Try the alternate port (465 ↔ 587) or switch TLS / STARTTLS.
Common questions
- Will SparrowDesk pull old emails?
No, only messages received after forwarding is turned on. - What if my SMTP password changes later?
SparrowDesk will mark the address as Verify again and prompt you to re‑enter the new password.