Search
If your support team manages customer conversations in SparrowDesk while your development team tracks tickets in Jira, connecting the two helps both teams work together more efficiently.
With the Jira integration, agents can create Jira tickets directly from support tickets or link existing Jira tickets to a customer conversation. This helps developers understand the customer context while support teams can easily track which ticket is being worked on
Once Jira is connected, agents can:
Make sure you have:
Note: The integration currently supports Jira Cloud.
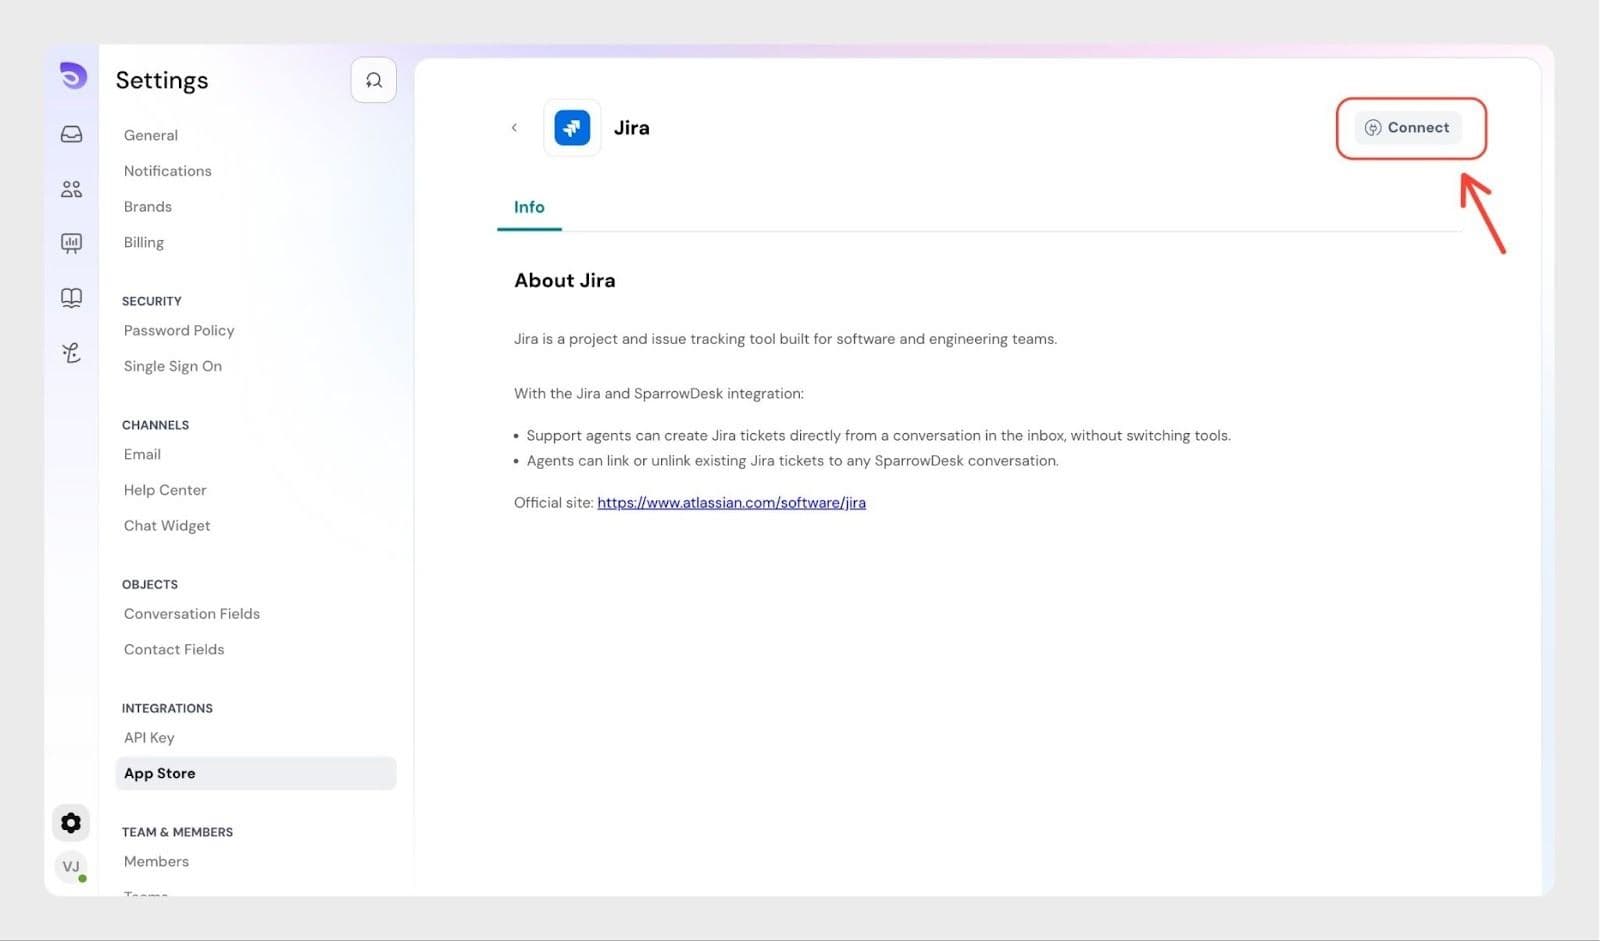
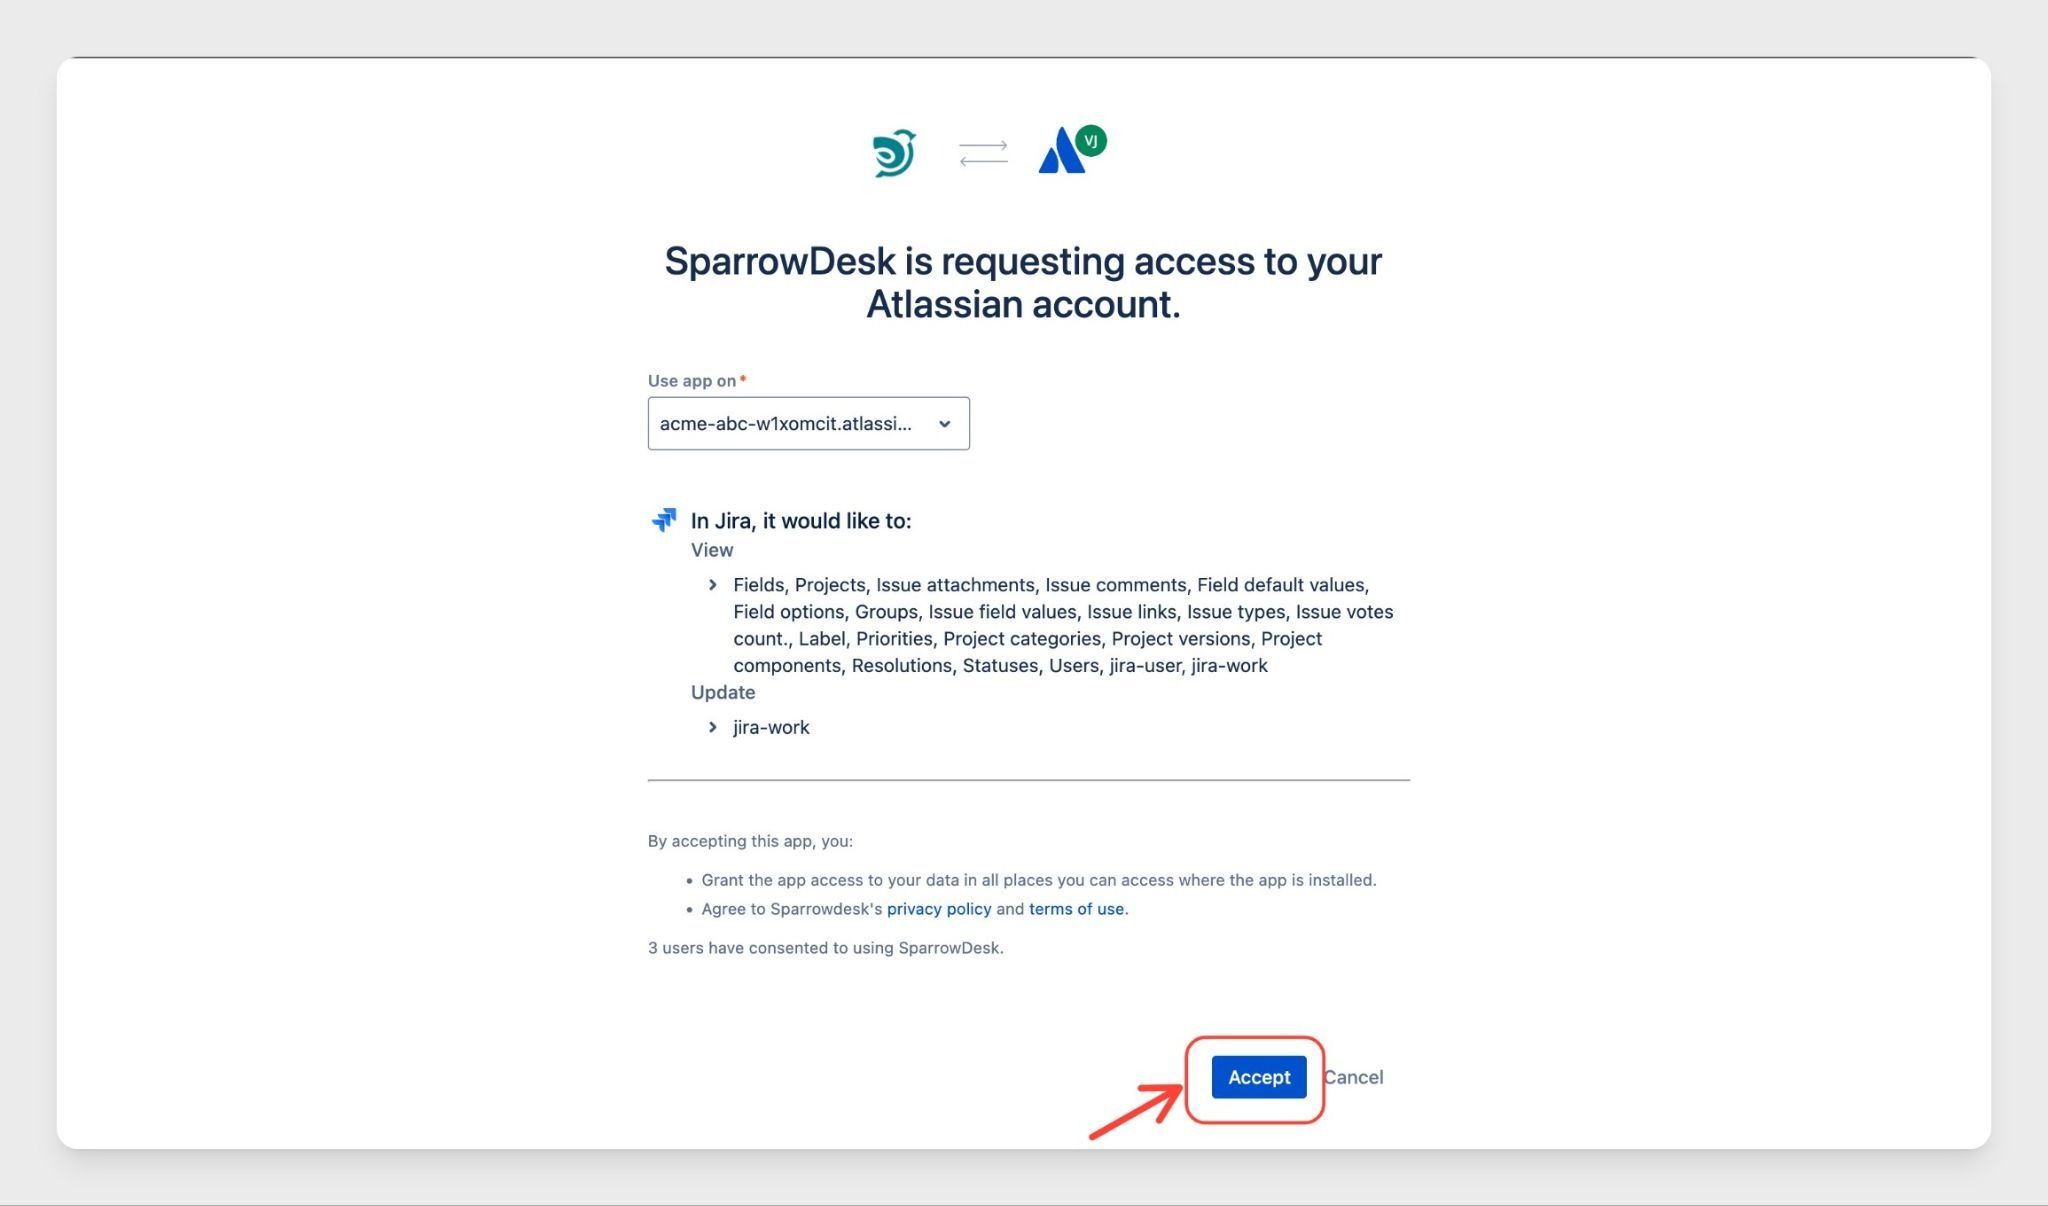
To start using the integration, first connect your Jira account.
Once the connection is complete, your agents can start linking or creating Jira tickets from SparrowDesk.
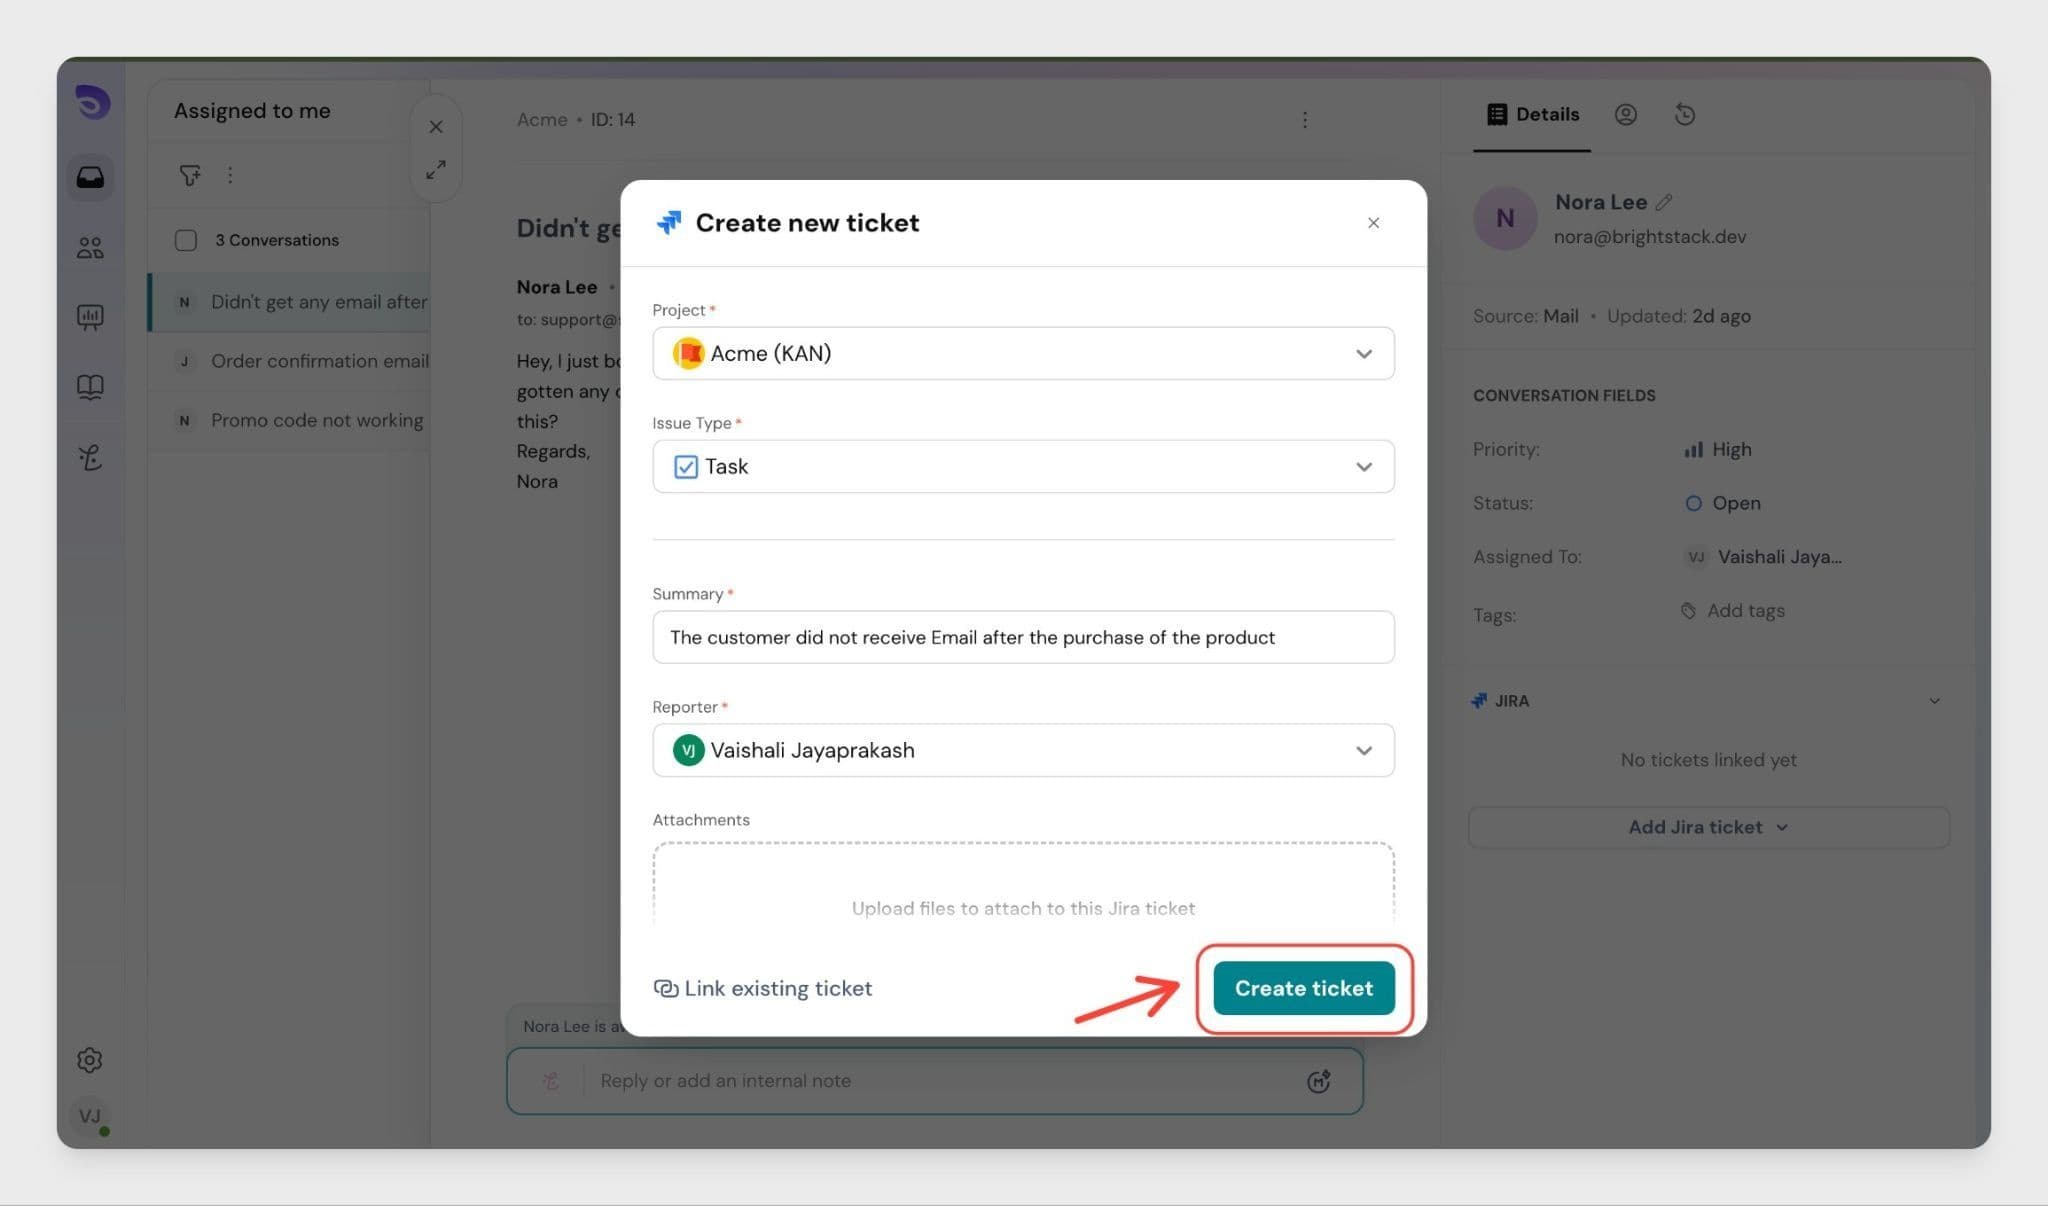
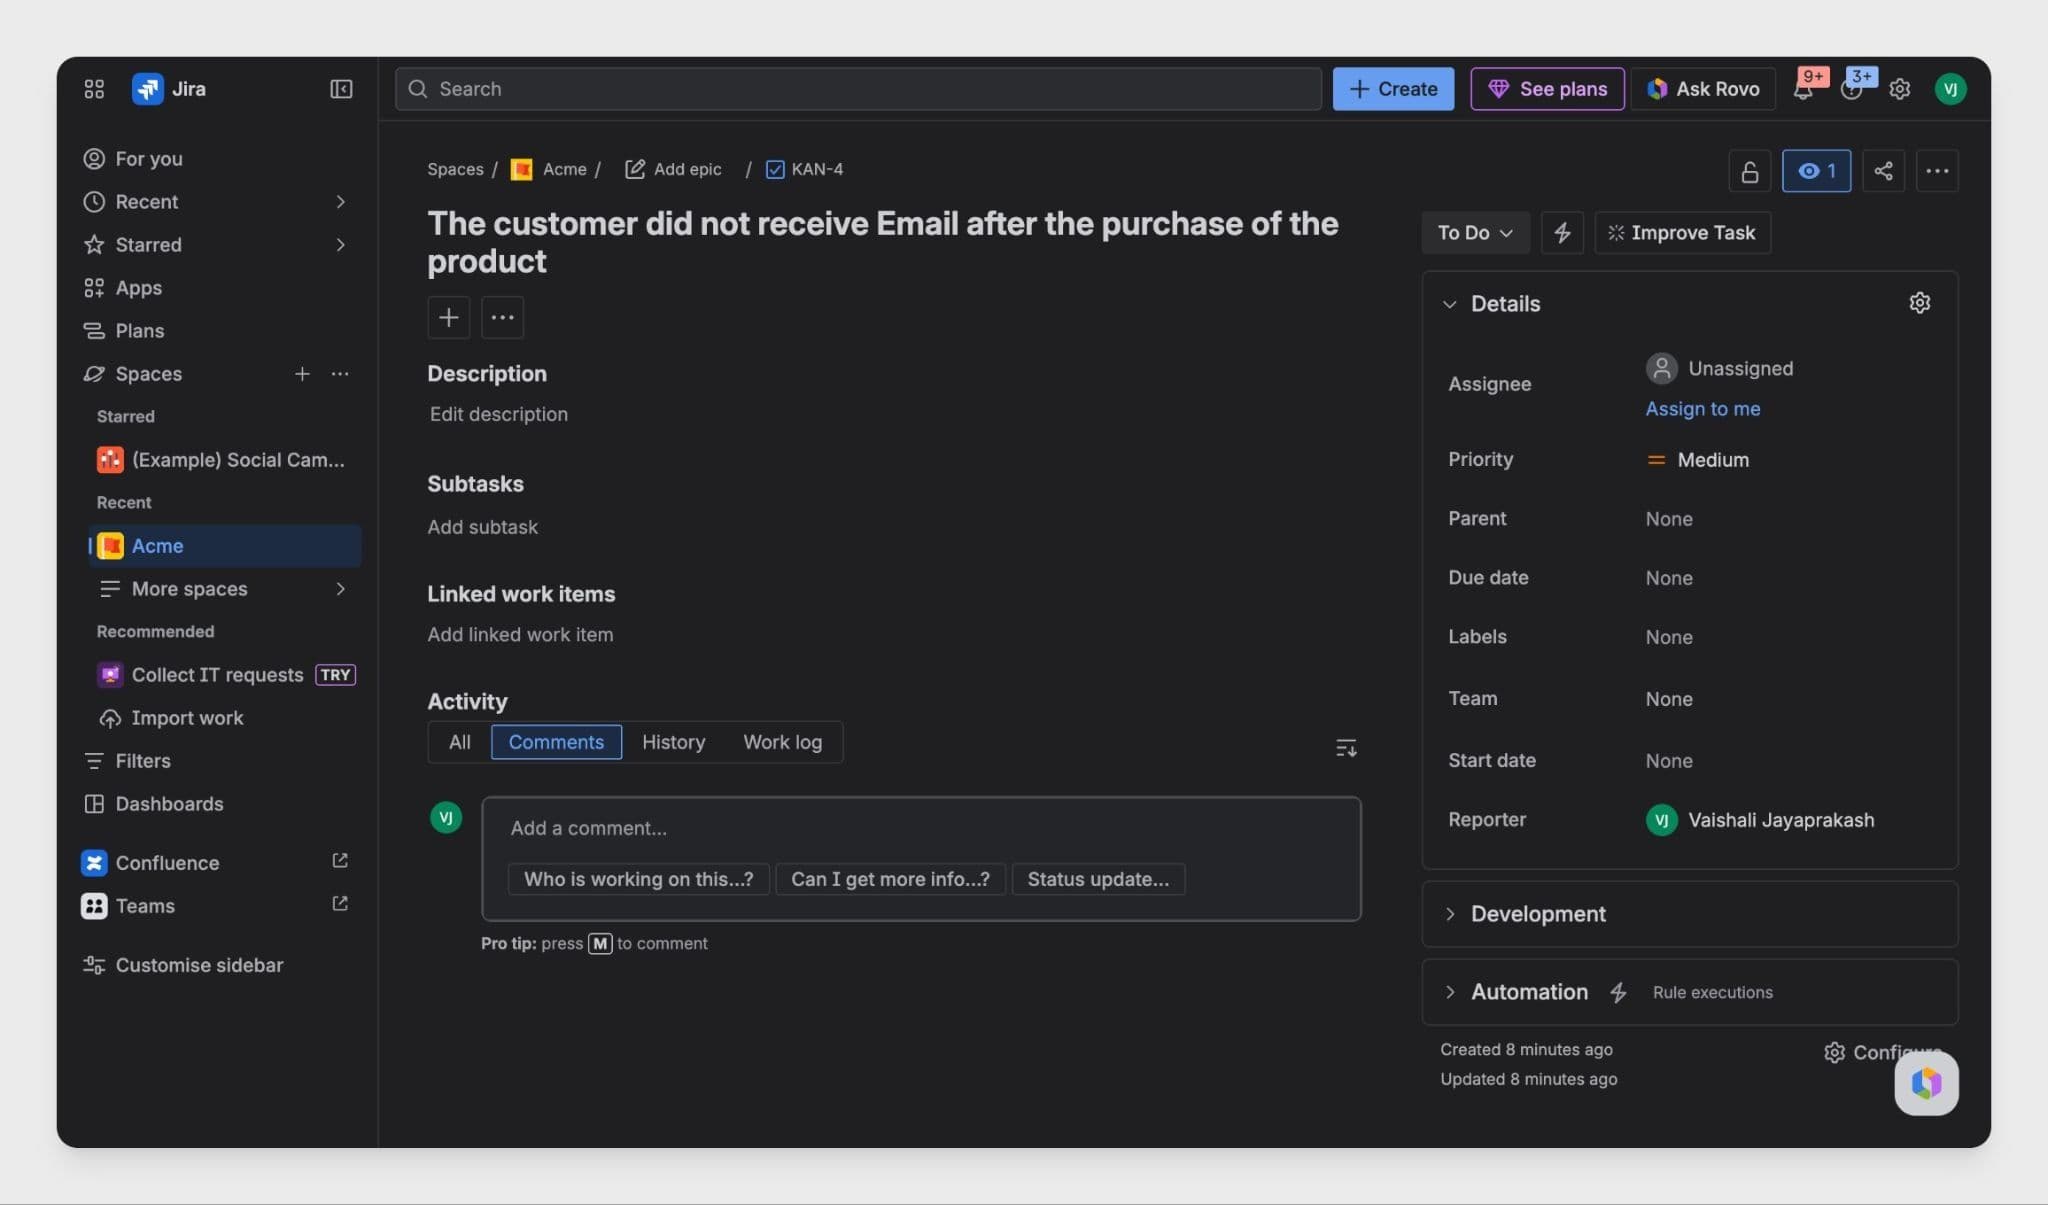
If a customer reports a bug or product problem, agents can create a Jira ticket directly from the support ticket.
The ticket will be created in Jira and linked to the ticket so both teams can track the request.
If the ticket contains files or screenshots, they can also be added as attachments to the Jira ticket.
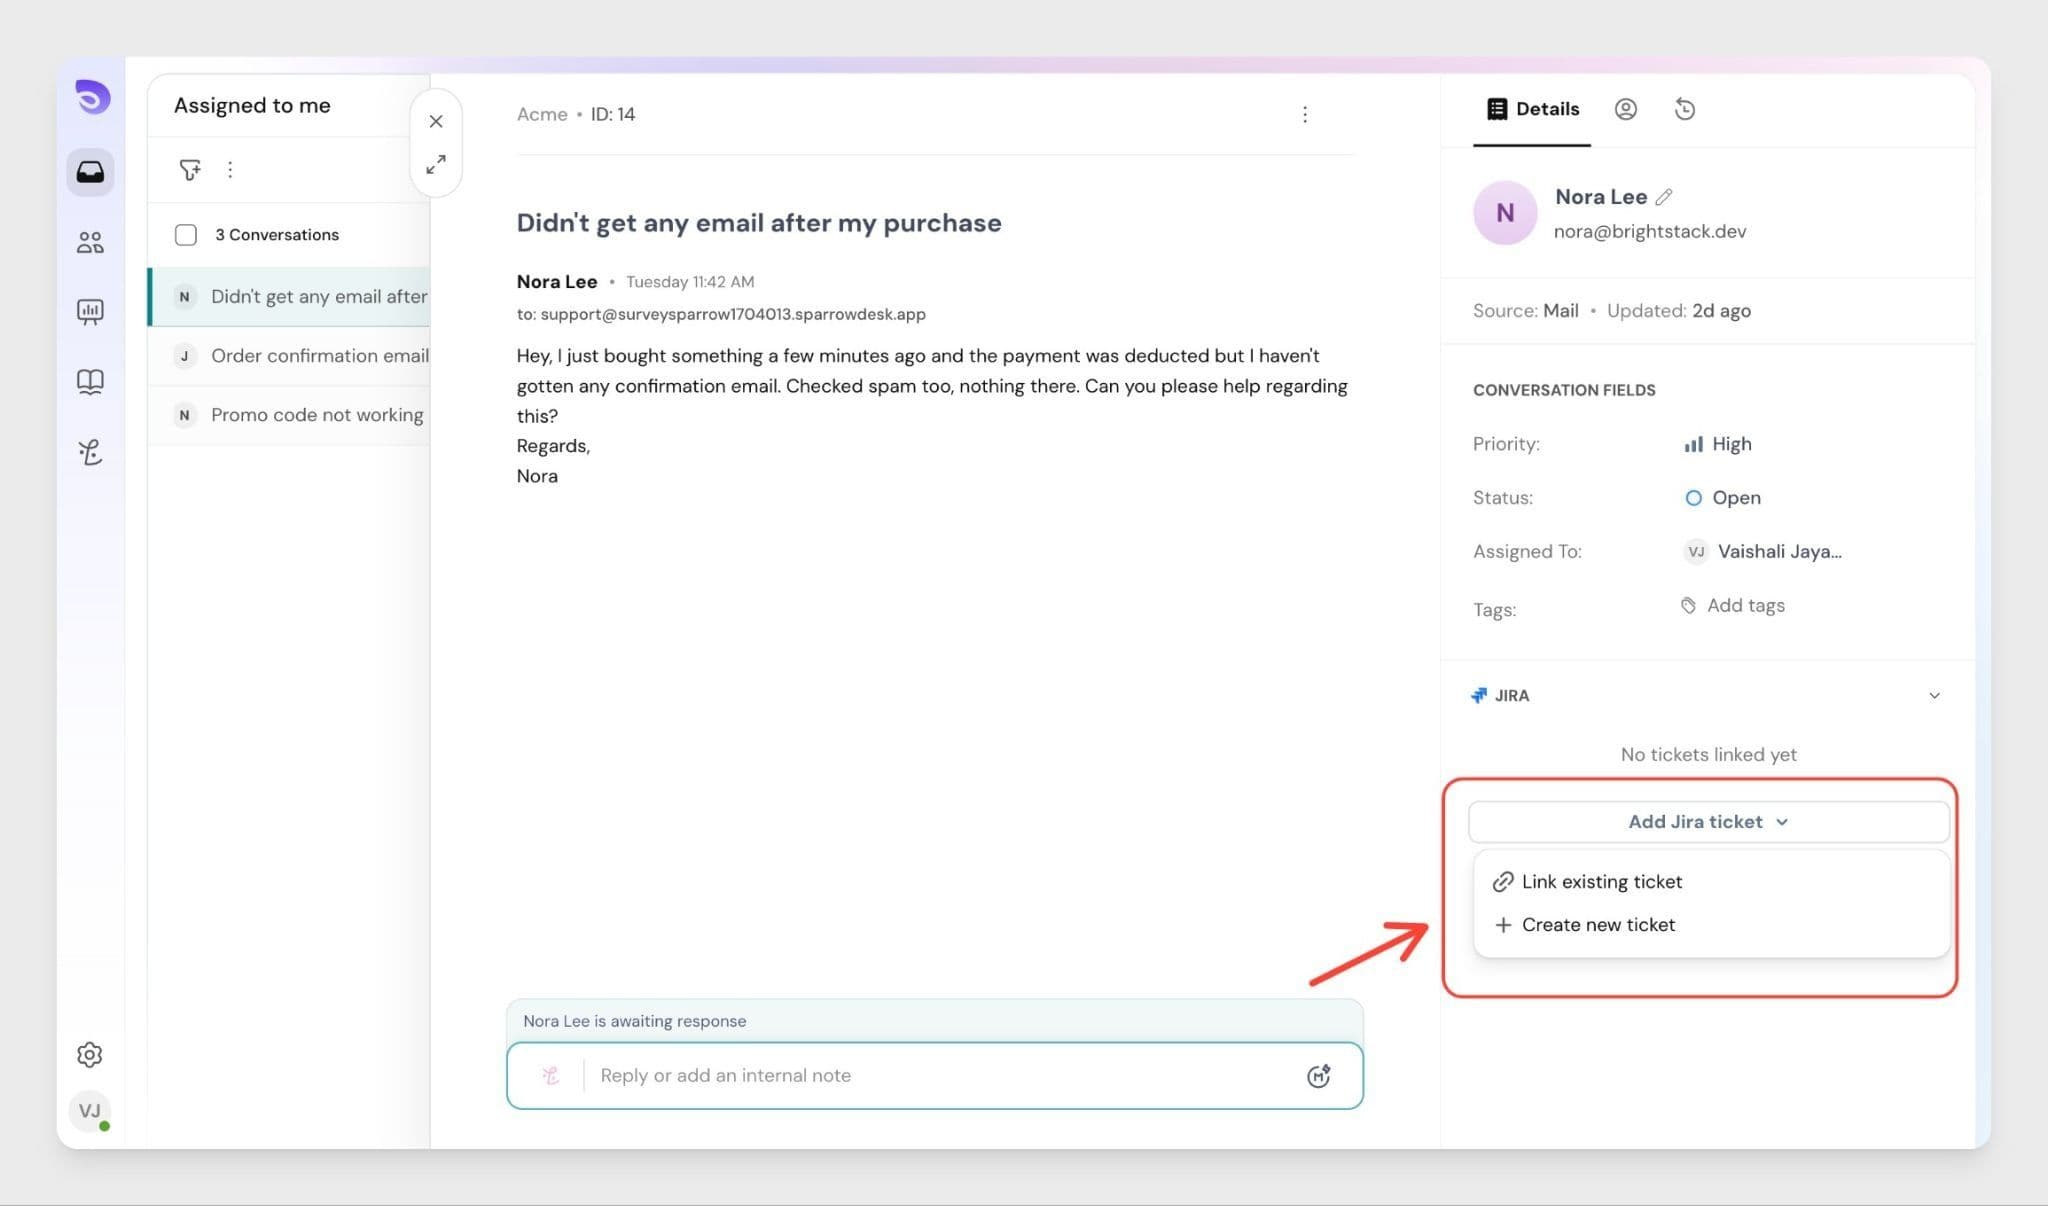
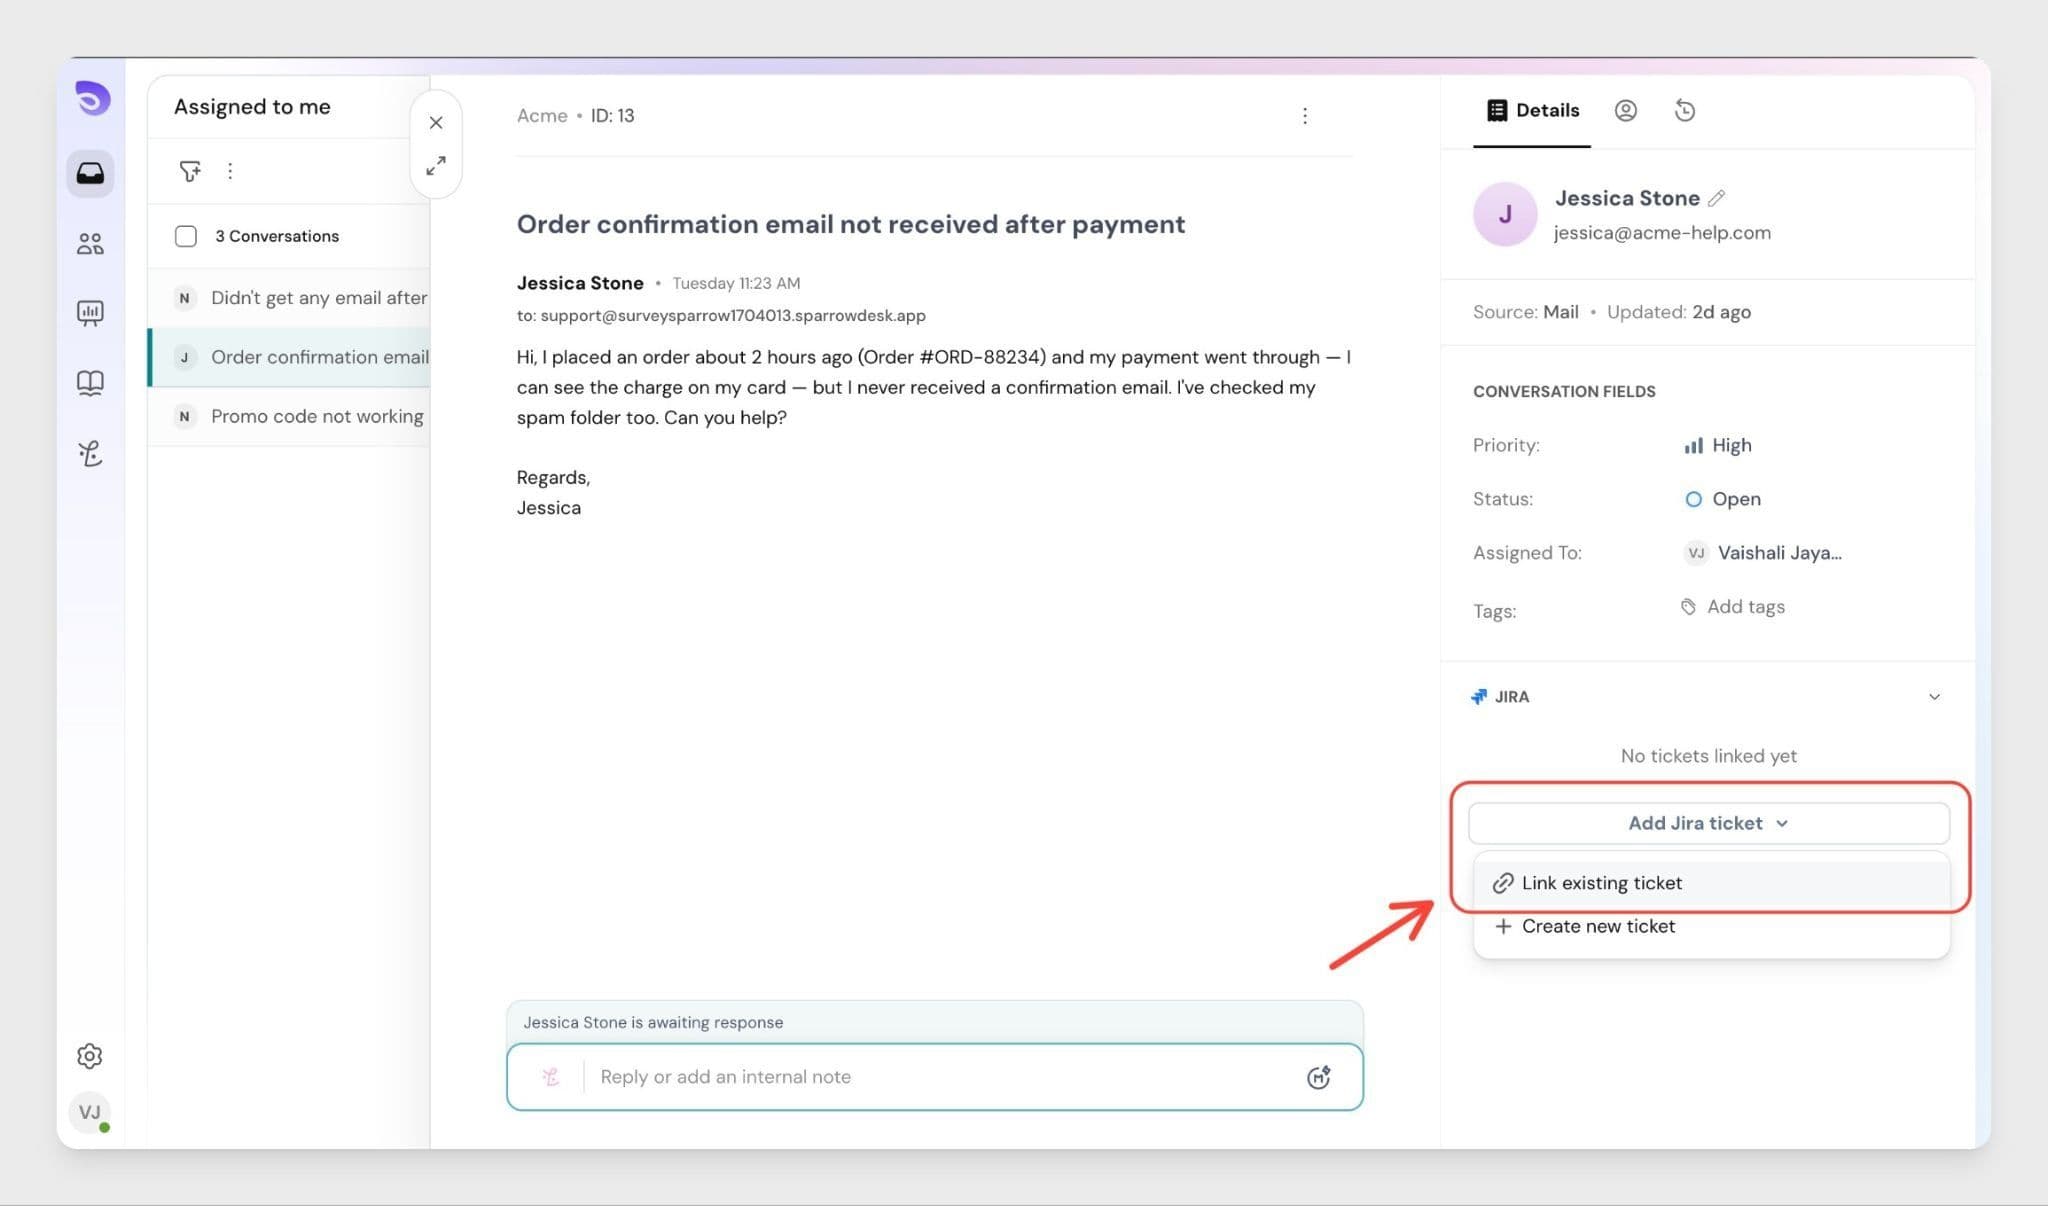
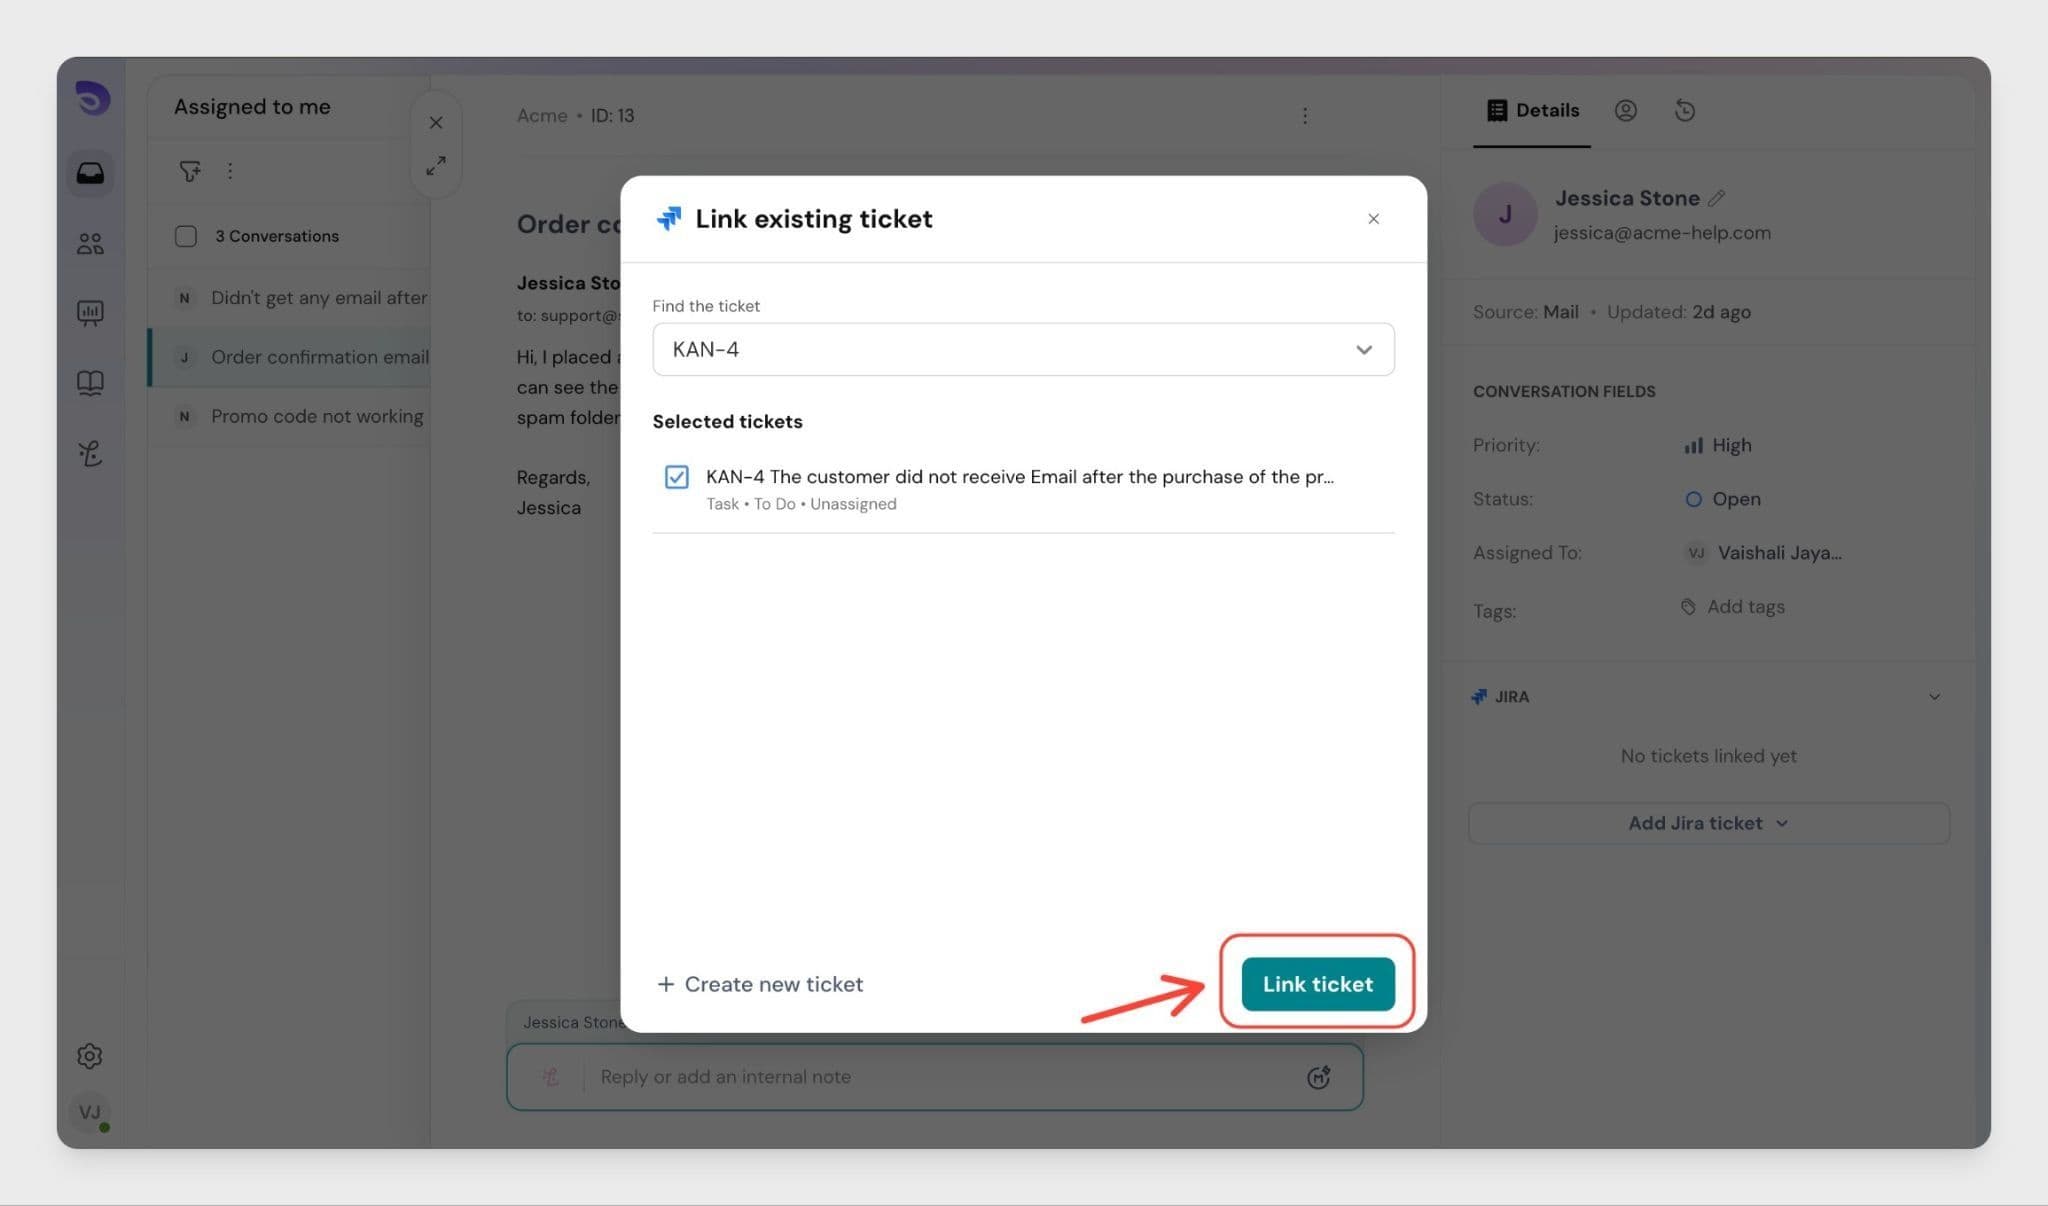
If a Jira ticket already exists for a problem, you can link it to the ticket instead of creating a new one.
Once linked, the Jira ticket will appear inside the ticket so agents can quickly reference it.
You can link multiple Jira tickets to the same ticket if needed.
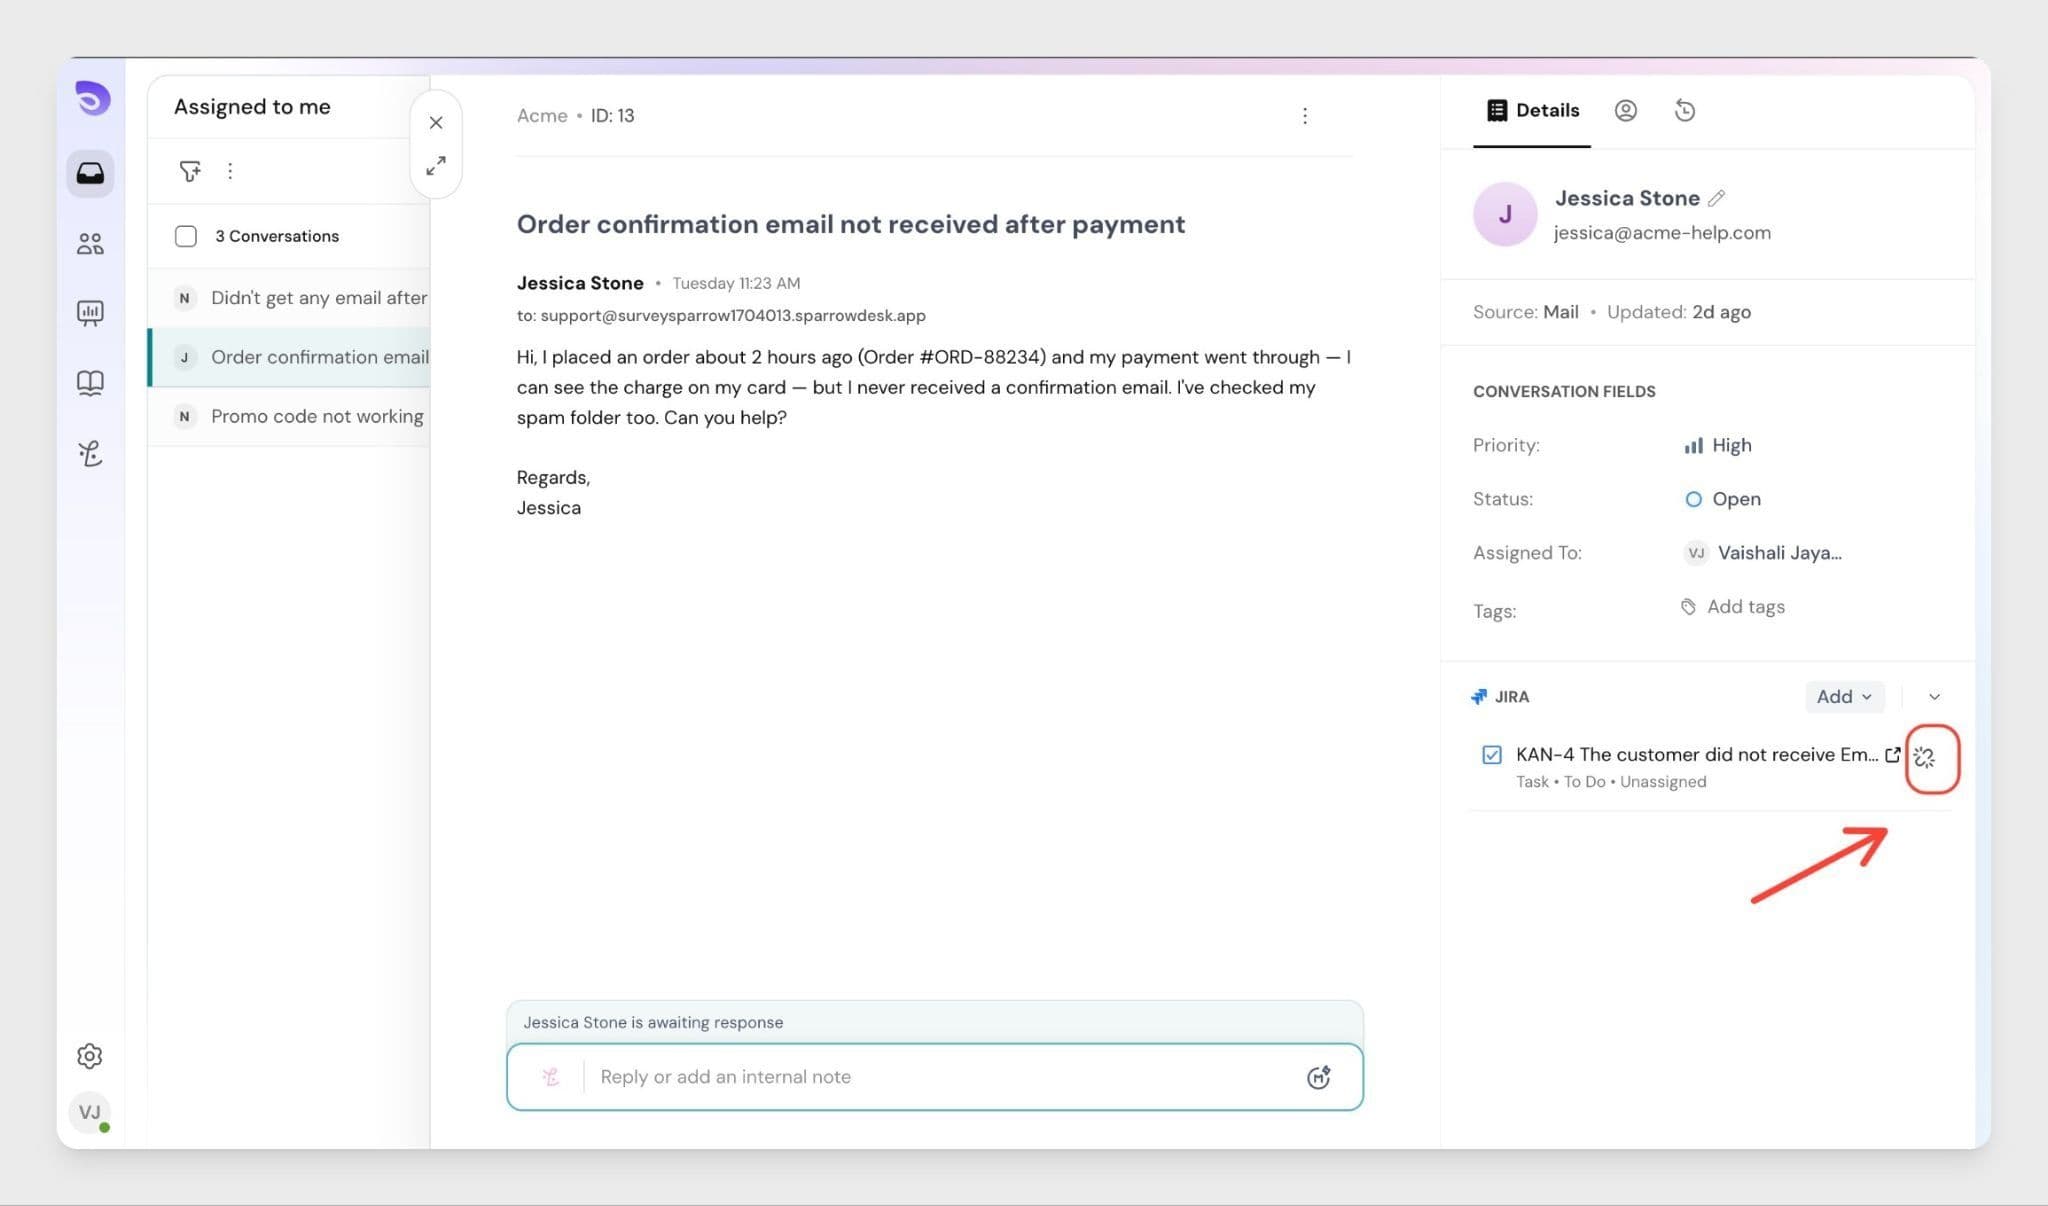
Viewing linked Jira tickets When a Jira ticket is linked to a support ticket:
This helps support teams share clear context with engineering teams.
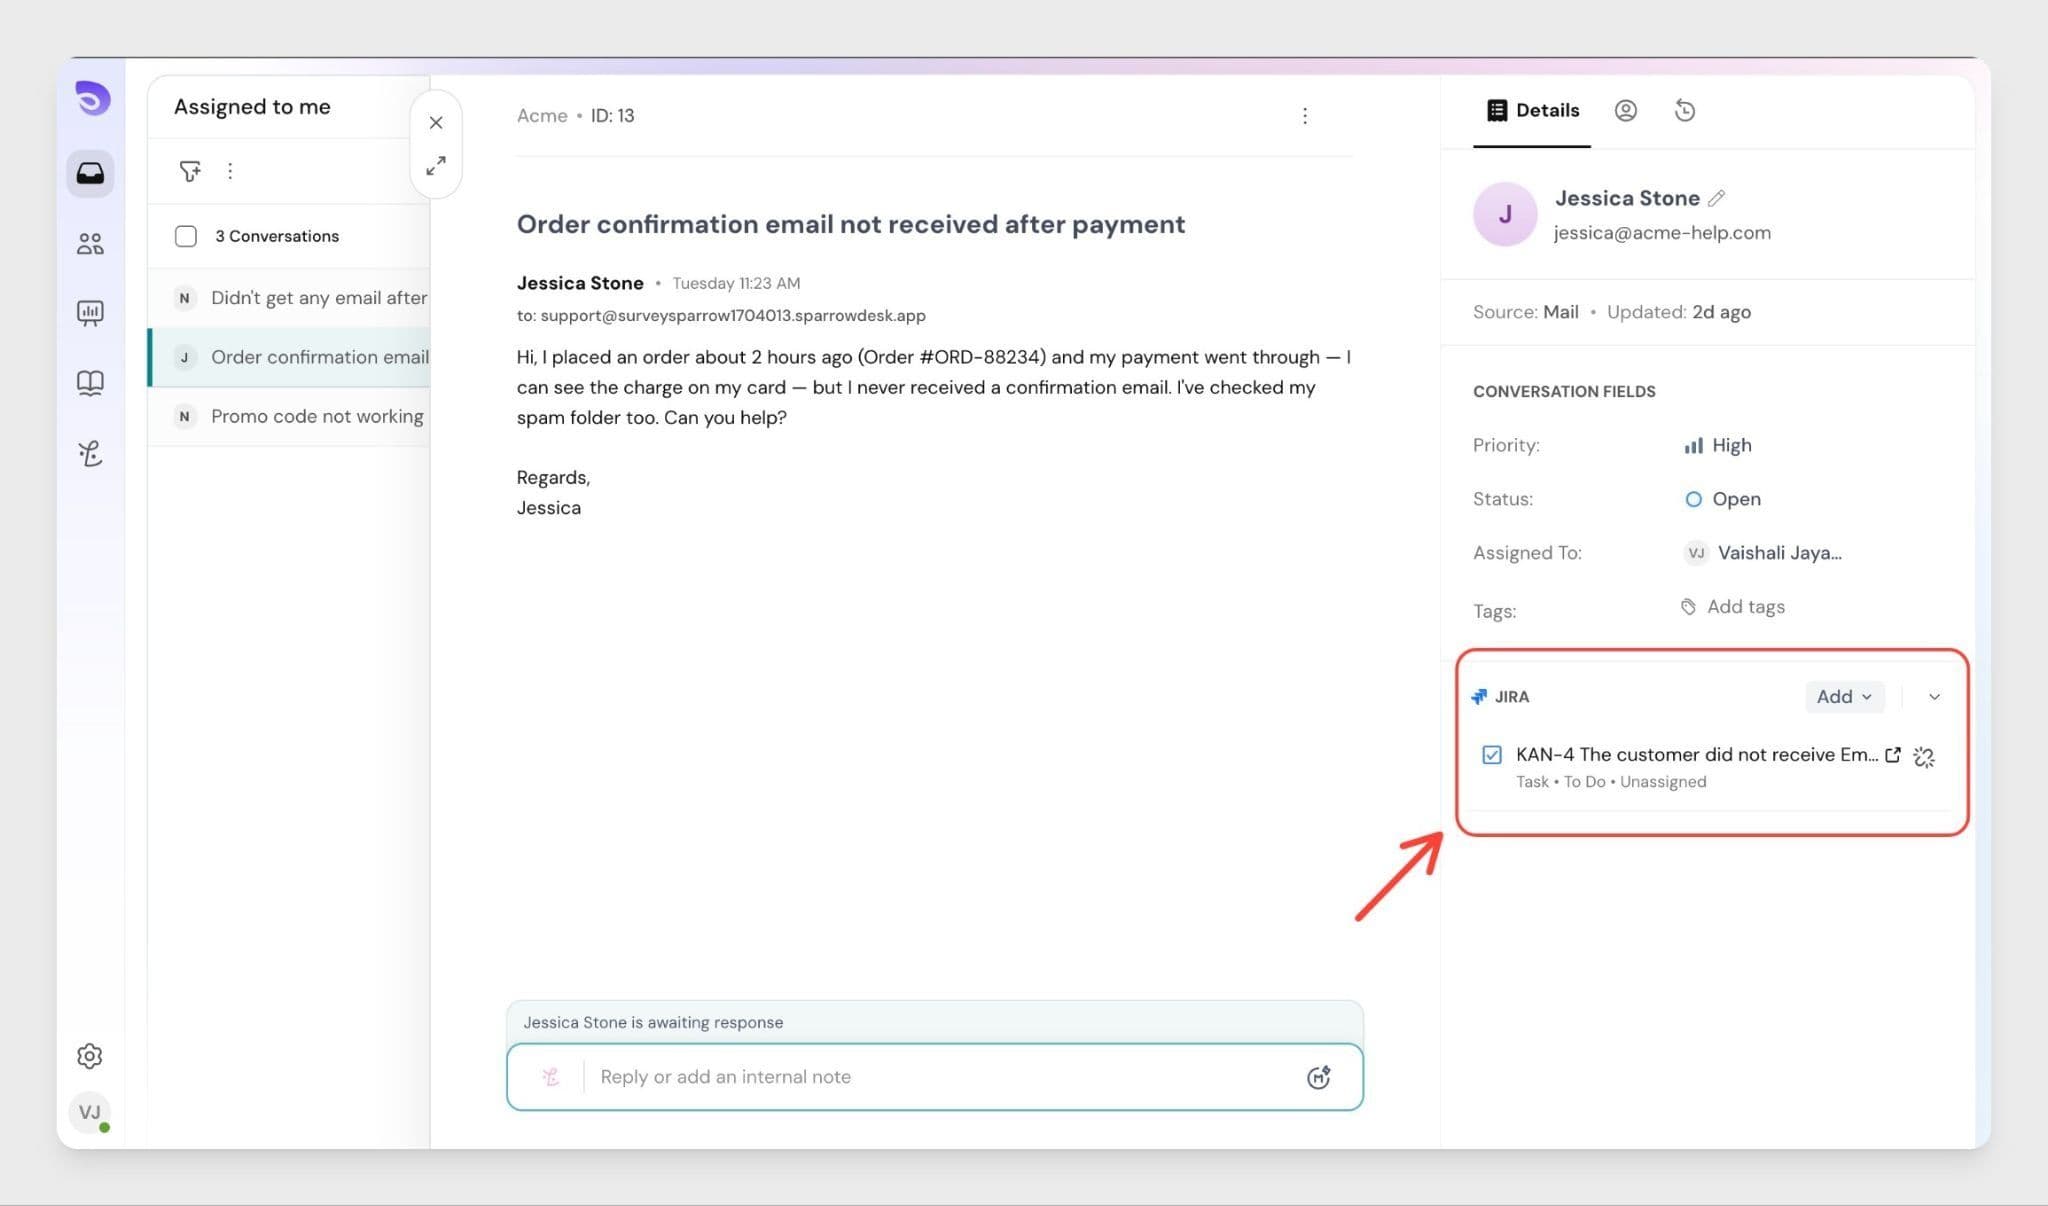
To view the ticket in jira, you click the icon highlighted below.
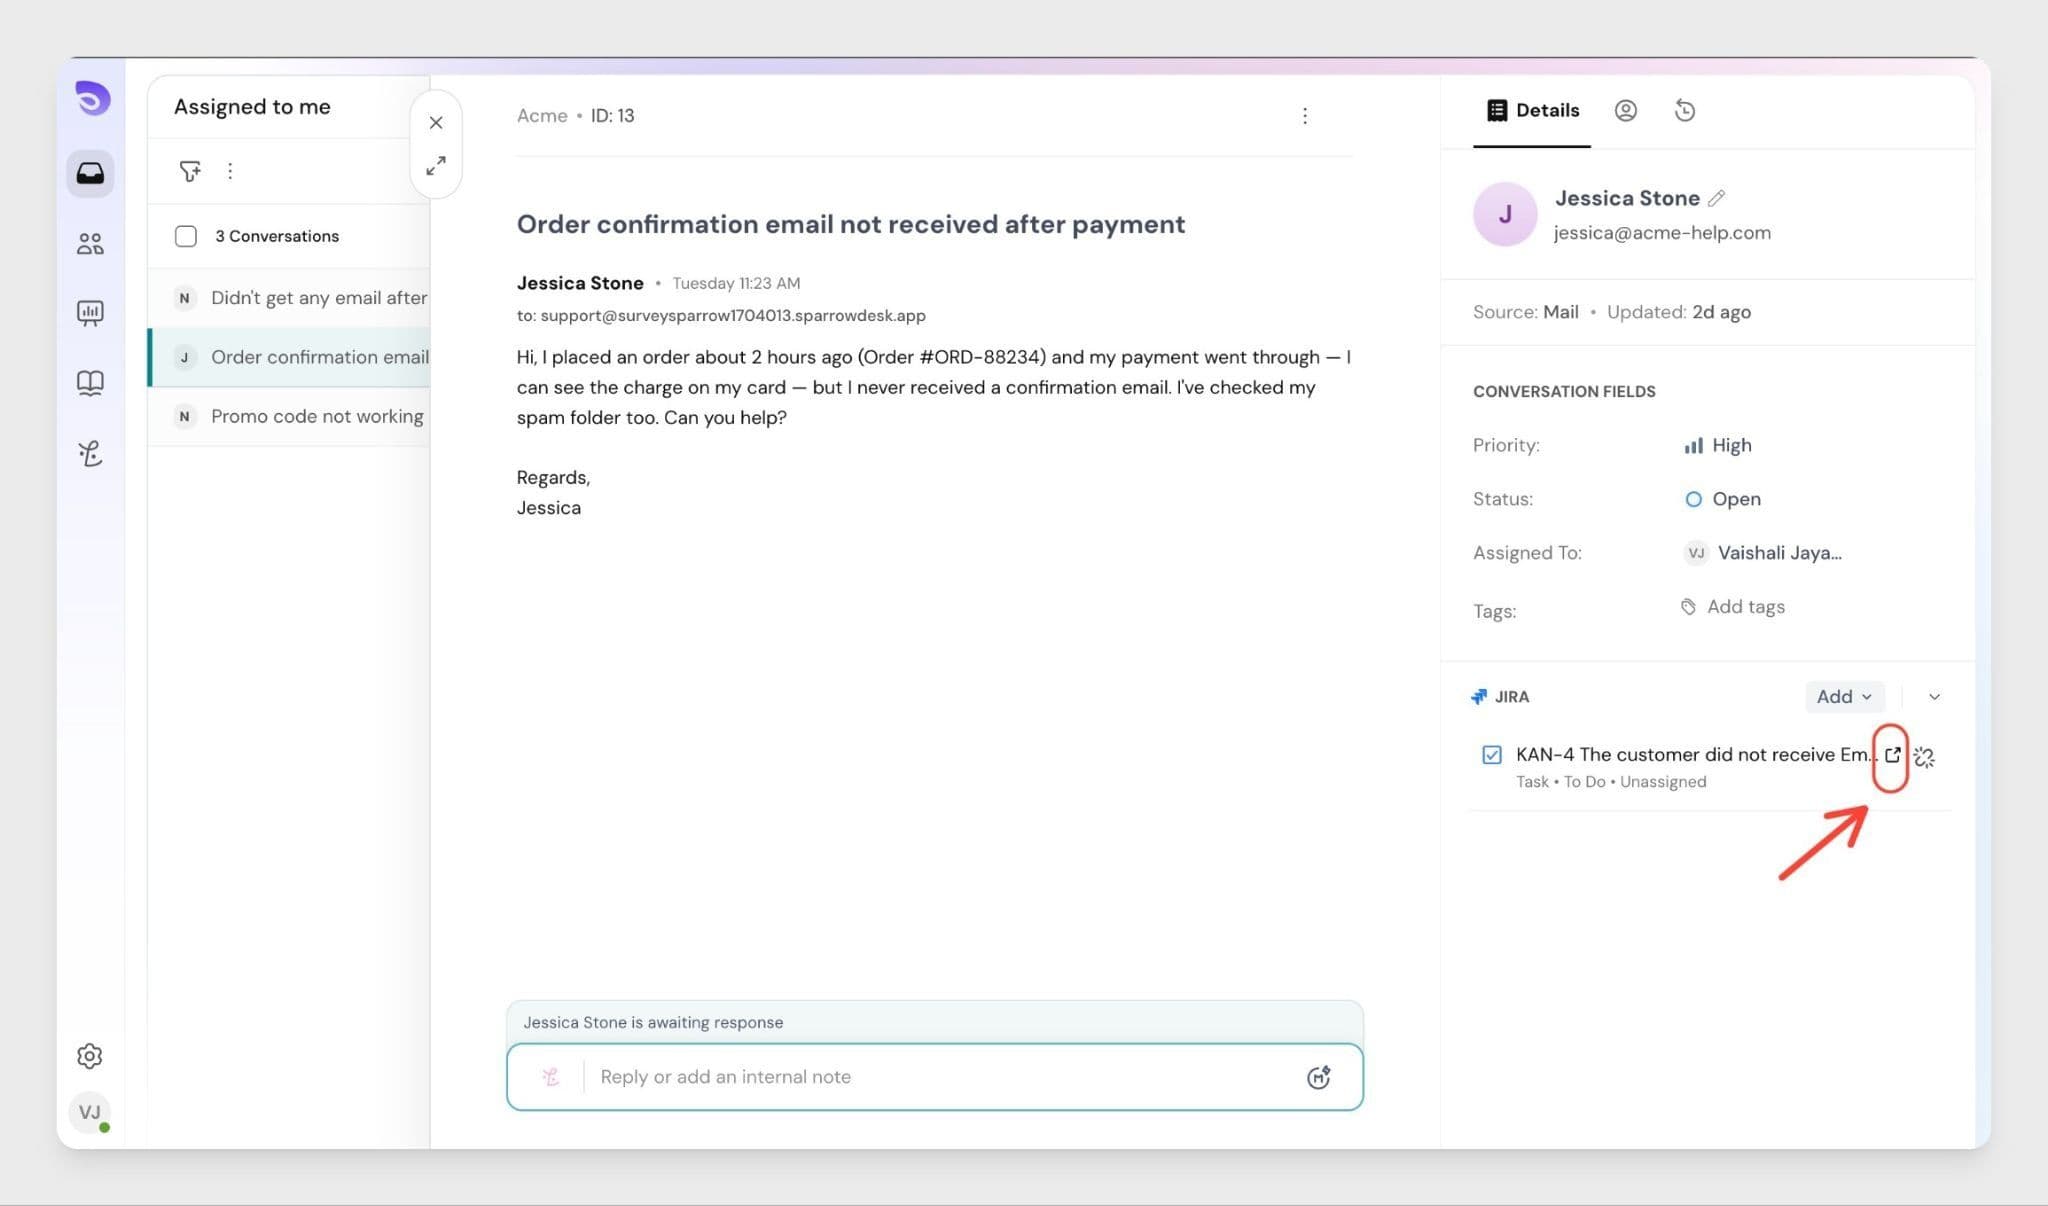
Once clicked, the ticket opens in your jira account.
To unlink a ticket from jira, you can click on the icon highlighted below.
Note: The Jira integration does not support real-time status updates at this time. If a developer updates the status of a linked Jira ticket, the change will not be automatically reflected in SparrowDesk. To stay in sync, agents and developers should communicate status changes manually.
If you no longer want to use the integration, you can disconnect it from SparrowDesk Settings at any time.
Once disconnected, SparrowDesk will no longer be able to create or link tickets to your Jira account.
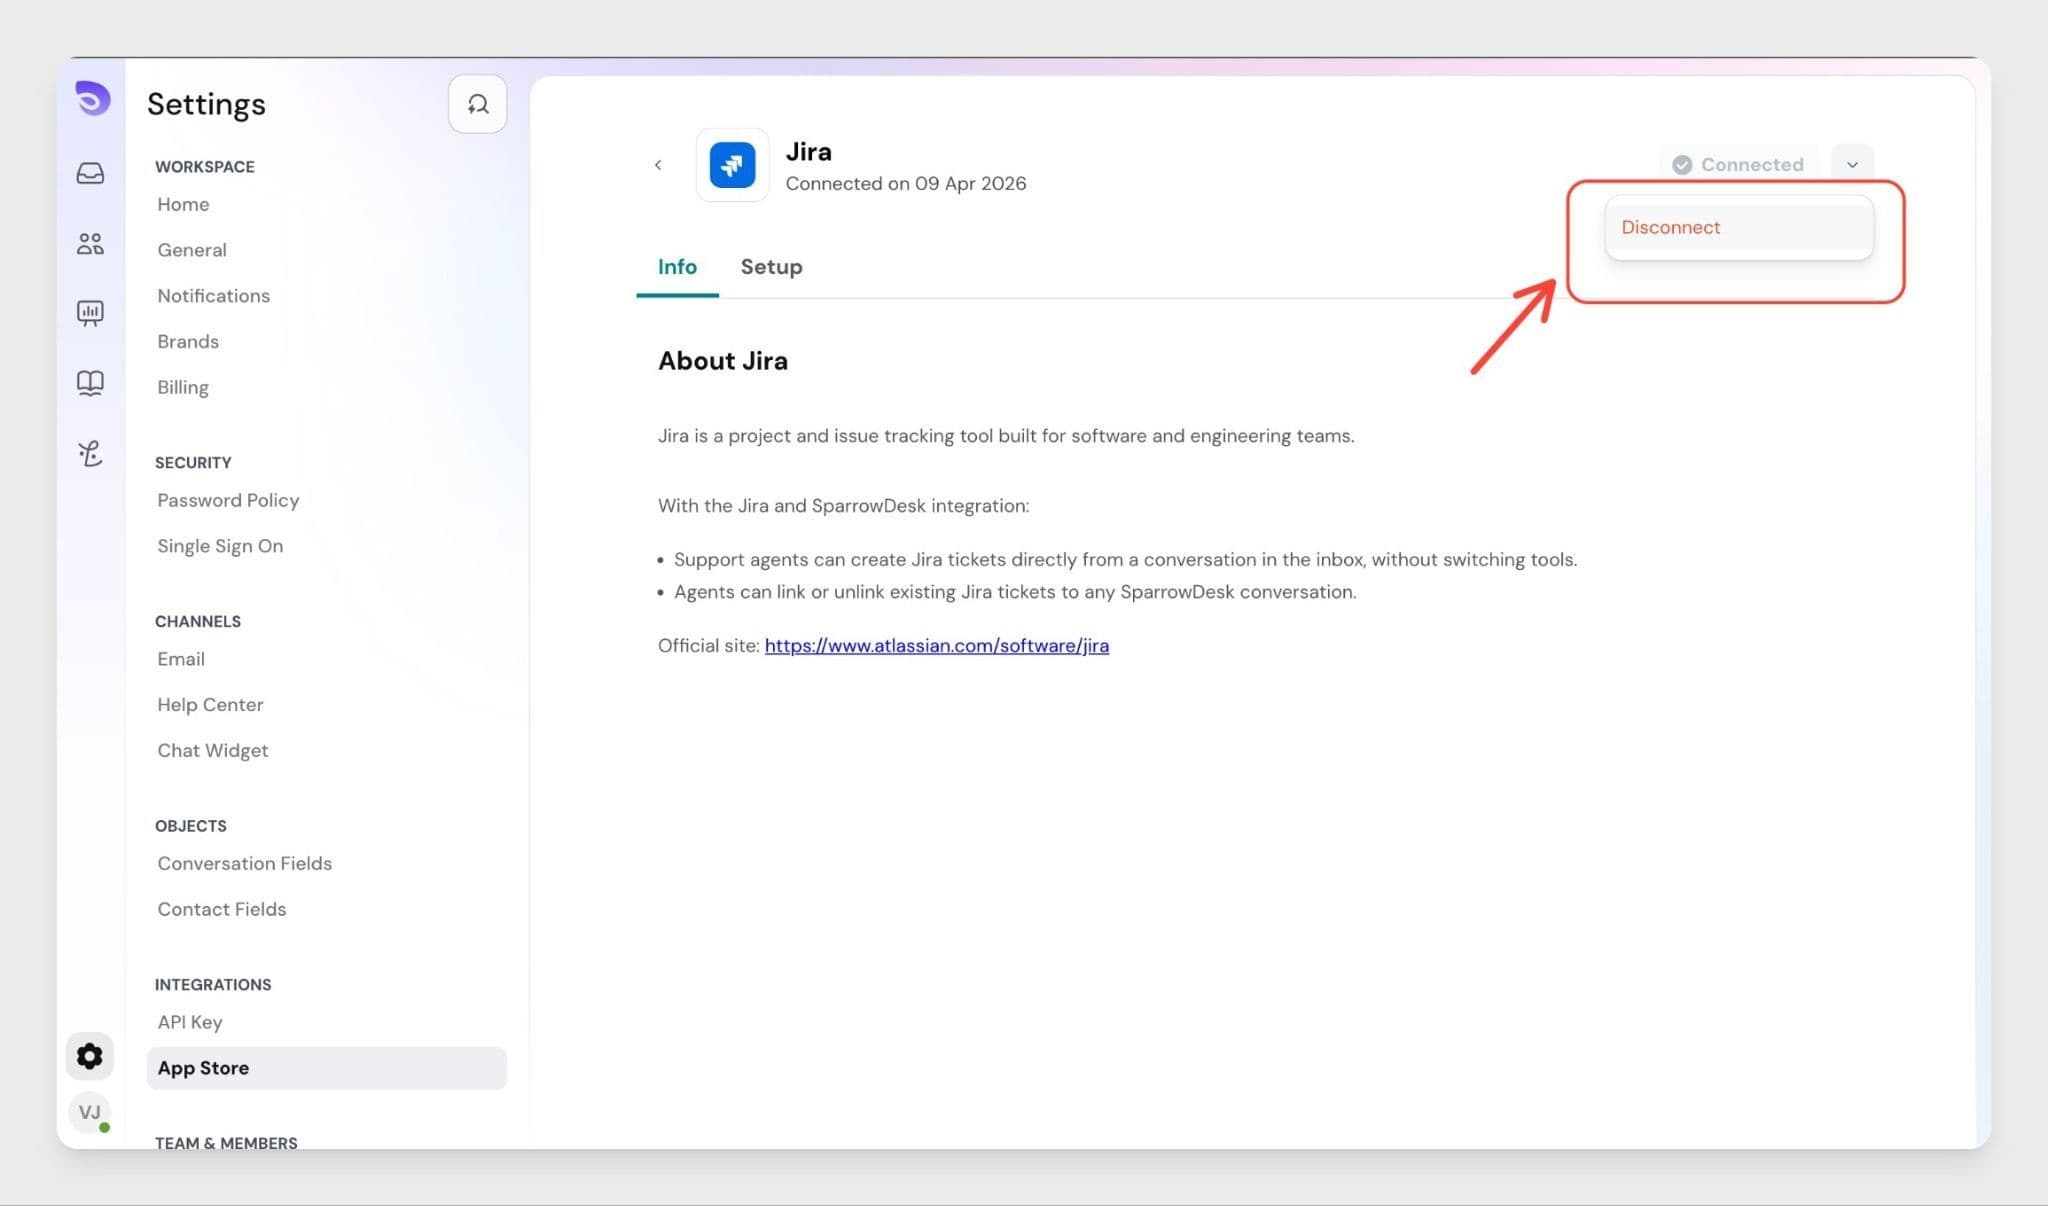
Note: Once disconnected, existing links between SparrowDesk tickets and Jira tickets will be removed. If you reconnect Jira later, earlier links are not restored automatically — tickets will need to be linked again manually.
Summary
The Jira–SparrowDesk integration is designed to keep your support and engineering teams working in sync:
Once connected, both teams have the context they need — in the tool they already use.
Frequently Asked Questions (FAQ)
1. Can multiple agents use the Jira integration once it is connected?
Yes. Once an admin connects the Jira account, all agents in SparrowDesk can create and link Jira tickets from their tickets. No individual setup is required per agent.
2. Can I link more than one Jira ticket to the same ticket?
Yes. You can link as many Jira tickets as needed to a single support ticket. All linked tickets appear in the Jira panel inside the ticket.
3. Will Jira ticket status changes appear in SparrowDesk automatically?
Not yet. Real-time status sync is not currently available. Agents can click the linked ticket to check the latest status directly in Jira.
4. Which Jira hosting types are supported?
The integration currently supports Jira Cloud only. Jira Data Center and Jira Server are not supported at this time.
5. What happens to previously linked tickets if I disconnect Jira?
Once disconnected, existing links between SparrowDesk tickets and Jira tickets will be removed. If you reconnect Jira later, earlier links are not restored automatically — tickets will need to be linked again manually.
Powered By SparrowDesk