Use a Custom Domain for Your Help Center

Use a Custom Domain for Your Help Center

Sebin

Sebin

September 2, 2025

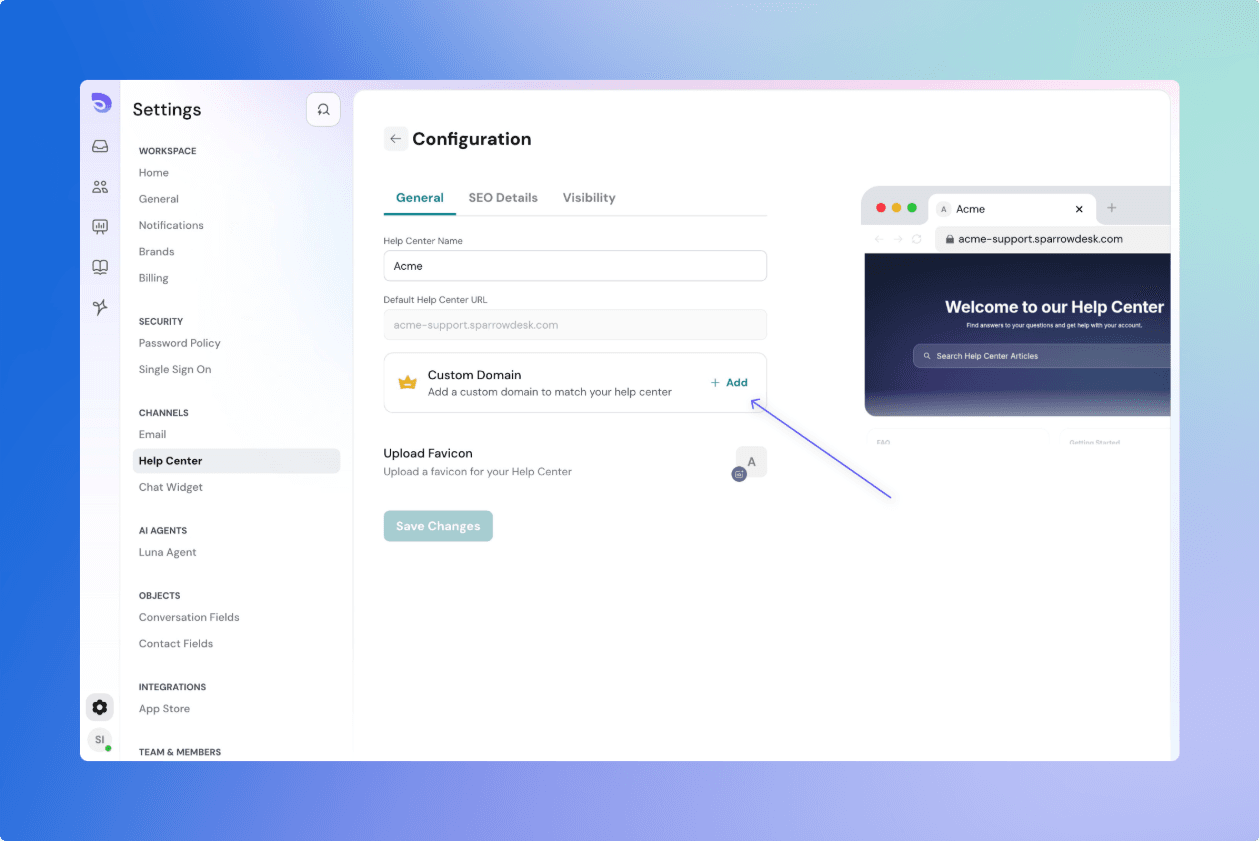
Make your Help Center look more professional by hosting it on your own domain , instead of the default SparrowDesk domain.This helps customers trust your brand and keeps your support pages aligned with your main website.

If you're not familiar with DNS or domain management, share the CNAME values with your IT team or domain provider support.


Add Your Custom Domain

  1. Go to Settings → Help Center → Custom Domain.
  2. Click on “Add Custom Domain”.
  3. Enter the full domain name where you'd like your Help Center to appear
  4. Click Next.

Sparrowdesk Help Center configuration screen.png


Update DNS Records

You’ll now see the DNS instructions. To complete verification:

  1. Copy the DNS records and log in to your domain provider (like GoDaddy, Namecheap, Cloudflare).
  2. Update the CNAME record

Software Settings Configuration Screen (1).png

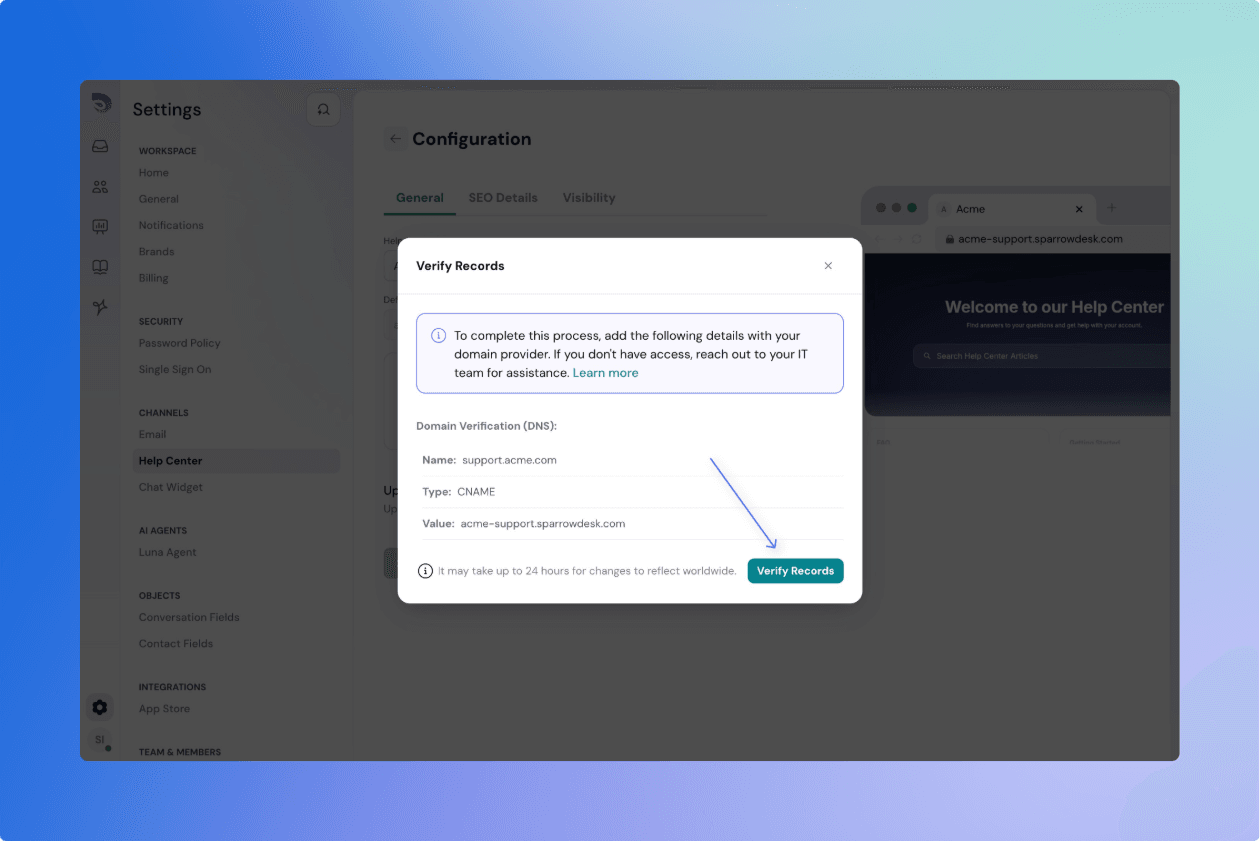
It may take up to 24 hours for DNS changes to reflect worldwide, though it's often much faster.

If you're using Cloudflare, make sure the proxy (orange cloud) is turned off for this DNS record.


Verify and Go Live

Once your DNS record is set:

  1. Return to the Verify Records step inside SparrowDesk.
  2. Click “Verify Records”.

If everything is correct, your Help Center will now be available at your custom domain.


SSL Certificate Setup (Automatic)

SparrowDesk will automatically generate an SSL certificate using Let’s Encrypt to secure your Help Center with https://.

  • This usually happens as soon as the domain is verified.
  • It may take a few seconds to a couple of minutes the first time someone visits your site.

Powered By SparrowDesk