Managing Custom Views in Inbox

Managing Custom Views in Inbox

Justin

Justin

September 13, 2025

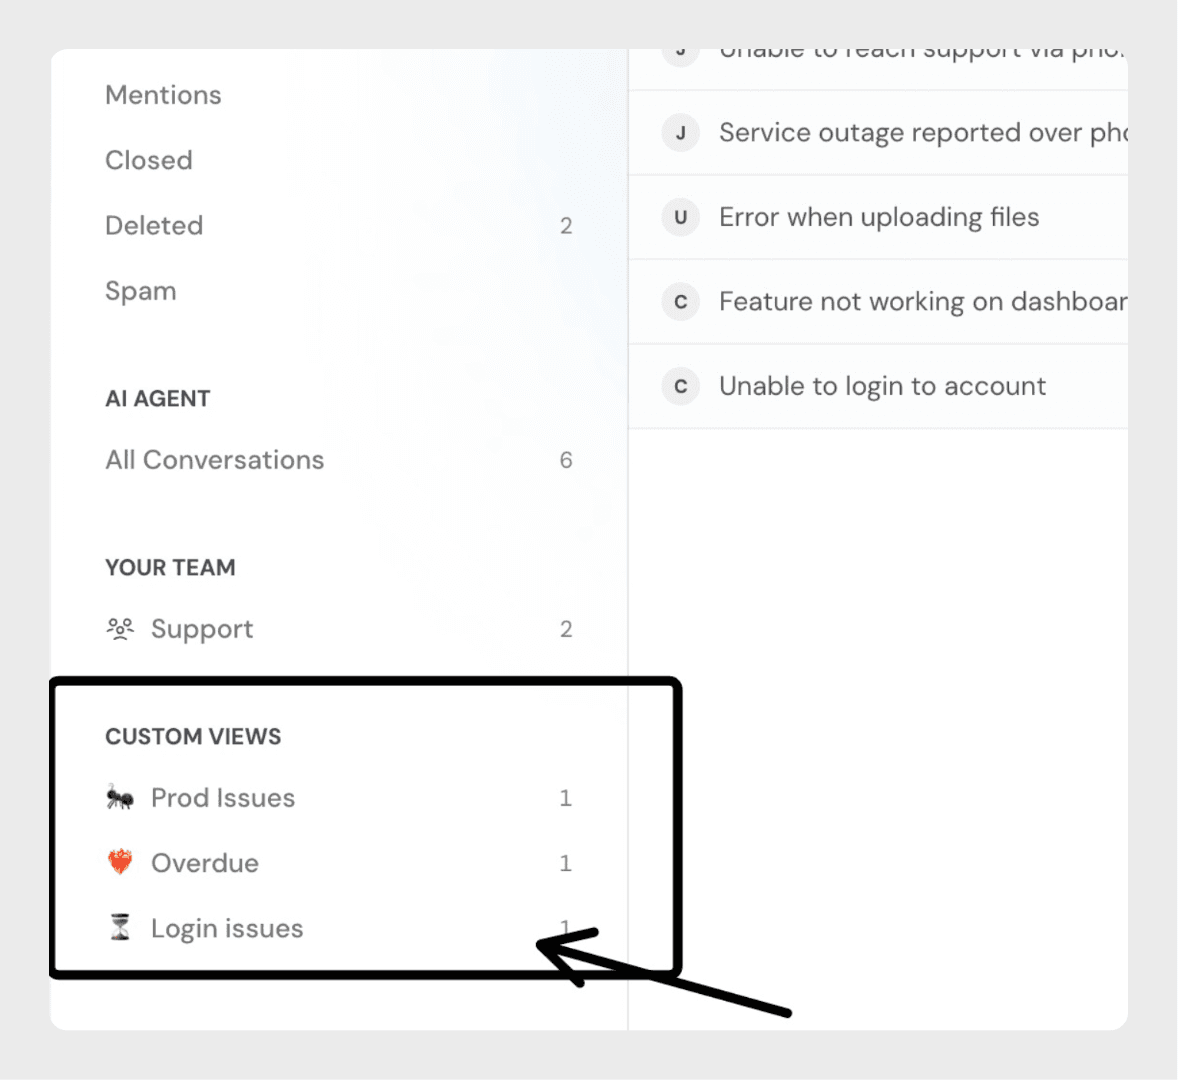
Custom views help you organize and access filtered conversations quickly. Instead of applying filters every time, you can save them as views and decide who gets access.

Using Filters

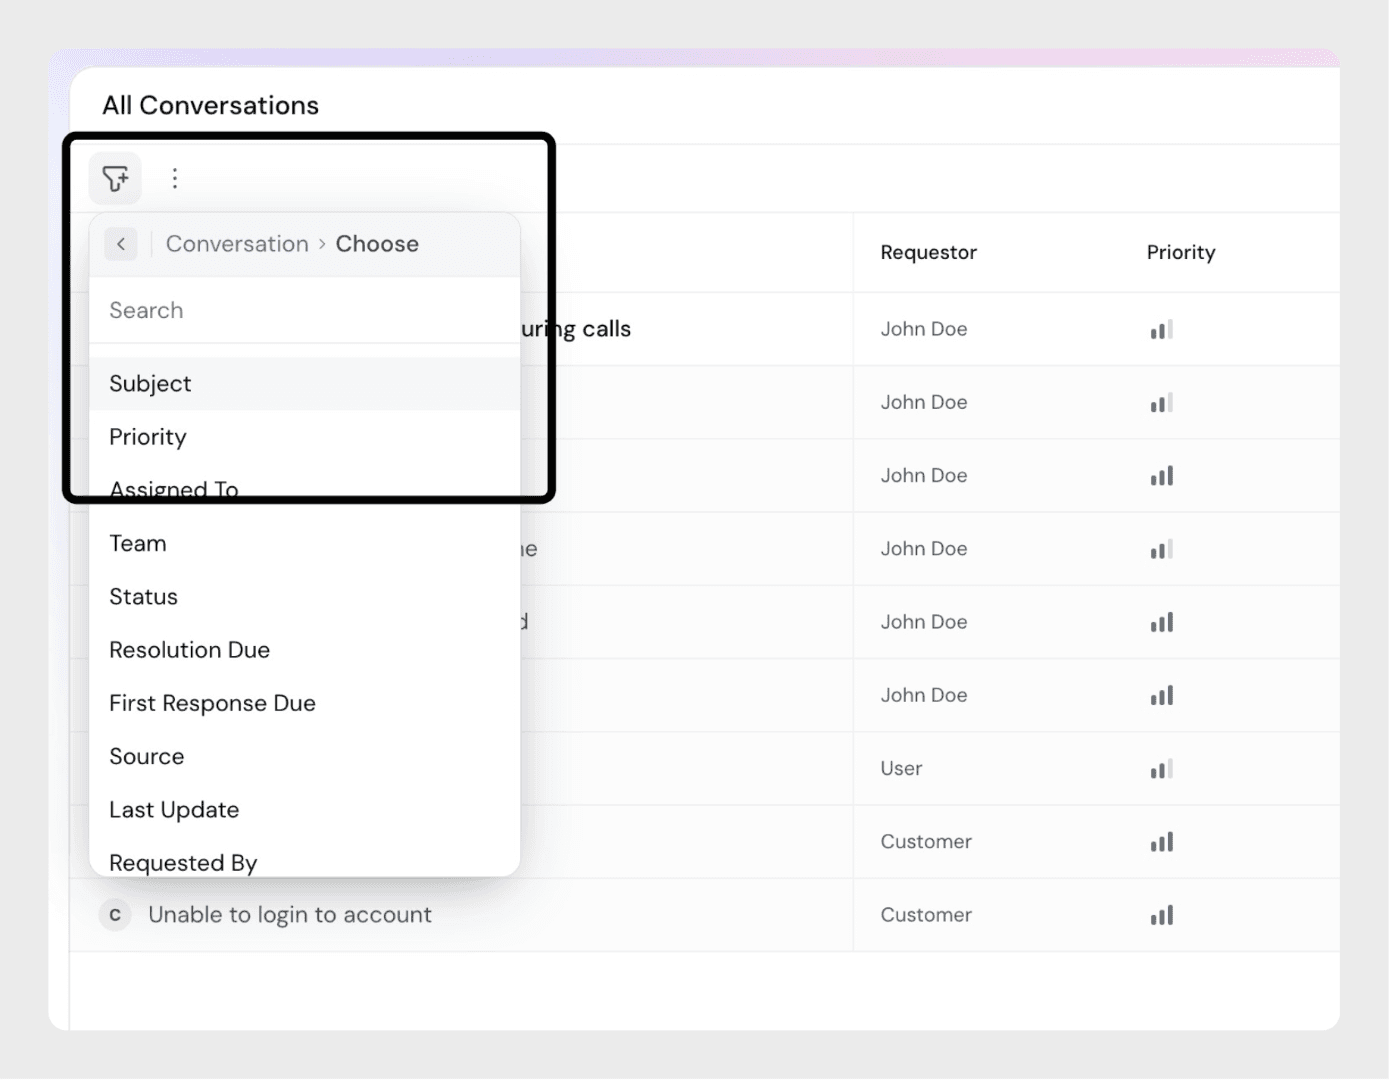
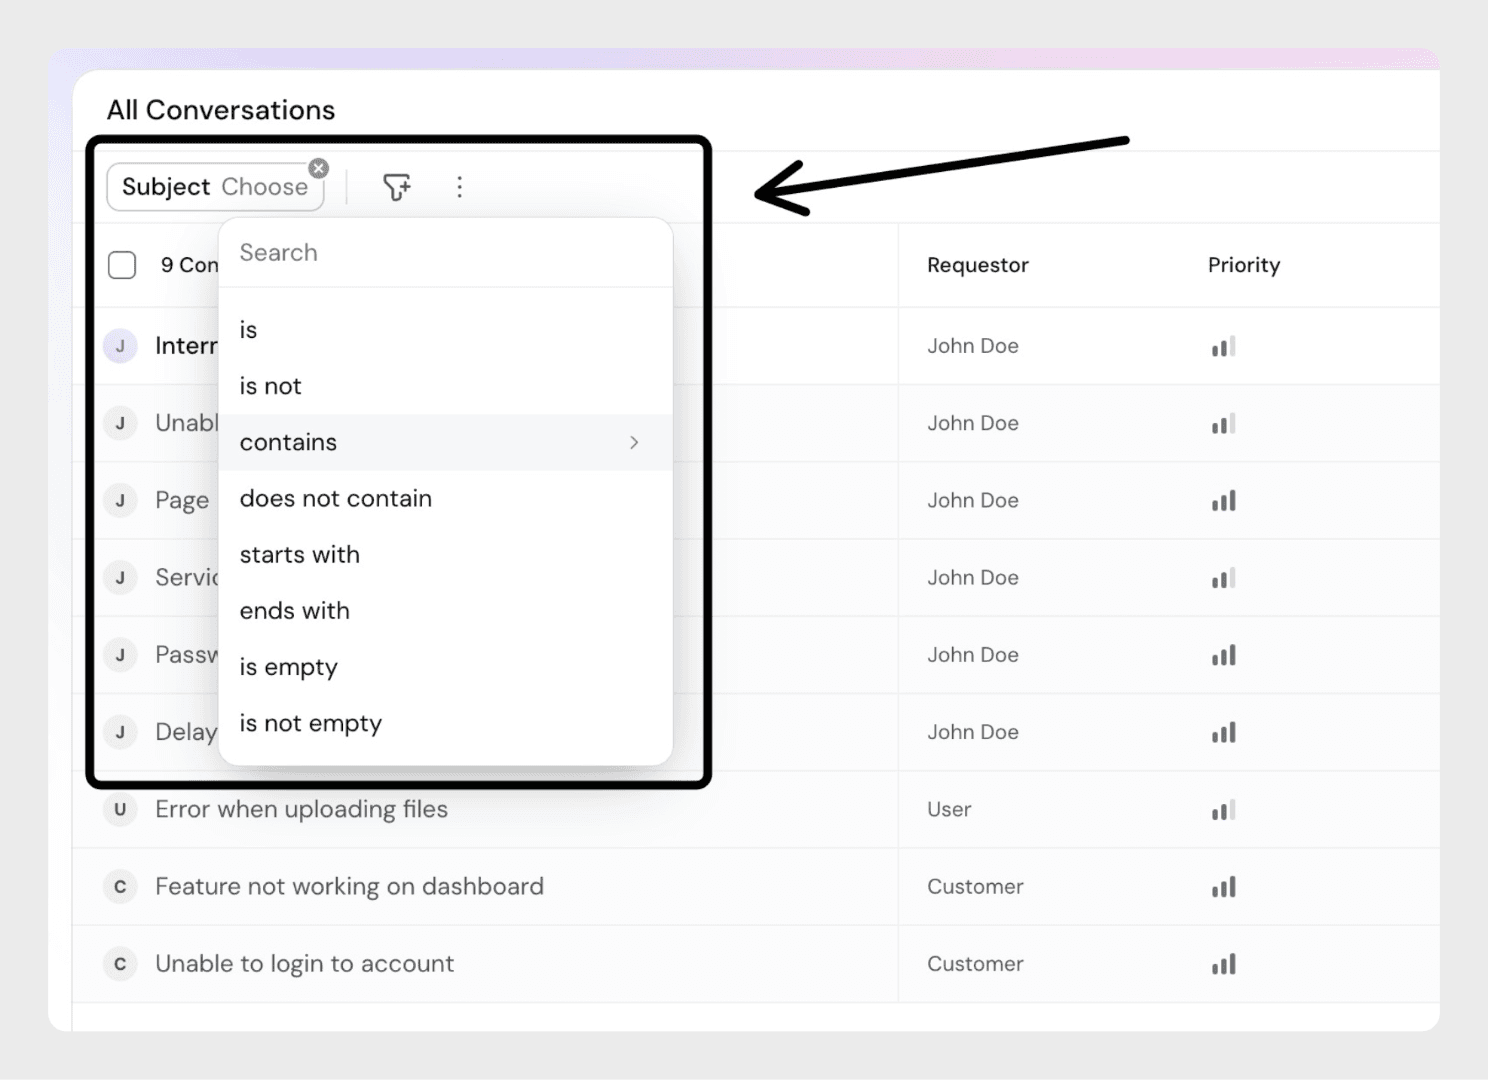
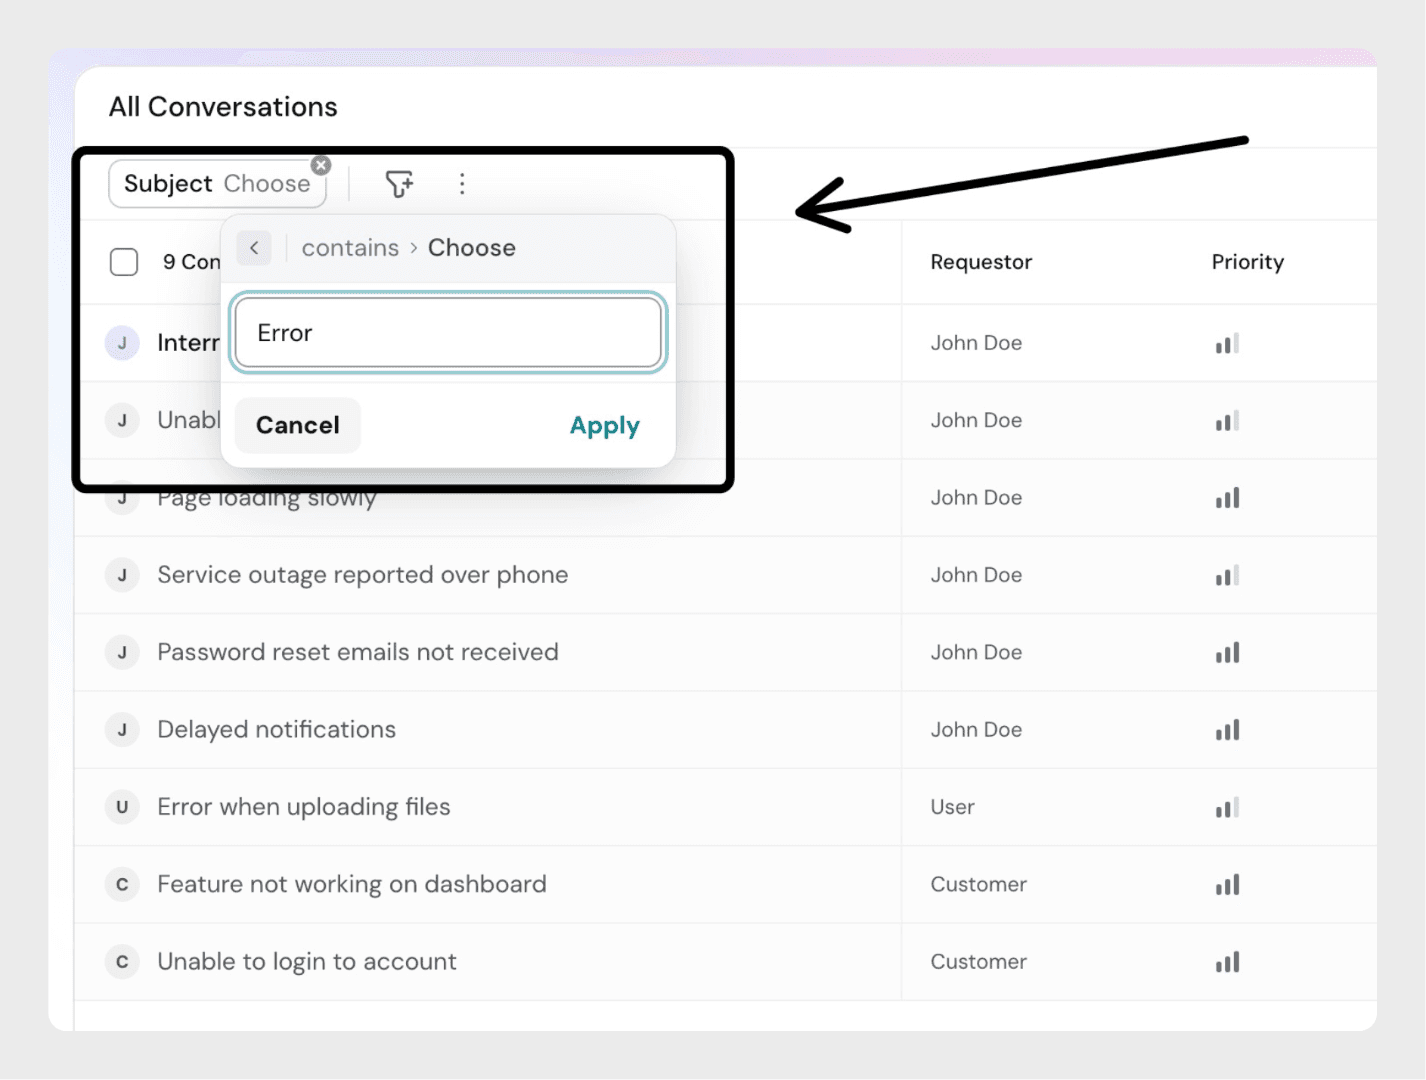
You can create custom views by applying filters to your inbox. There are two ways to filter conversations:

Standard Filters

Step 1: Click on the Filter button at the top of your inbox.

image.pngStep 2: Choose the field you want to filter by (e.g., status, priority, assignee, etc.)

image.pngStep 3: Select an operator. Options vary depending on the field type (e.g., is, is not, greater than, less than, contains, does not contain etc ...).

image.pngStep 4: Enter or select a value.

image.pngStep 5: Click Apply to see the filtered conversations.

AI Filter (Beta)

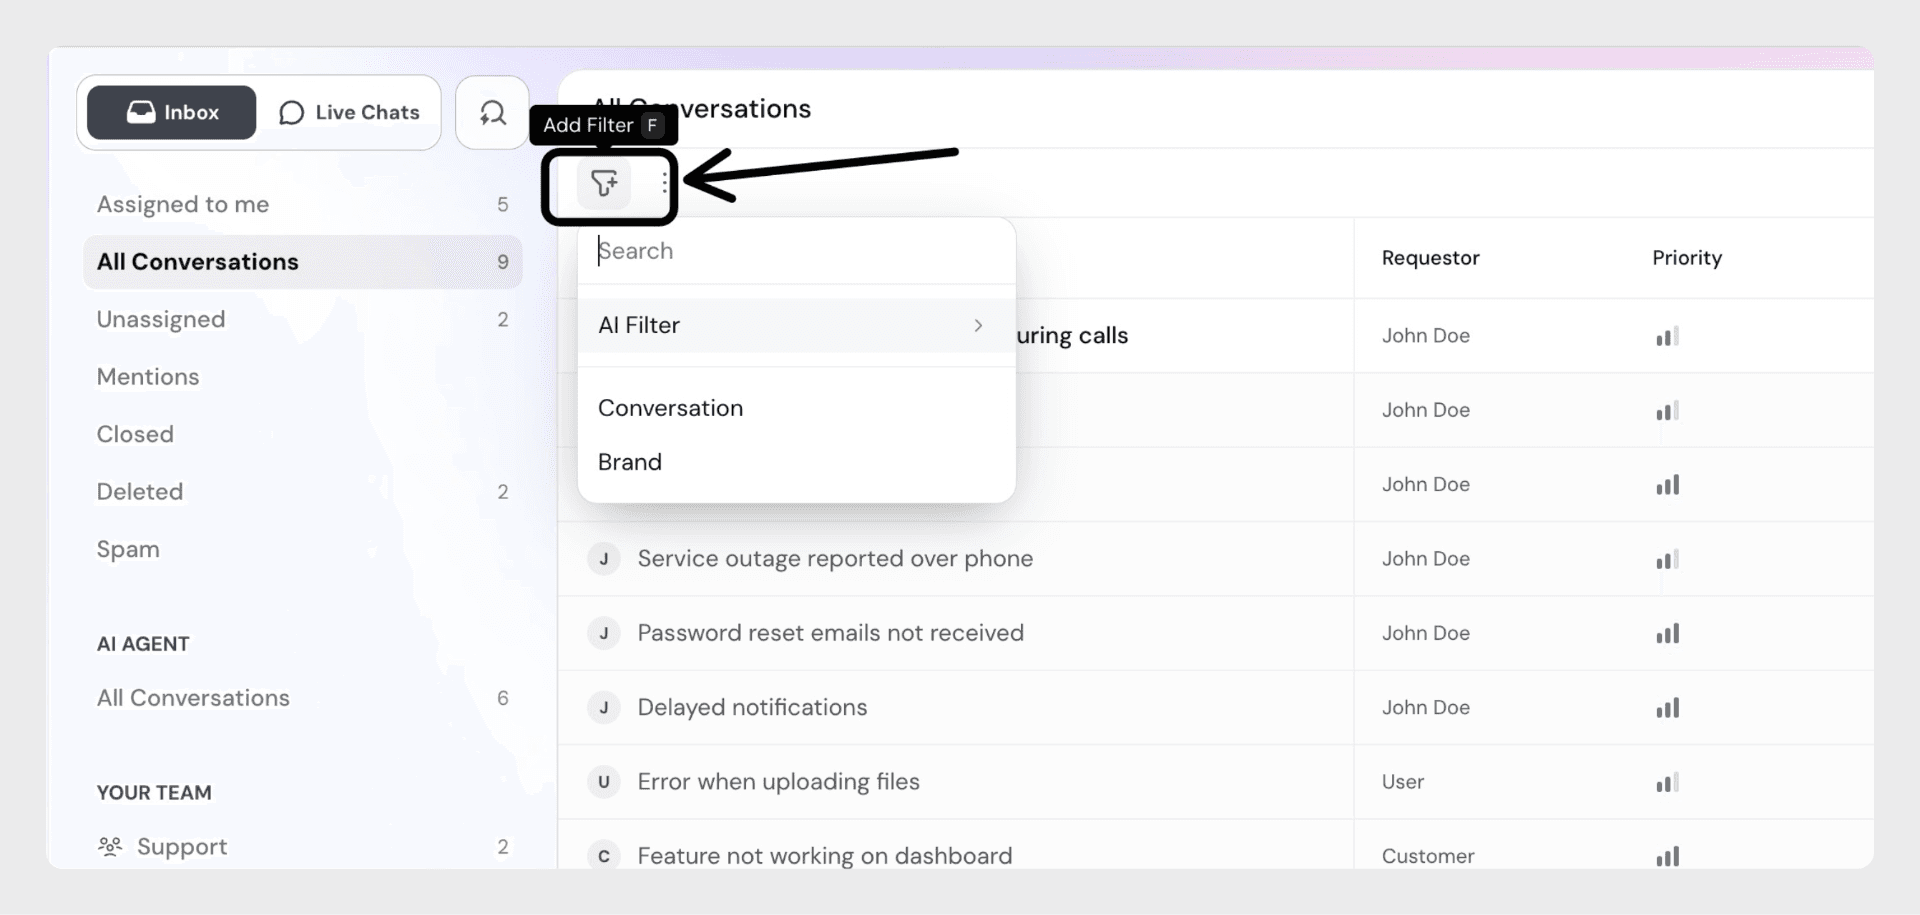
The AI Filter lets you filter conversations using natural language instead of manually selecting fields and operators.

image.pngExamples of natural language filters:

  • Subject contains Error
  • Requested by John
  • Assigned to David

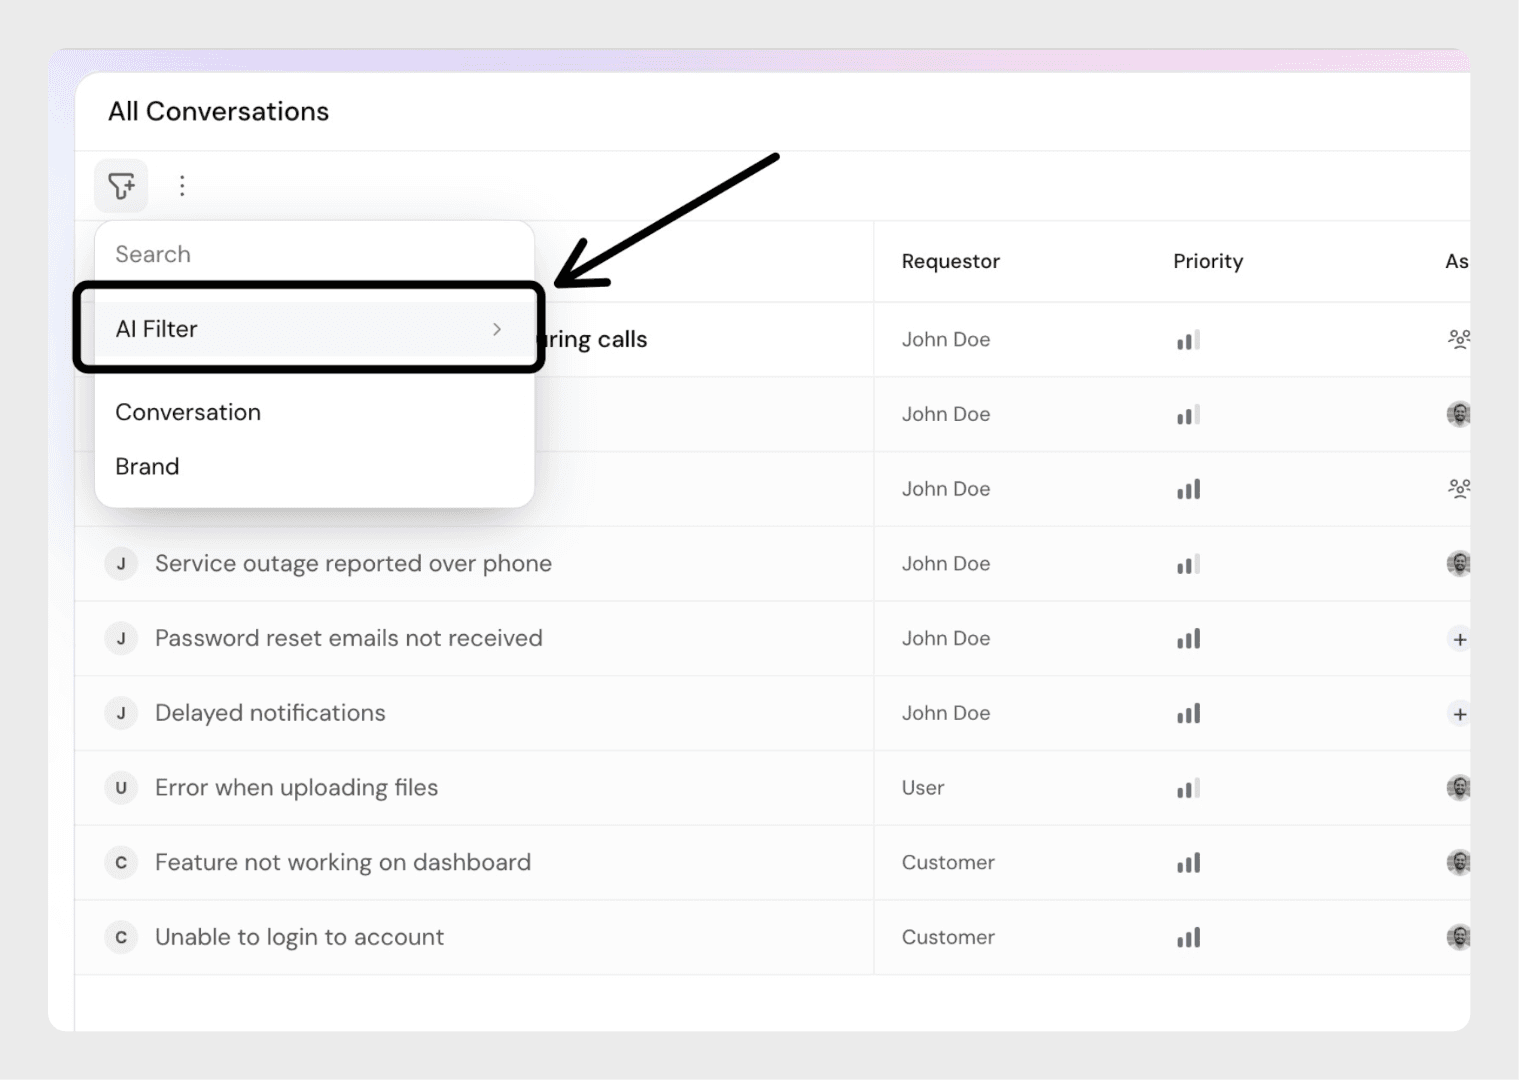
The AI will interpret your request, match it to the correct column, and apply the filter.

Creating a Custom View

Custom views are saved sets of filters with a custom name that you define. This name, along with an optional emoji, helps you quickly recognize and access the view in the sidebar.

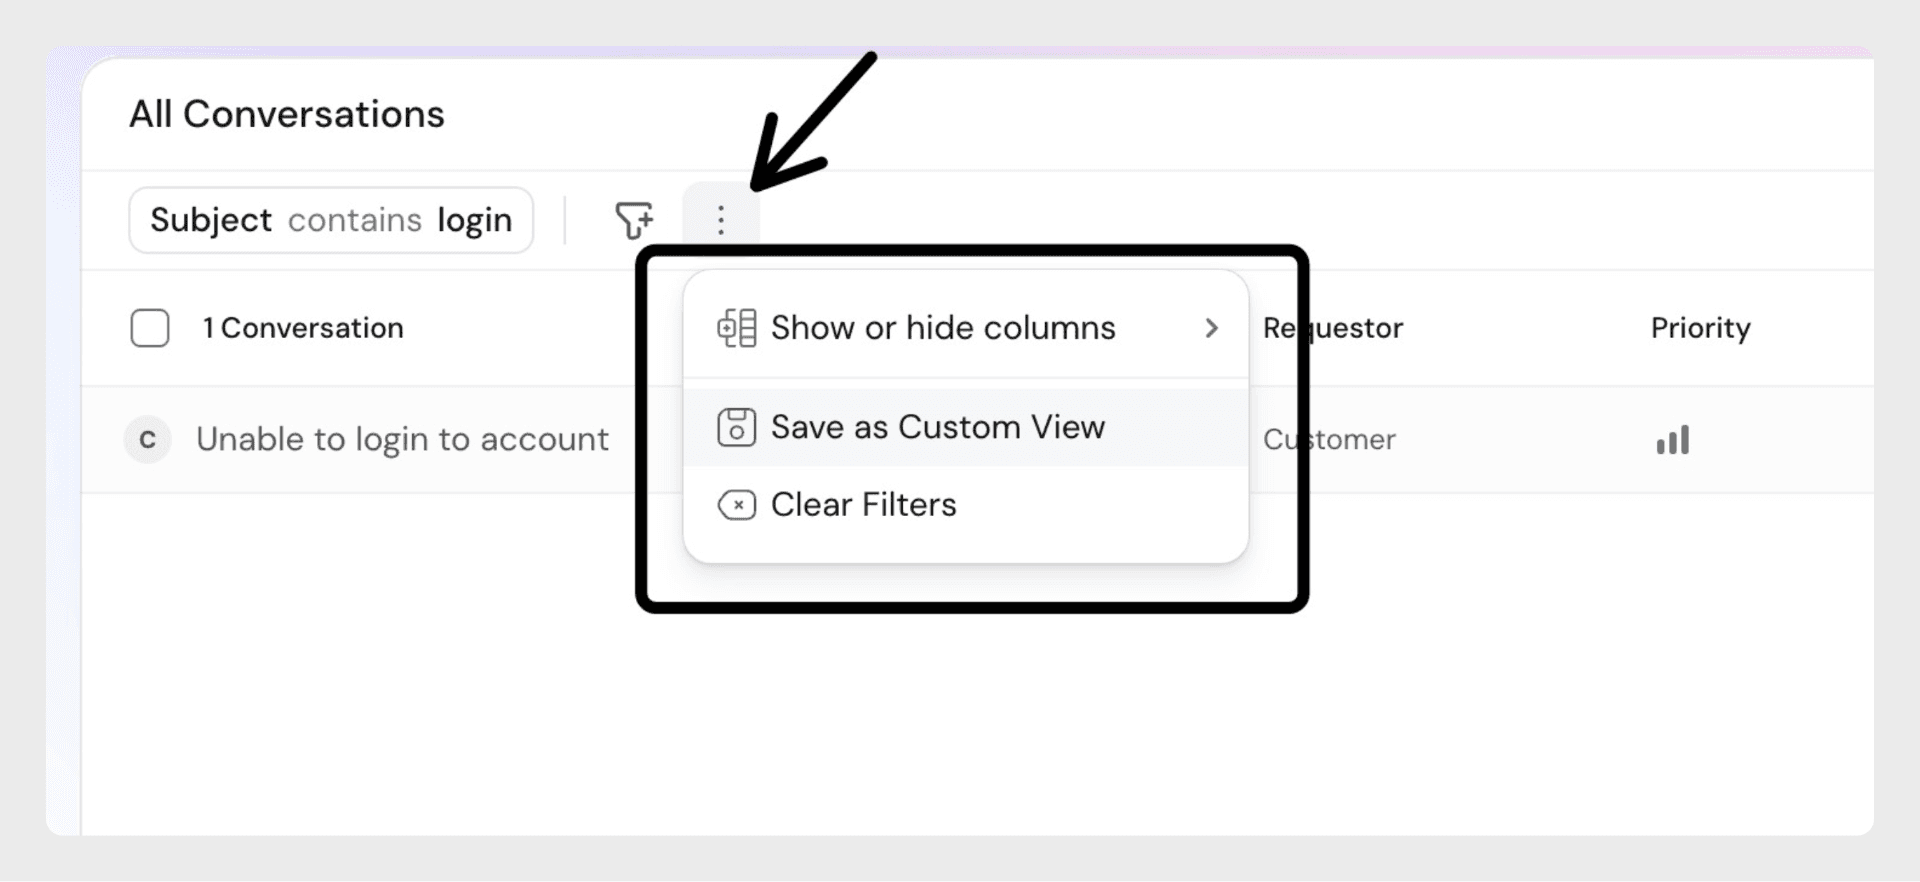
Step 1: Apply the filters you want in your inbox (using either Standard Filters or the AI Filter).

Step 2: From the dropdown, click Save as Custom View

image.pngStep 3: In the pop-up window, enter the required fields such as name and visibility

image.pngView Name: Enter a name (up to 30 characters). Choose something descriptive so you can identify it later. You can also select an emoji, which will appear before the view name in the sidebar.

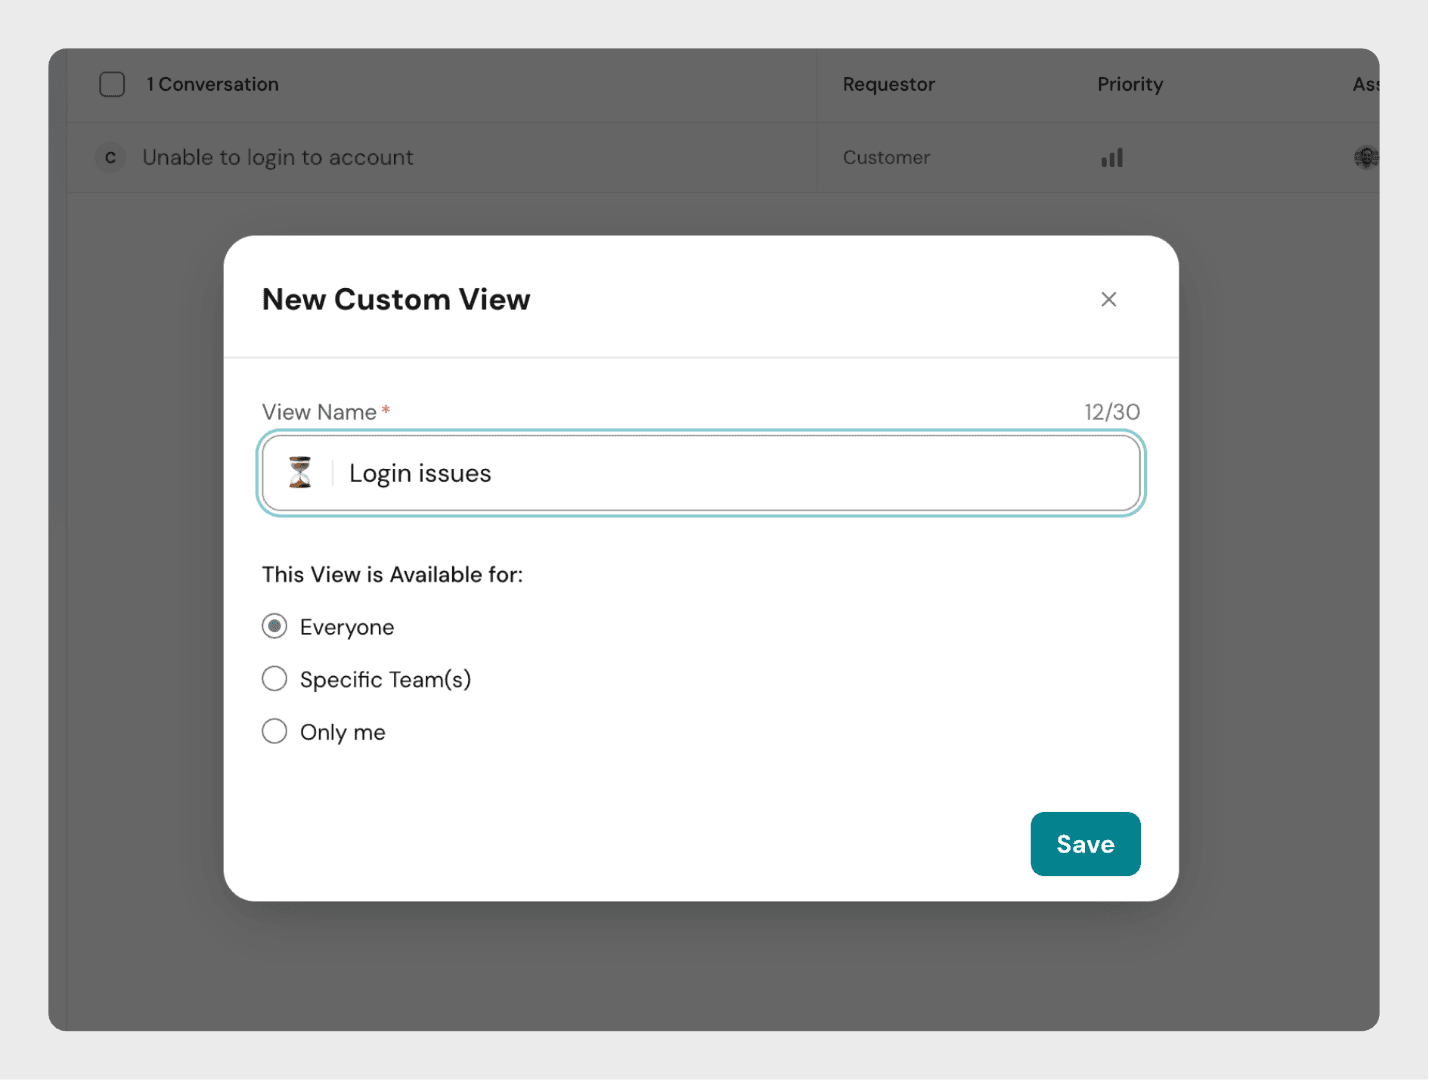
Visibility: Decide who should have access to this view:

  1. Everyone – All members in your workspace can see and use this view.
  2. Specific Team(s) – Choose one or more teams that can access the view.
  3. Only me – The view will remain private to you.

Step 4: Click Save.

image.pngOnce saved, your custom view will appear in the sidebar under Custom Views. You can click the view at any time to instantly apply its filters.

Editing or Deleting a Custom View

  • To edit a saved view, hover over it in the sidebar and click the options menu. You can rename it or change its visibility.

image.png

  • To delete a view, select Delete from the options menu. Deleted views cannot be recovered, but you can always create a new one using filters.


FAQ

Who can create views for everyone or for specific teams?
Only users with the right permissions can create views that are visible to everyone or to specific teams. Without these permissions, you can only create private views for yourself.

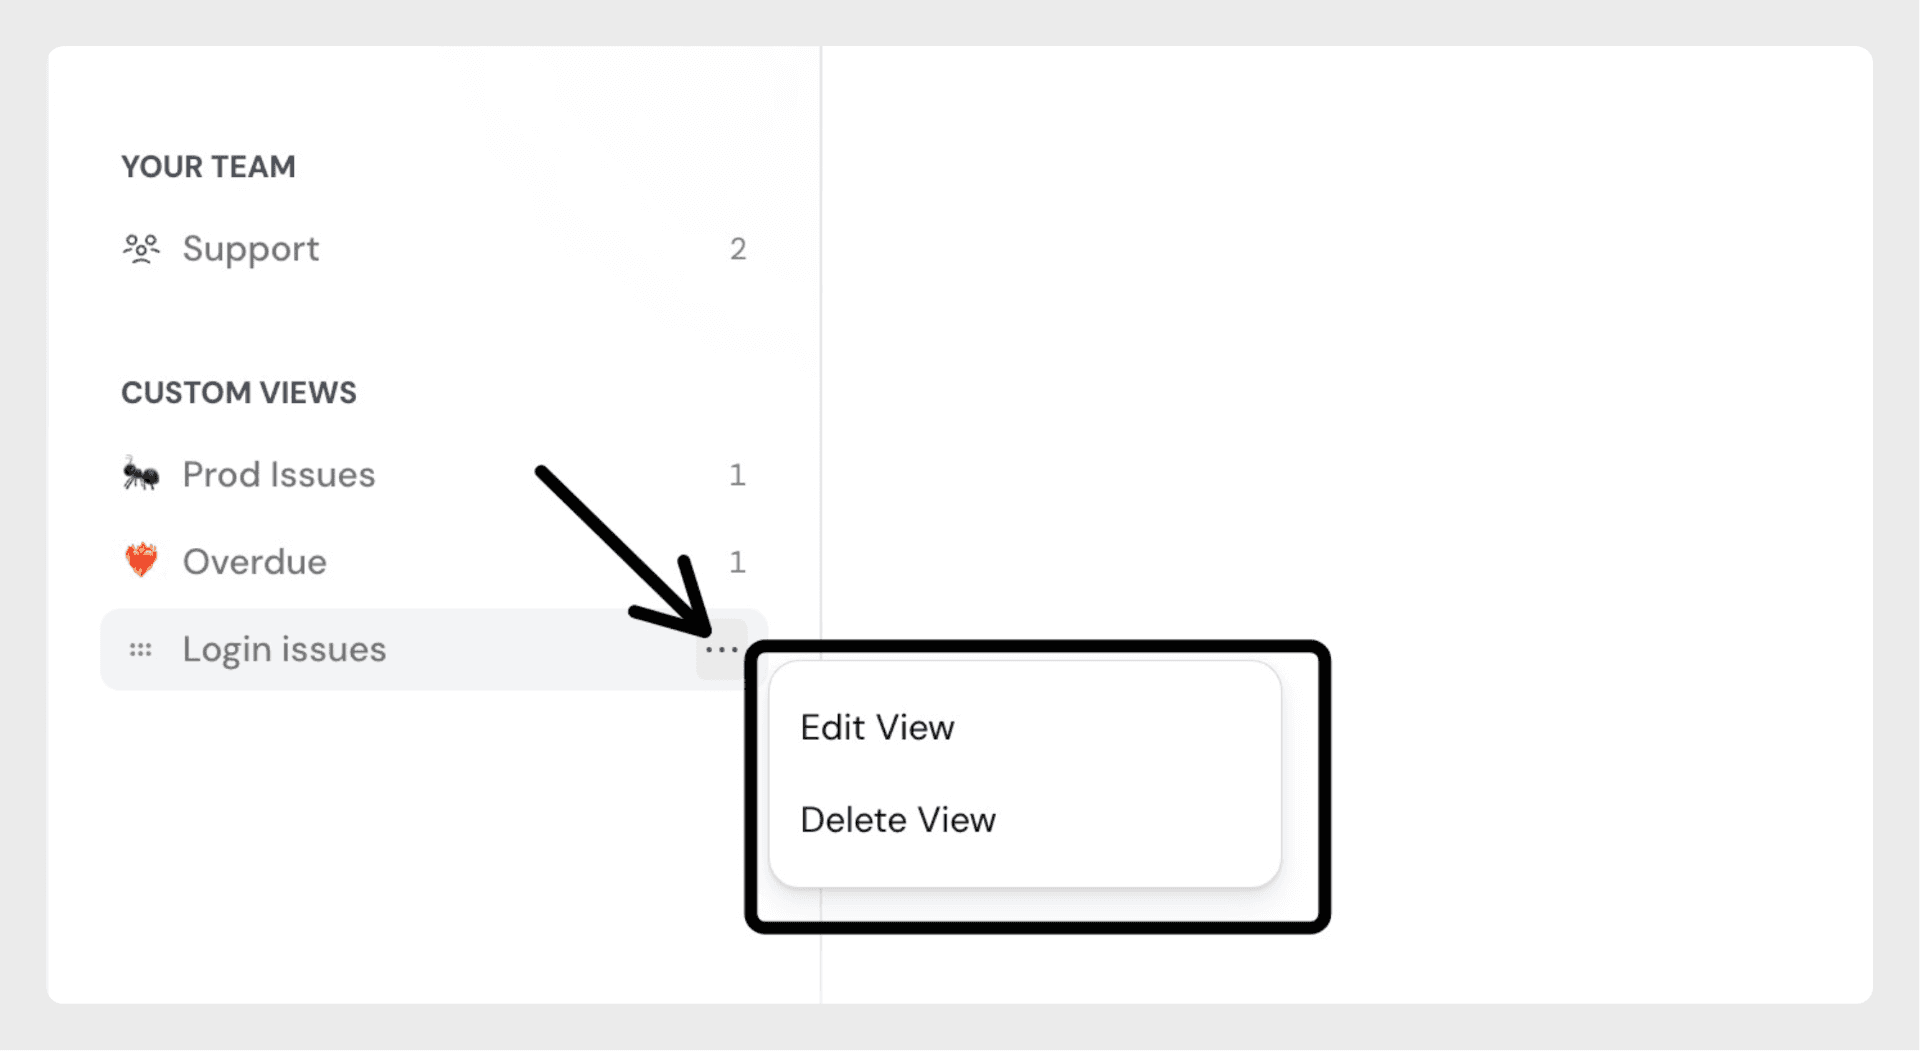
Who can manage a saved view?
A saved view can be managed (edited or deleted) only by the author who created it or by an admin. Other users cannot modify or delete views they did not create.


Powered By SparrowDesk