
How to Create a Command
Commands tell your AI Agent what to do when a specific situation comes up in a conversation. This guide walks you through setting one up from scratch.
Examples
Here are a few examples of what you can do with Commands.
Tag a conversation based on topic
Trigger: When a customer sends a message
Command: If the customer is talking about a billing issue, add the tag "billing" to the conversation.
This keeps your inbox organized without anyone having to manually tag conversations.
Process a refund via API
Trigger: When a customer raises a refund request
Command:
- Make an API call to your backend to check if the customer's subscription is valid
- If valid, check your refund policies to determine eligibility
- If the customer is eligible, make another API call to process the refund
- Once confirmed, send the customer a message letting them know the refund has been processed
This handles the full refund workflow automatically, from eligibility check to customer confirmation, without a support agent needing to step in.
Getting to Commands
- Log in to your SparrowDesk account
- From the sidebar, click the Zoona AI icon
- Select your AI Agent, then click Knowledge
- From the tabs at the top, click Commands
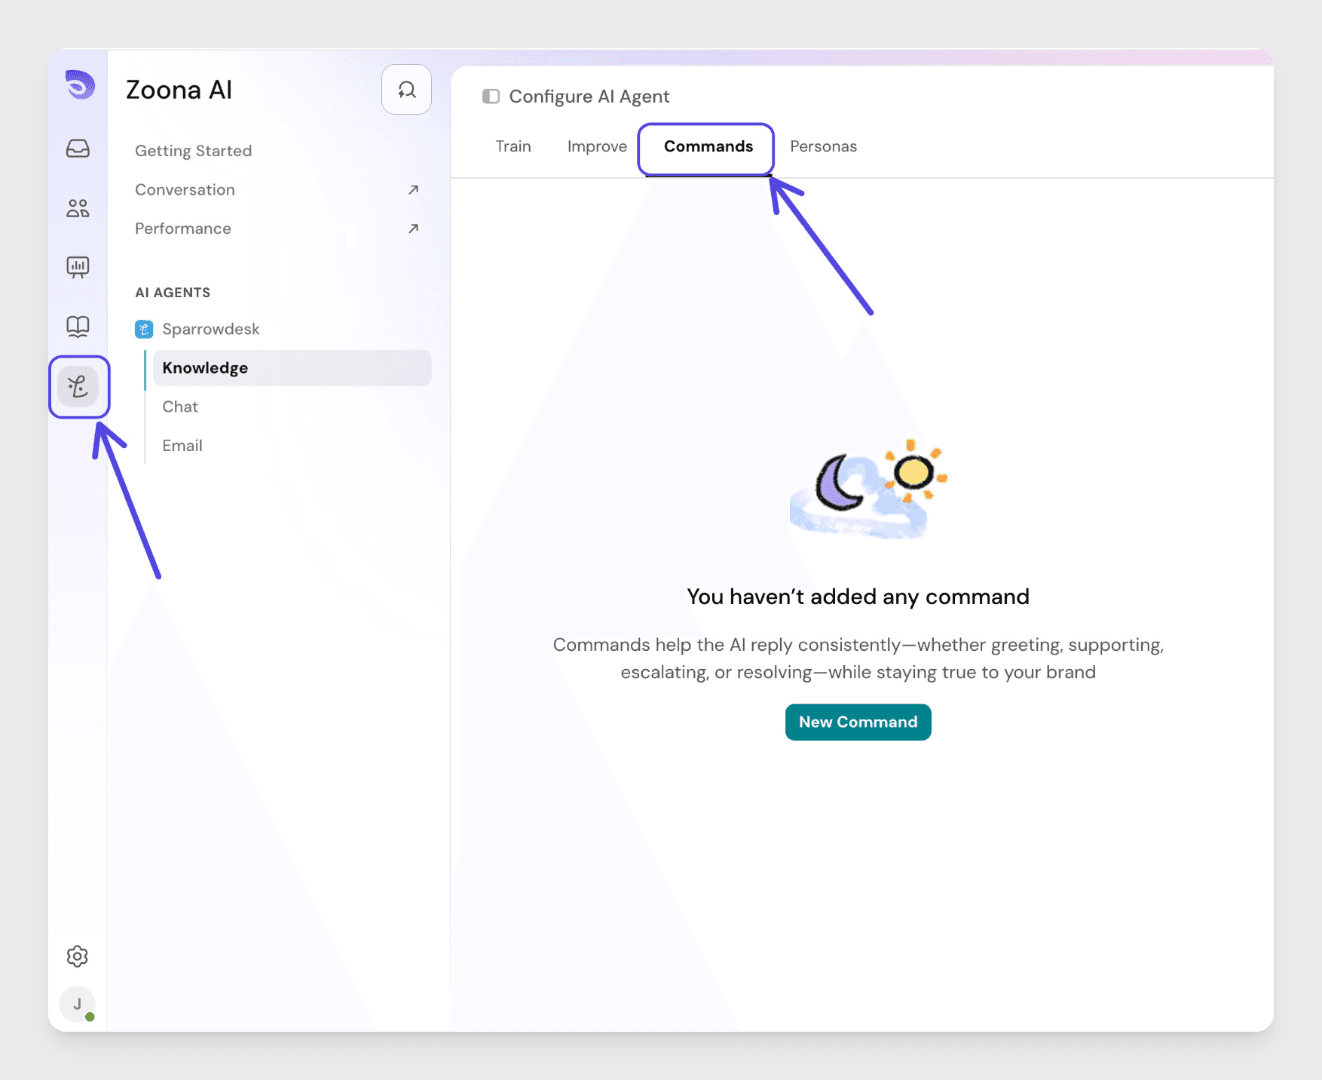
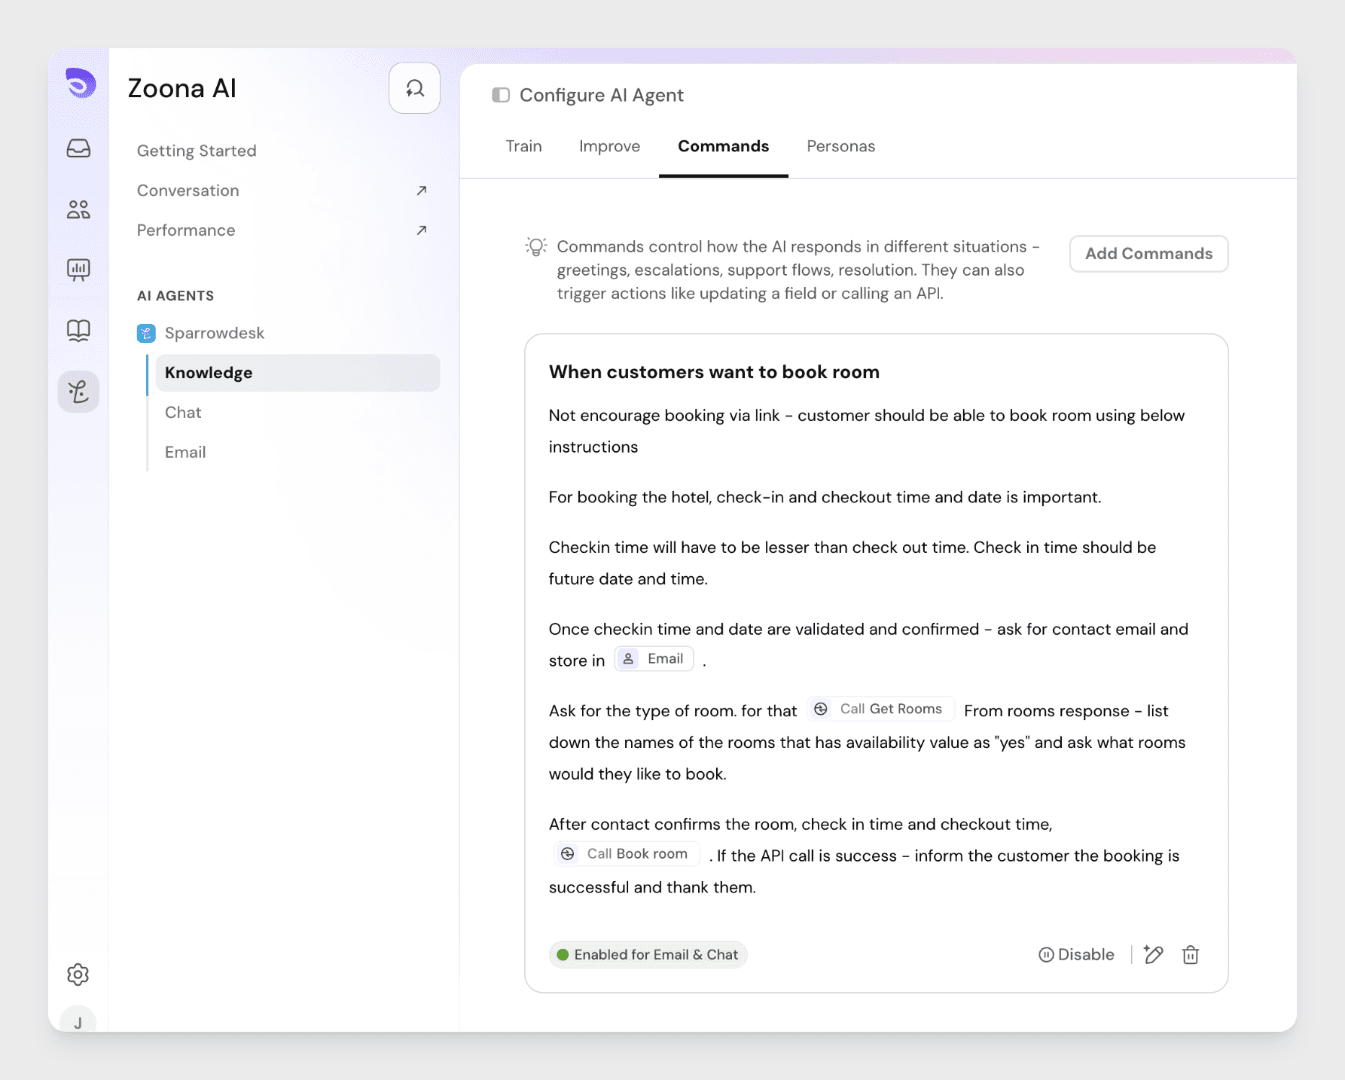
Here you will see all existing commands and an option to add a new one.
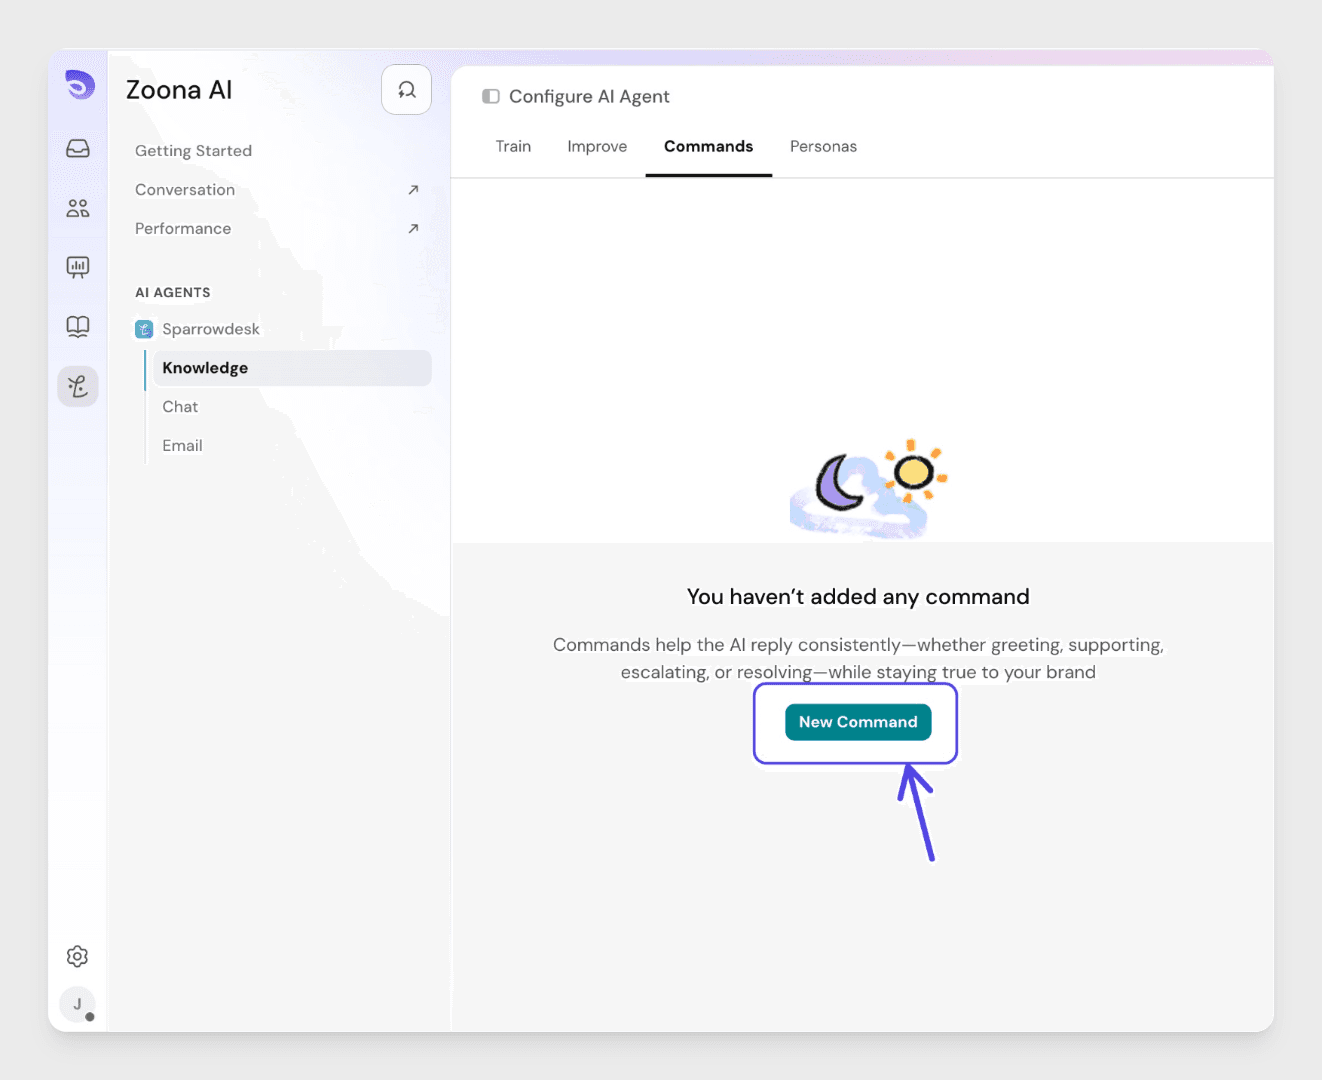
Creating a Command
Click Add Command.
A modal will open with two fields to fill in.
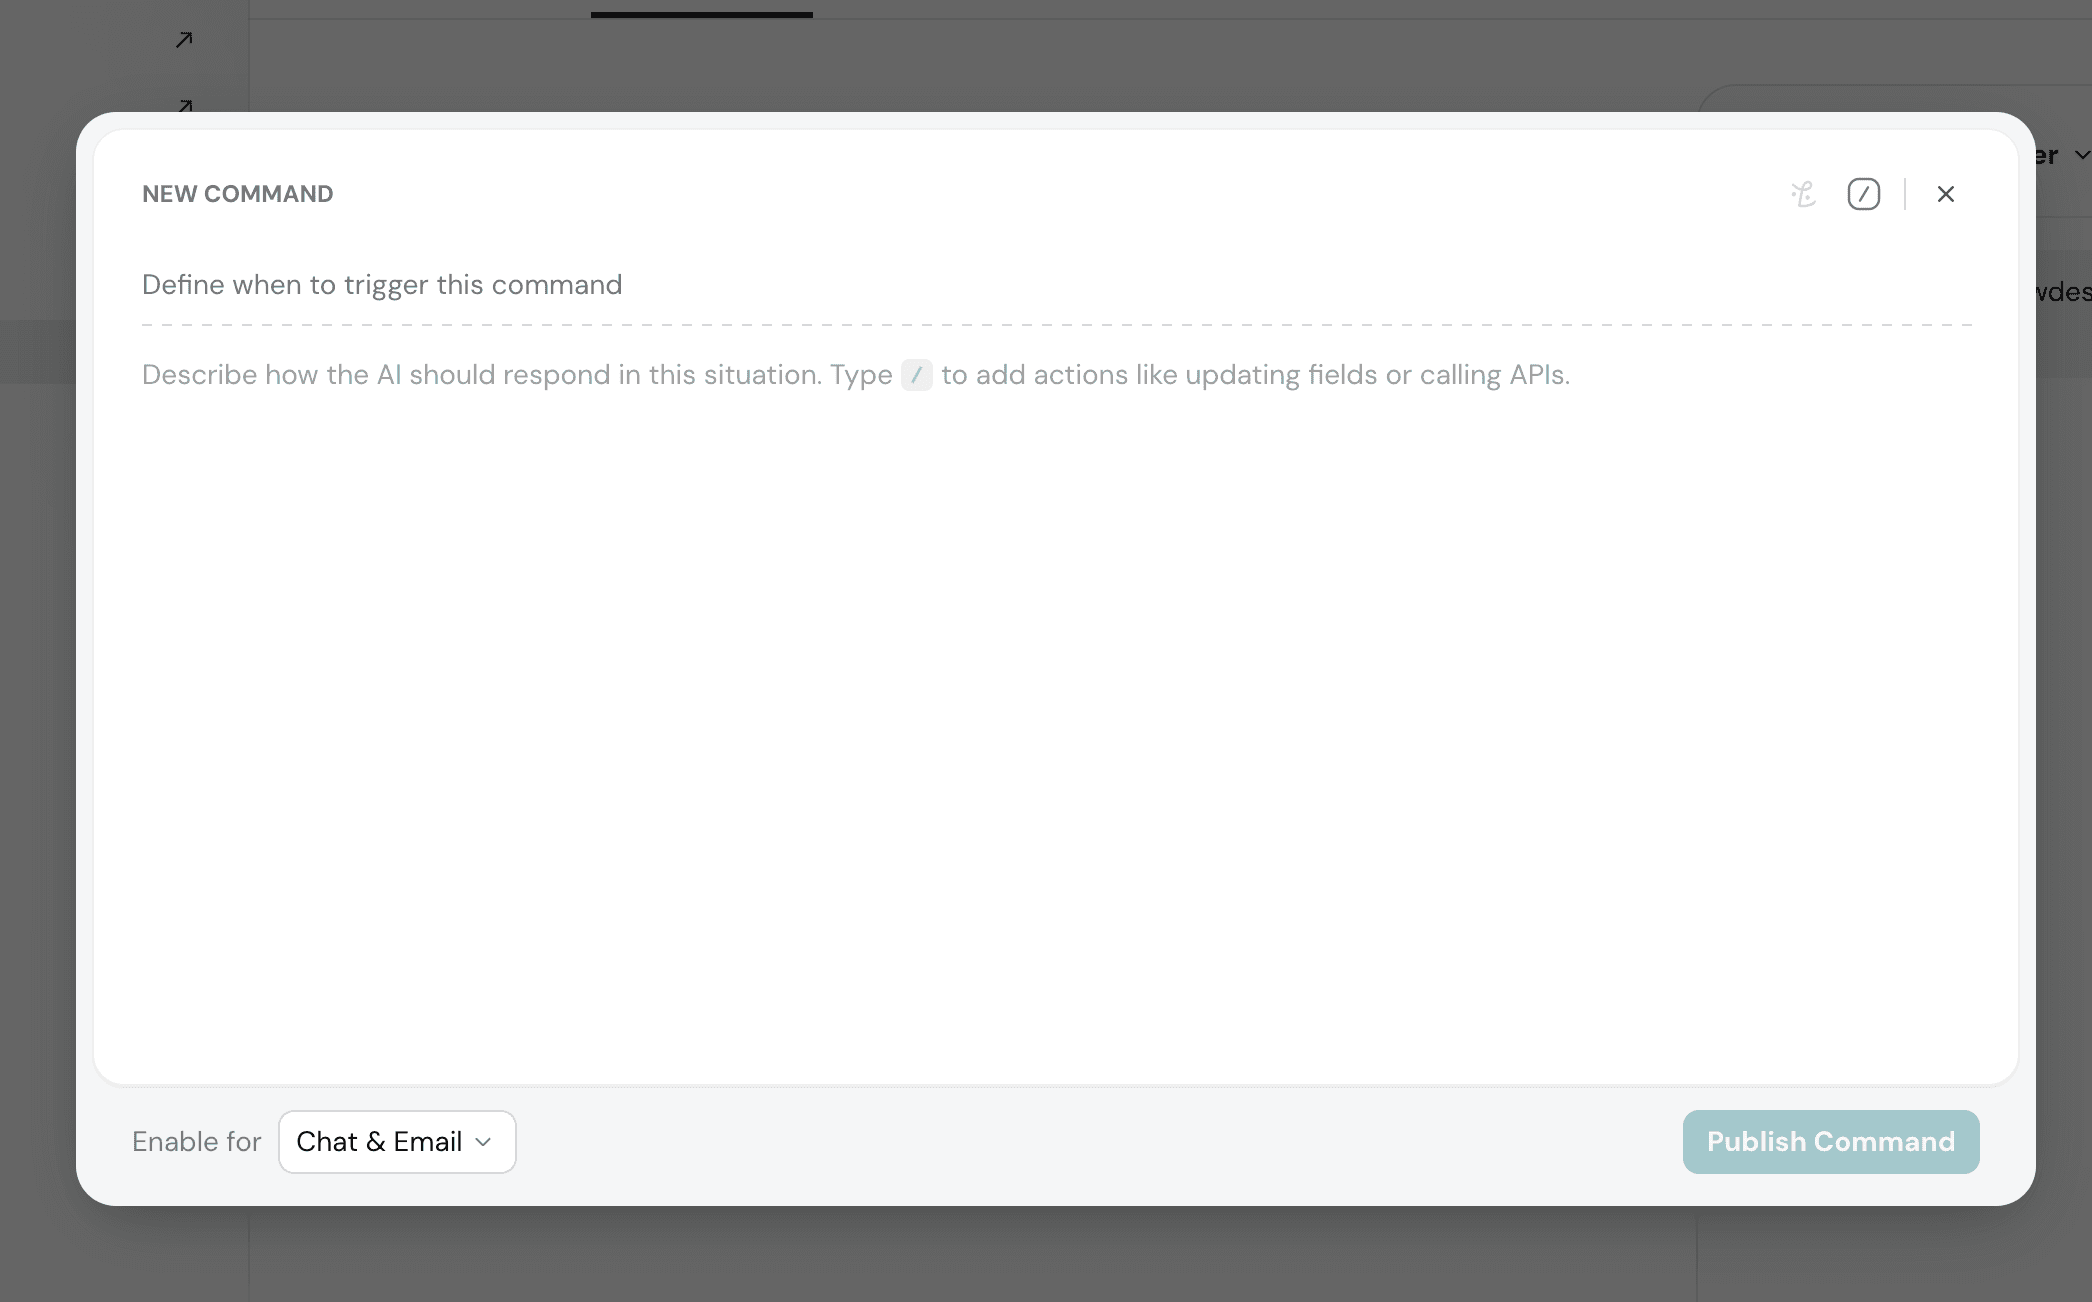
1. Define when to trigger this command
Describe the scenario in natural language. This is the condition the AI Agent checks during a conversation. For example: "When a customer reports a billing error" or "When a user asks to cancel their subscription."
2. Define what the command should do
Describe the action in natural language.
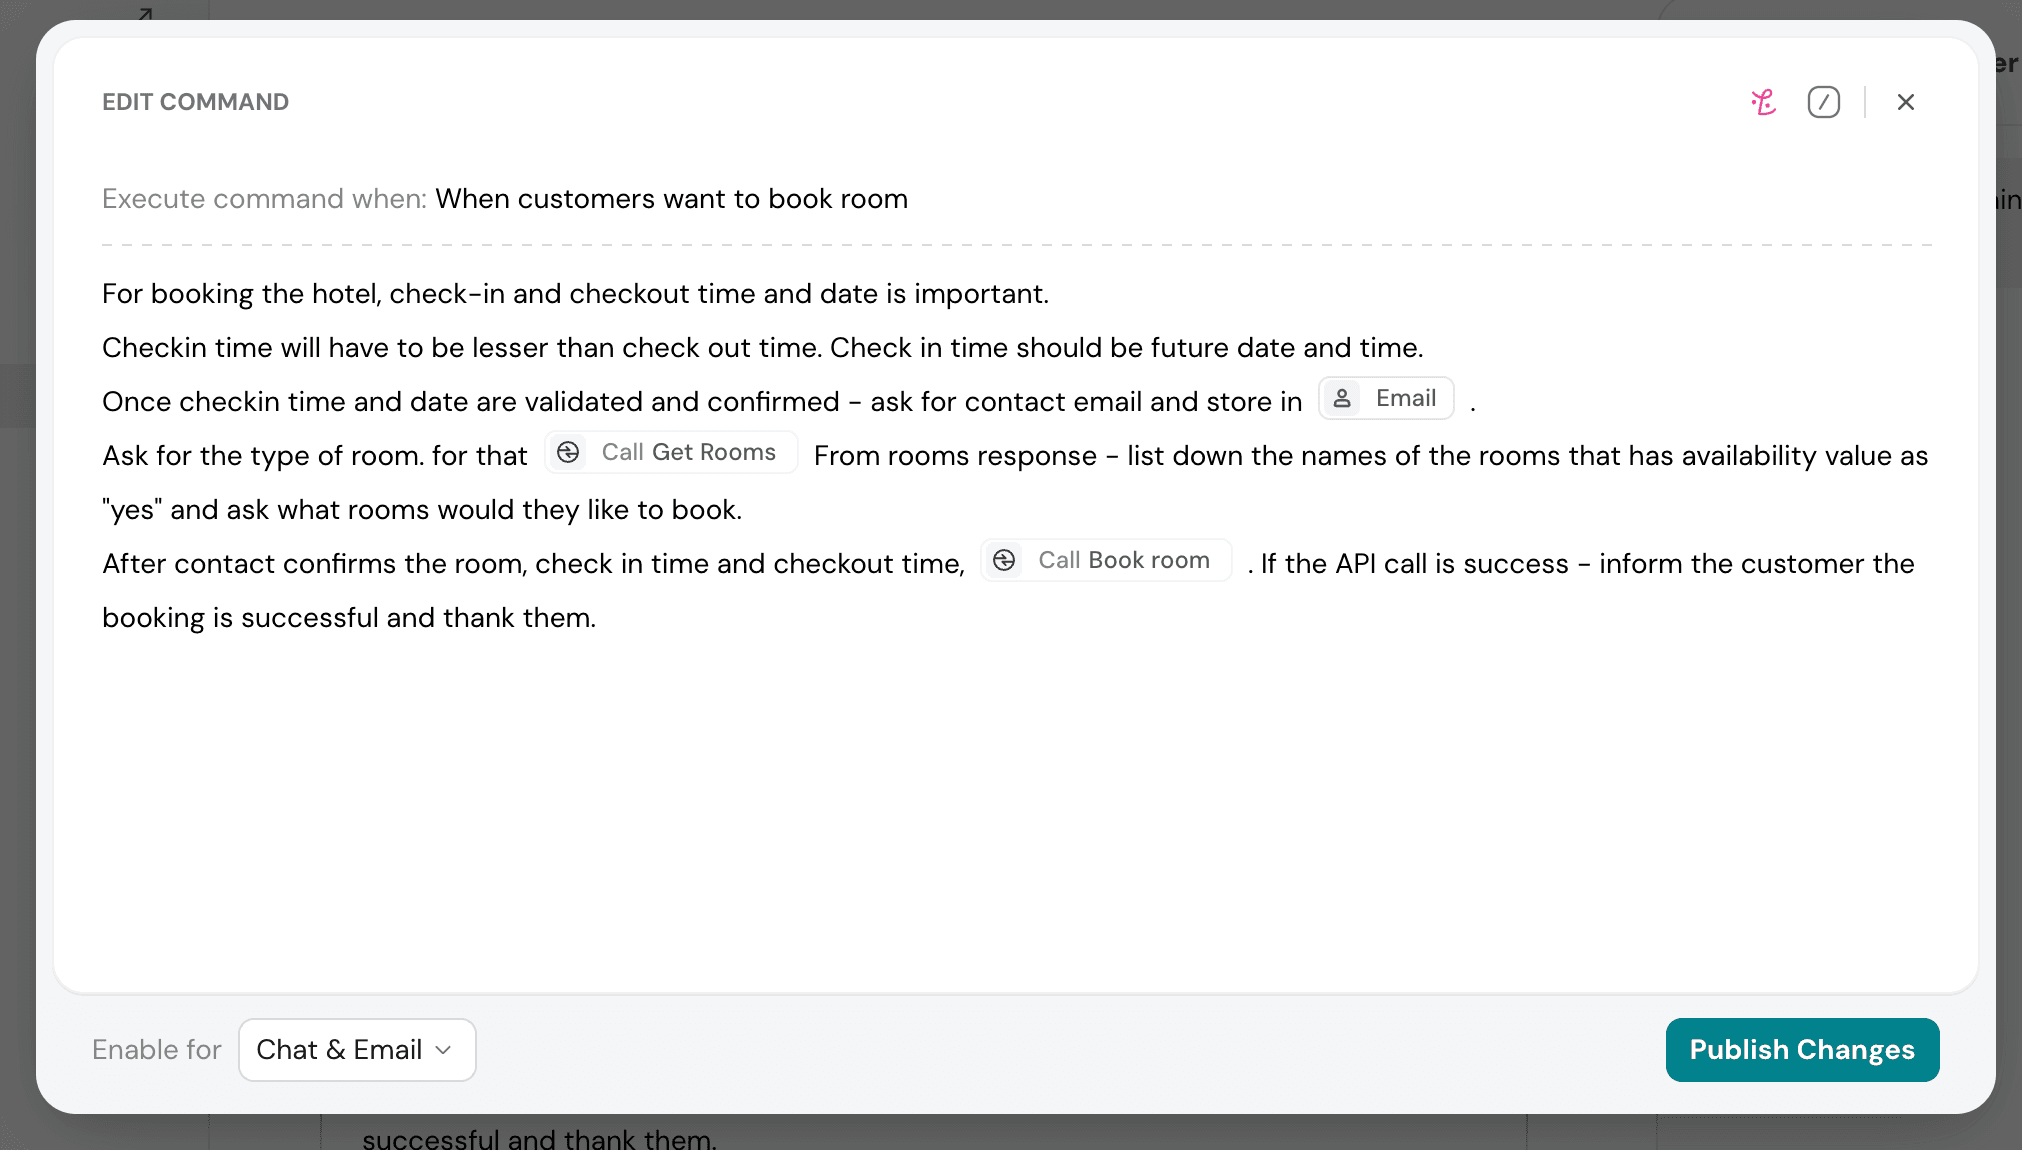
While typing, you can press / (forward slash) to insert structured building blocks:
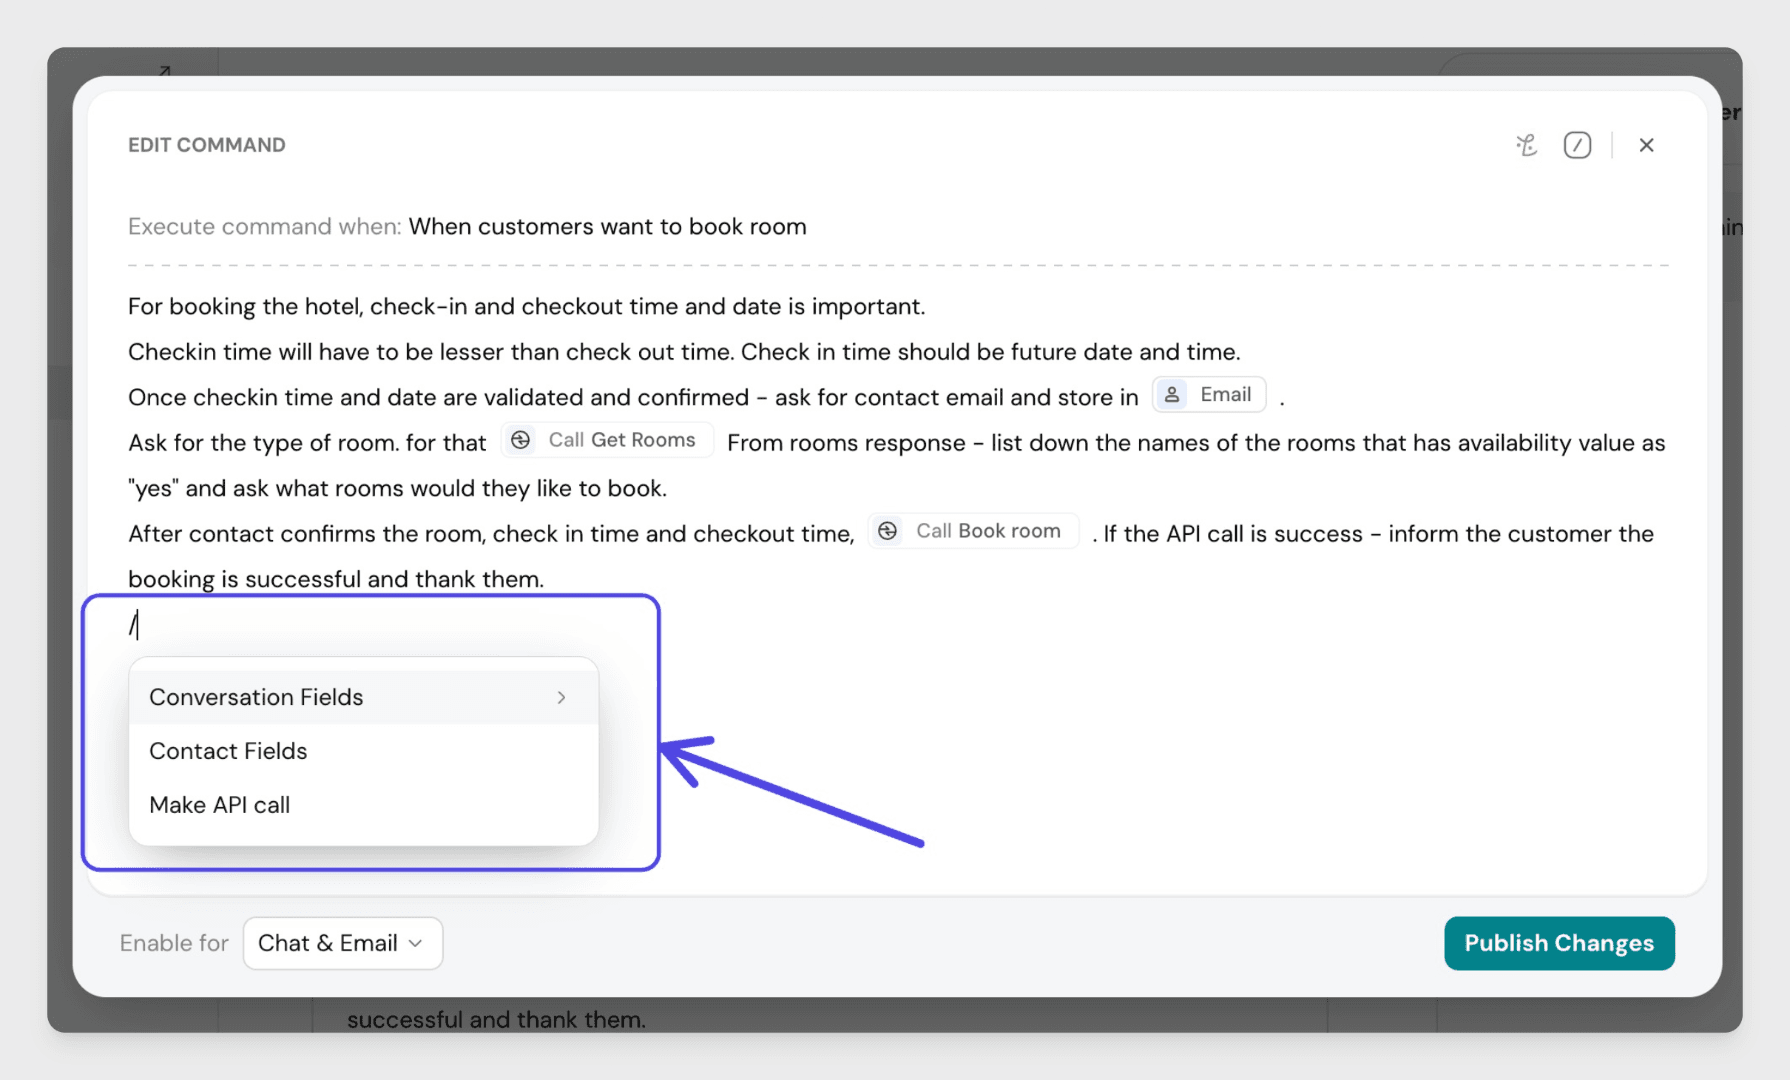
Conversation fields - reference or update properties of the current conversation.
Contact fields - reference or update properties of the contact. For example, check a contact property and take action based on its value, or update it as part of the workflow.
Make API call - connect to a third-party system. When you select this, a modal opens where you configure the following:
- Name - a label to identify this API call later
- HTTP method - choose from GET, POST, PUT, PATCH, or DELETE
- Endpoint - the API URL; you can use platform variables to make it dynamic
- Authentication - choose from No Authentication, Basic Authentication, Bearer Token, or OAuth
- Headers - define headers that will be sent with every request
- Body - available for POST, PUT, PATCH, and DELETE methods; build the request body using platform variables
Once configured, you can Test Request to see a sample response before saving the API call.
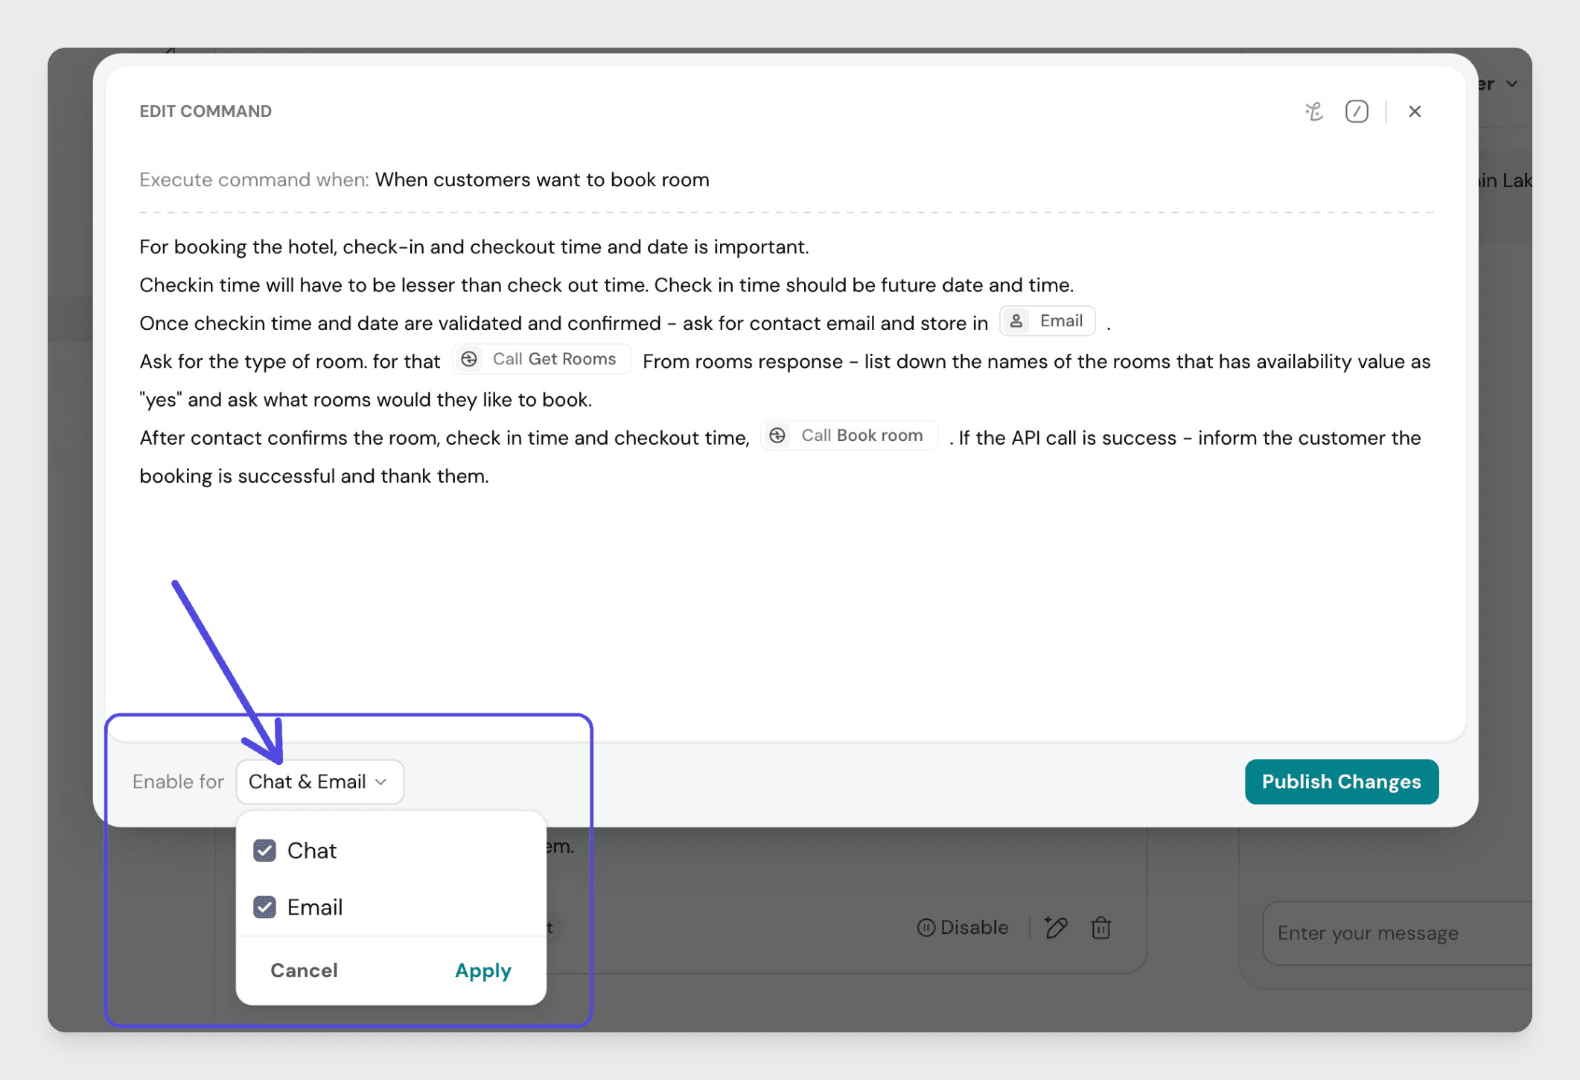
Setting where the command is active
After defining the trigger and action, click Enable for Chat and Email to choose which channels this command should be active in. Select your preferred options and click Apply.
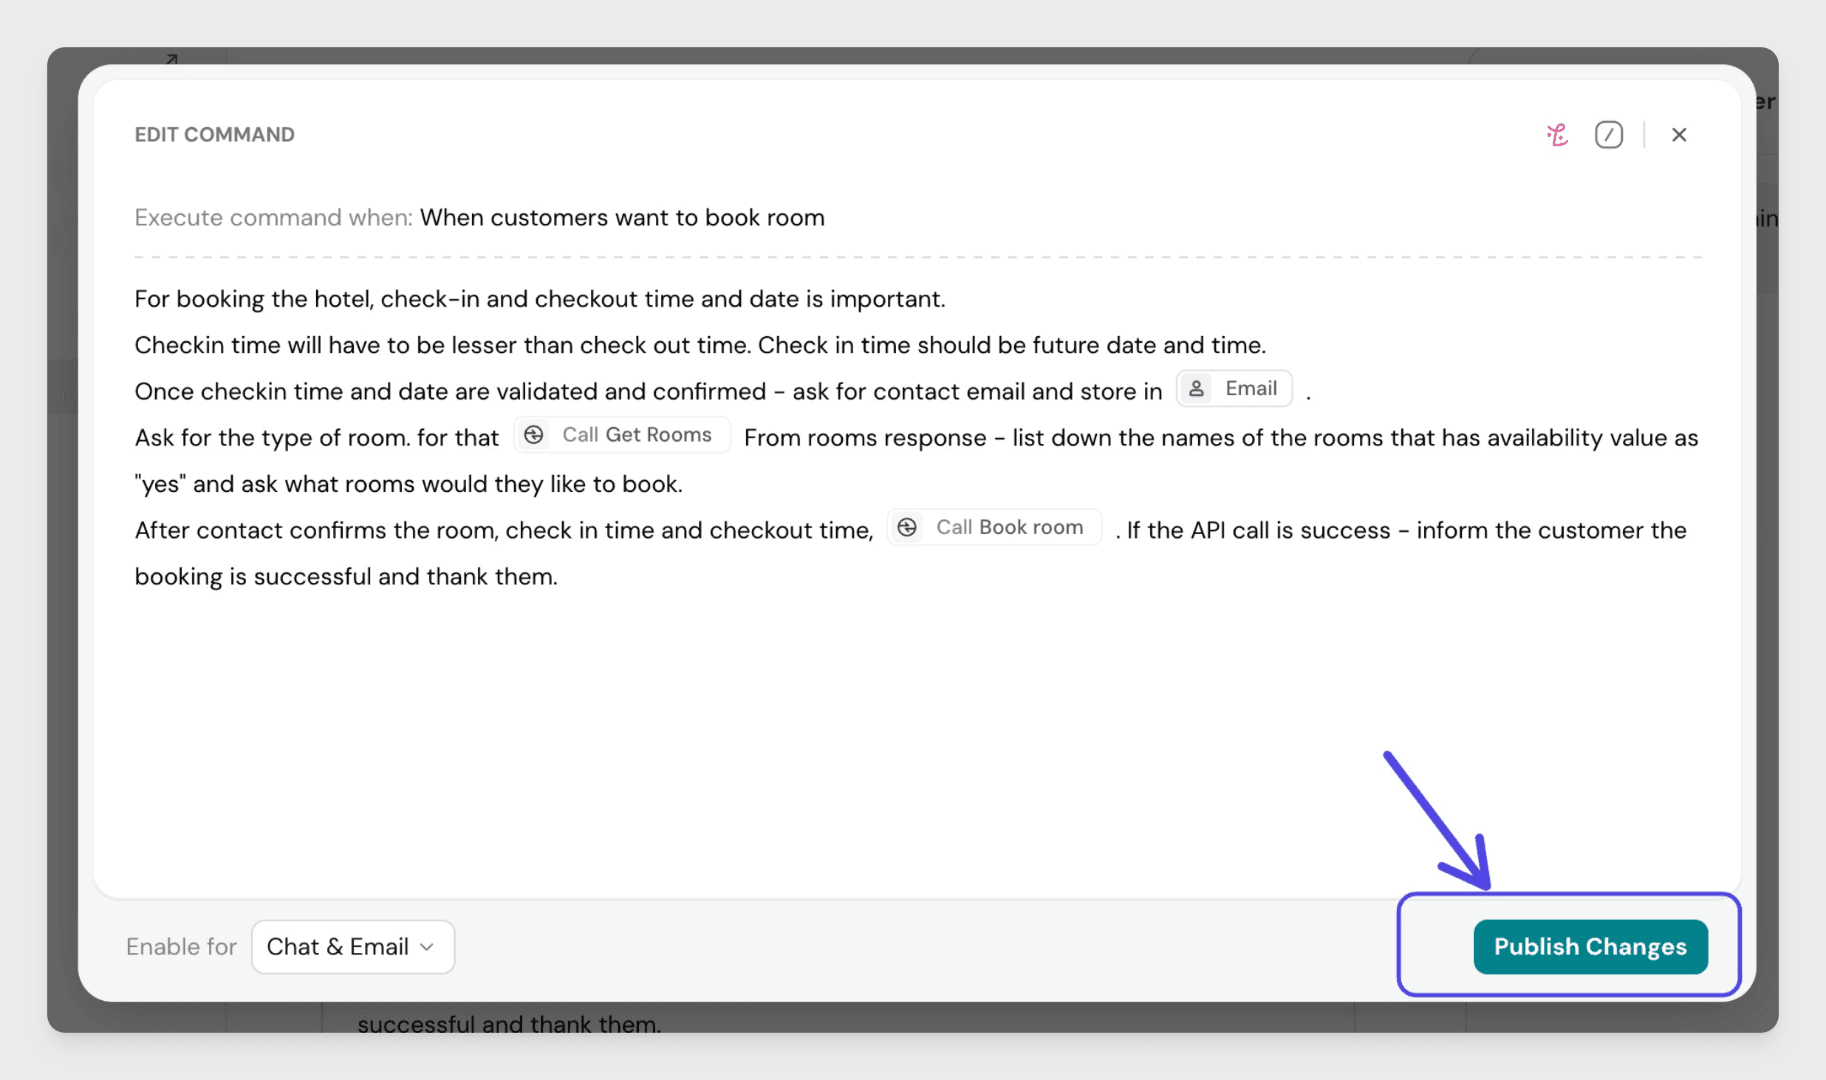
Publishing the command
Click Publish Command to save and activate it. From this point on, the AI Agent will execute this command whenever it encounters a scenario that matches your trigger logic.
Managing existing commands
From the Commands tab, you can manage any published command:
- Disable - turns the command off without deleting it; the AI Agent will skip it even if the trigger condition is met
- Edit - opens the command so you can update the trigger or action instructions
- Delete - permanently removes the command
