sparrowdesk-logo-transparent-1.png
Go to sparrowdesk.com
Home
SparrowDesk Overview
  • Overview of SparrowDesk
  • Feature Overview in SparrowDesk
  • SparrowDesk Glossary
Getting Started
  • Setting Up Account Details
  • Default Business Hours
  • Understanding and Creating Teams
  • Inviting Members to the Platform
  • Roles and Permissions
  • Single Sign-On
  • Brands in SparrowDesk
  • Getting Started FAQs
  • Use a custom domain for your support portal
Inbox
  • Understanding the Inbox in SparrowDesk
  • Managing Custom Views in Inbox
  • Live Chats in Inbox
  • Staying on Top of New Messages from Customers
  • Conversation Fields in SparrowDesk
  • Merging Conversations in SparrowDesk
  • Adding Watchers to a conversation
  • Round Robin assignment explained
  • Export Conversations as CSV
  • Bulk update fields
  • Forward a Conversation to an External Contact
  • Common Email Delivery Errors
Channels
  • Setting Up Email as a Support ChannelConnect your custom email address How do I send and receive emails via SMTP and IMAP ? How do I find my SMTP/IMAP server address and port number? Common Errors while Connecting through SMTP/IMAPHow to Prevent Emails From Going to Spam Email Signatures
  • Installing Chat Widget Chat Widget Installation on WordPressInstall the Chat Widget on ShopifyCustomising Chat WidgetEmbedding and Configuring the SparrowDesk Chat WidgetChat Widget SettingsWhy End Users Don’t Always See Their Chat HistoryTrack page visits in SparrowDesk
Contacts
  • Contacts in SparrowDesk
  • How to manage contact segments
  • Deleting and Blocking Contacts in SparrowDesk
  • Contact Fields in SparrowDesk
Reports
  • Conversation Report
  • Team Performance Report
  • Understanding the AI Agent Report in SparrowDesk
  • Viewing CSAT reports in SparrowDesk
  • Reports FAQ
  • Exporting Reports as PDF
Automation
  • Macros
  • Business Hours
  • Service-Level Agreements (SLAs)
  • Setting up CSAT (Customer Satisfaction) in SparrowDesk
Zoona AI
  • AI Suggested replies in your Inbox
  • AI-Generated Chat Subjects
  • Zoona AI Knowledge Improvements
  • Introduction to AI AgentAI Agent - Configure PersonaTraining your AI AgentZoona AI Agent CommandsAI Agent - Deploying on chatAI Agent - Deploying on EmailHow to Create a Command Zoona AI Agent - FAQUnderstanding AI resolutions in SparrowDesk
Workflows
  • Automate repetitive tasks through Workflows
  • How to Create a Workflow
  • Workflow Blocks Library
Help Centre
  • Write Knowledge Articles for your Help Centre and AI Agents
  • Setting Up and Customizing Your Help Center
  • Use a Custom Domain for Your Help Center
  • Make Your Help Centre Discoverable in Search results
  • Adding Google Tag Manager to your Help Center
  • Creating a Ticket Form Setting up Customer Portal
Billing
  • How does SparrowDesk pricing work?
  • What is Seat ?
  • Manage your Billing and Invoices
  • About Sales Tax
  • How to cancel your subscription
  • Frequently Asked Questions
  • AI Co-pilot and AI Resolution billing
  • SparrowDesk Startup Program
Apps and Integrations
  • Okta Single Sign on setup for SparrowDesk
  • Integrating HubSpot with SparrowDesk
  • Integrating SurveySparrow with SparrowDesk
  • Integrating SparrowDesk with Zapier
  • Connecting SparrowDesk with Attio
  • Connecting SparrowDesk with Linear
  • Integrating SparrowDesk with Jira
  • Connecting SparrowDesk for Gmail
  • Integrating SparrowDesk with Notion
  • Integrating SparrowDesk with Slack
  • Integrating SparrowDesk with Shopify
  • Connect WhatsApp to SparrowDesk

How to manage contact segments

Timer1 min read
JustinJustin

Contact Segments in SparrowDesk let you group contacts together based on specific criteria. These segments are helpful for improving productivity, running automations, or triggering workflows. You can create segments using default or custom contact properties.


Why Contact Segments Matter

  • Organization: Easily manage large contact databases by grouping them into meaningful clusters.
  • Automation: Use segments in workflows to automate actions like auto-tagging, assigning, or messaging.
  • Productivity: Filter out irrelevant contacts and focus only on what matters for specific tasks.


How to Create a Contact Segment

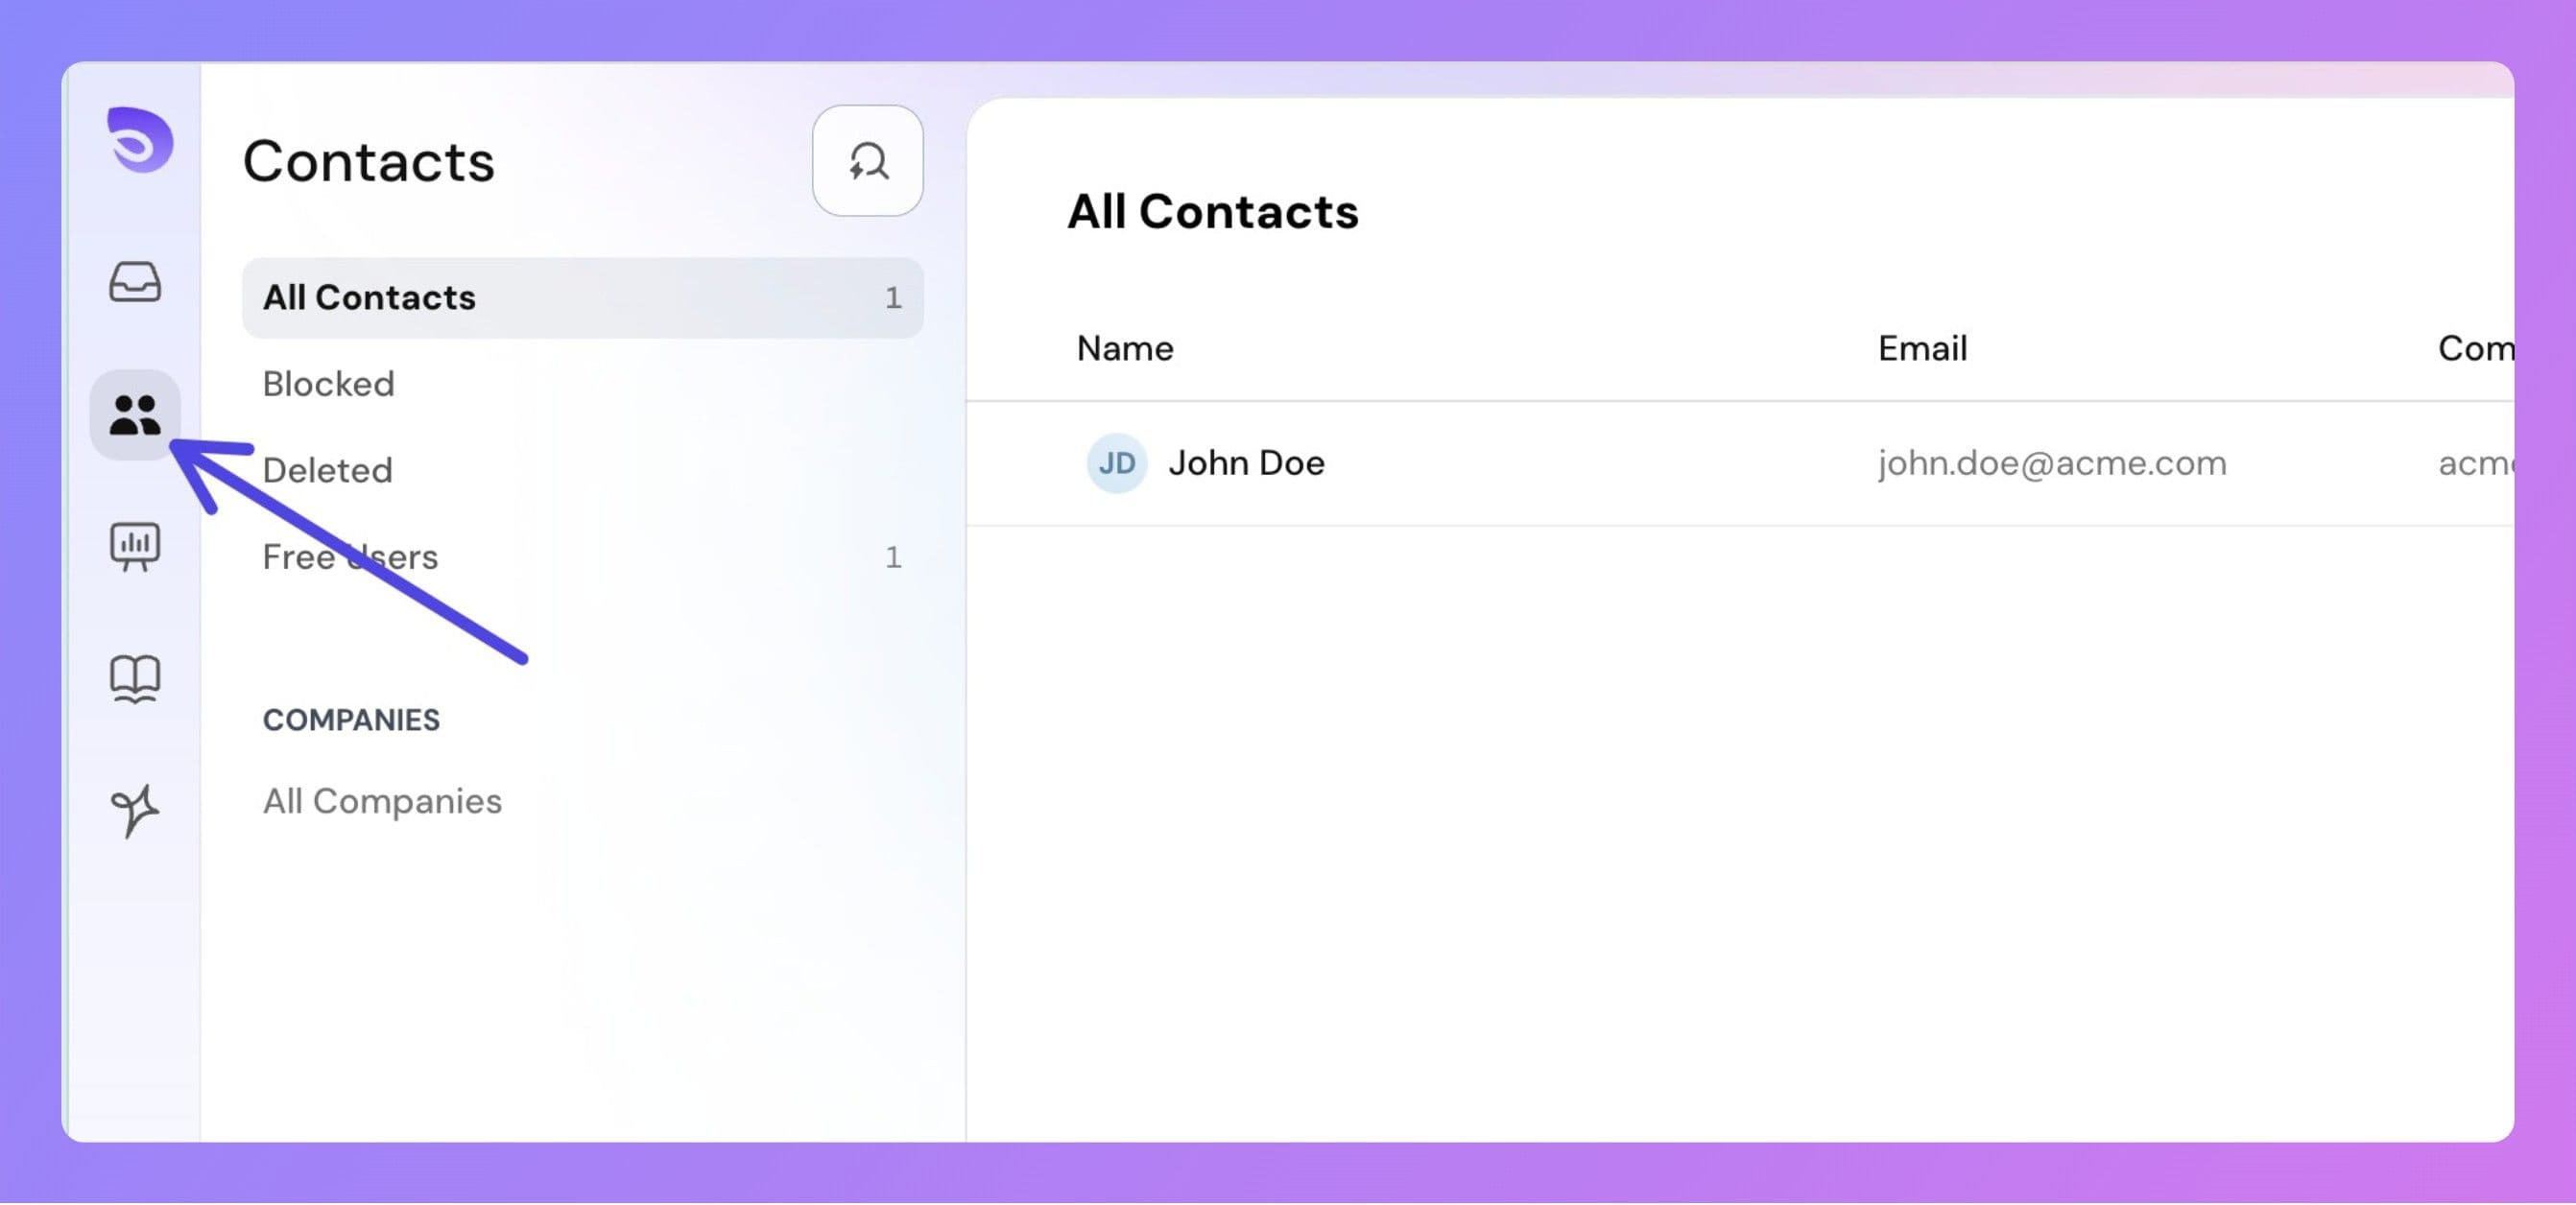
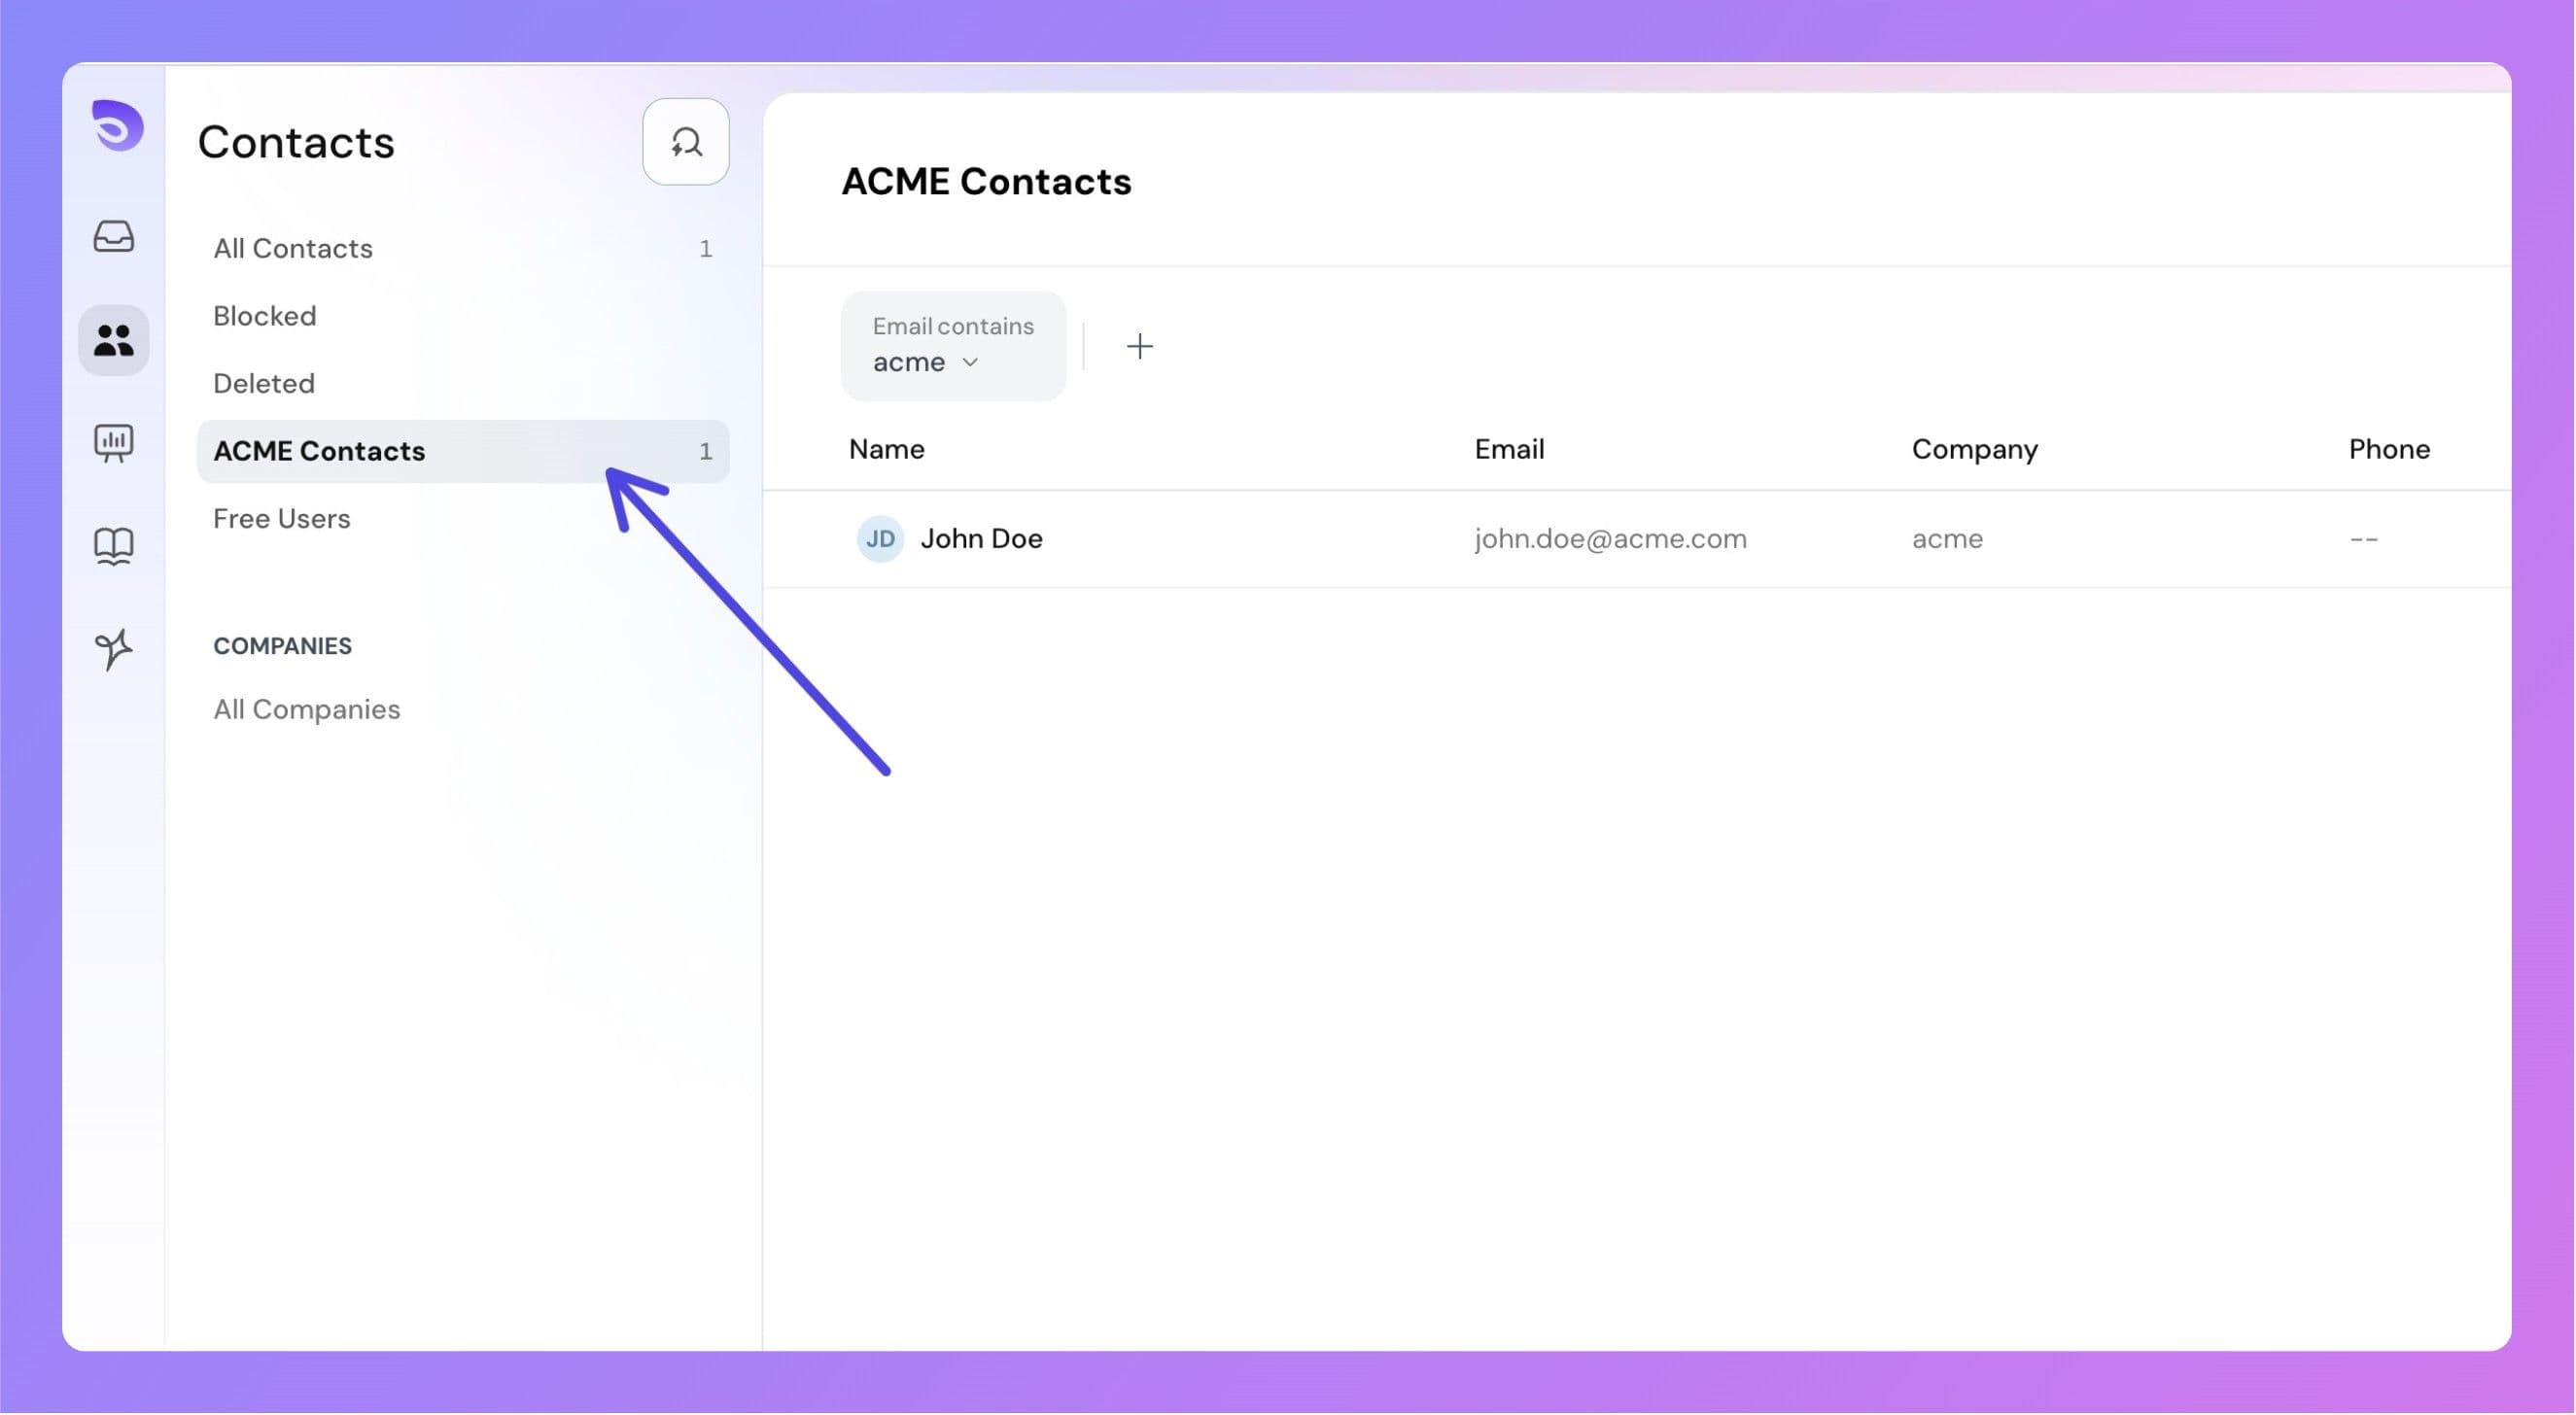
Step 1: Go to Contacts Page, access the Contacts section from the sidebar.

contacts-sidebar.jpg

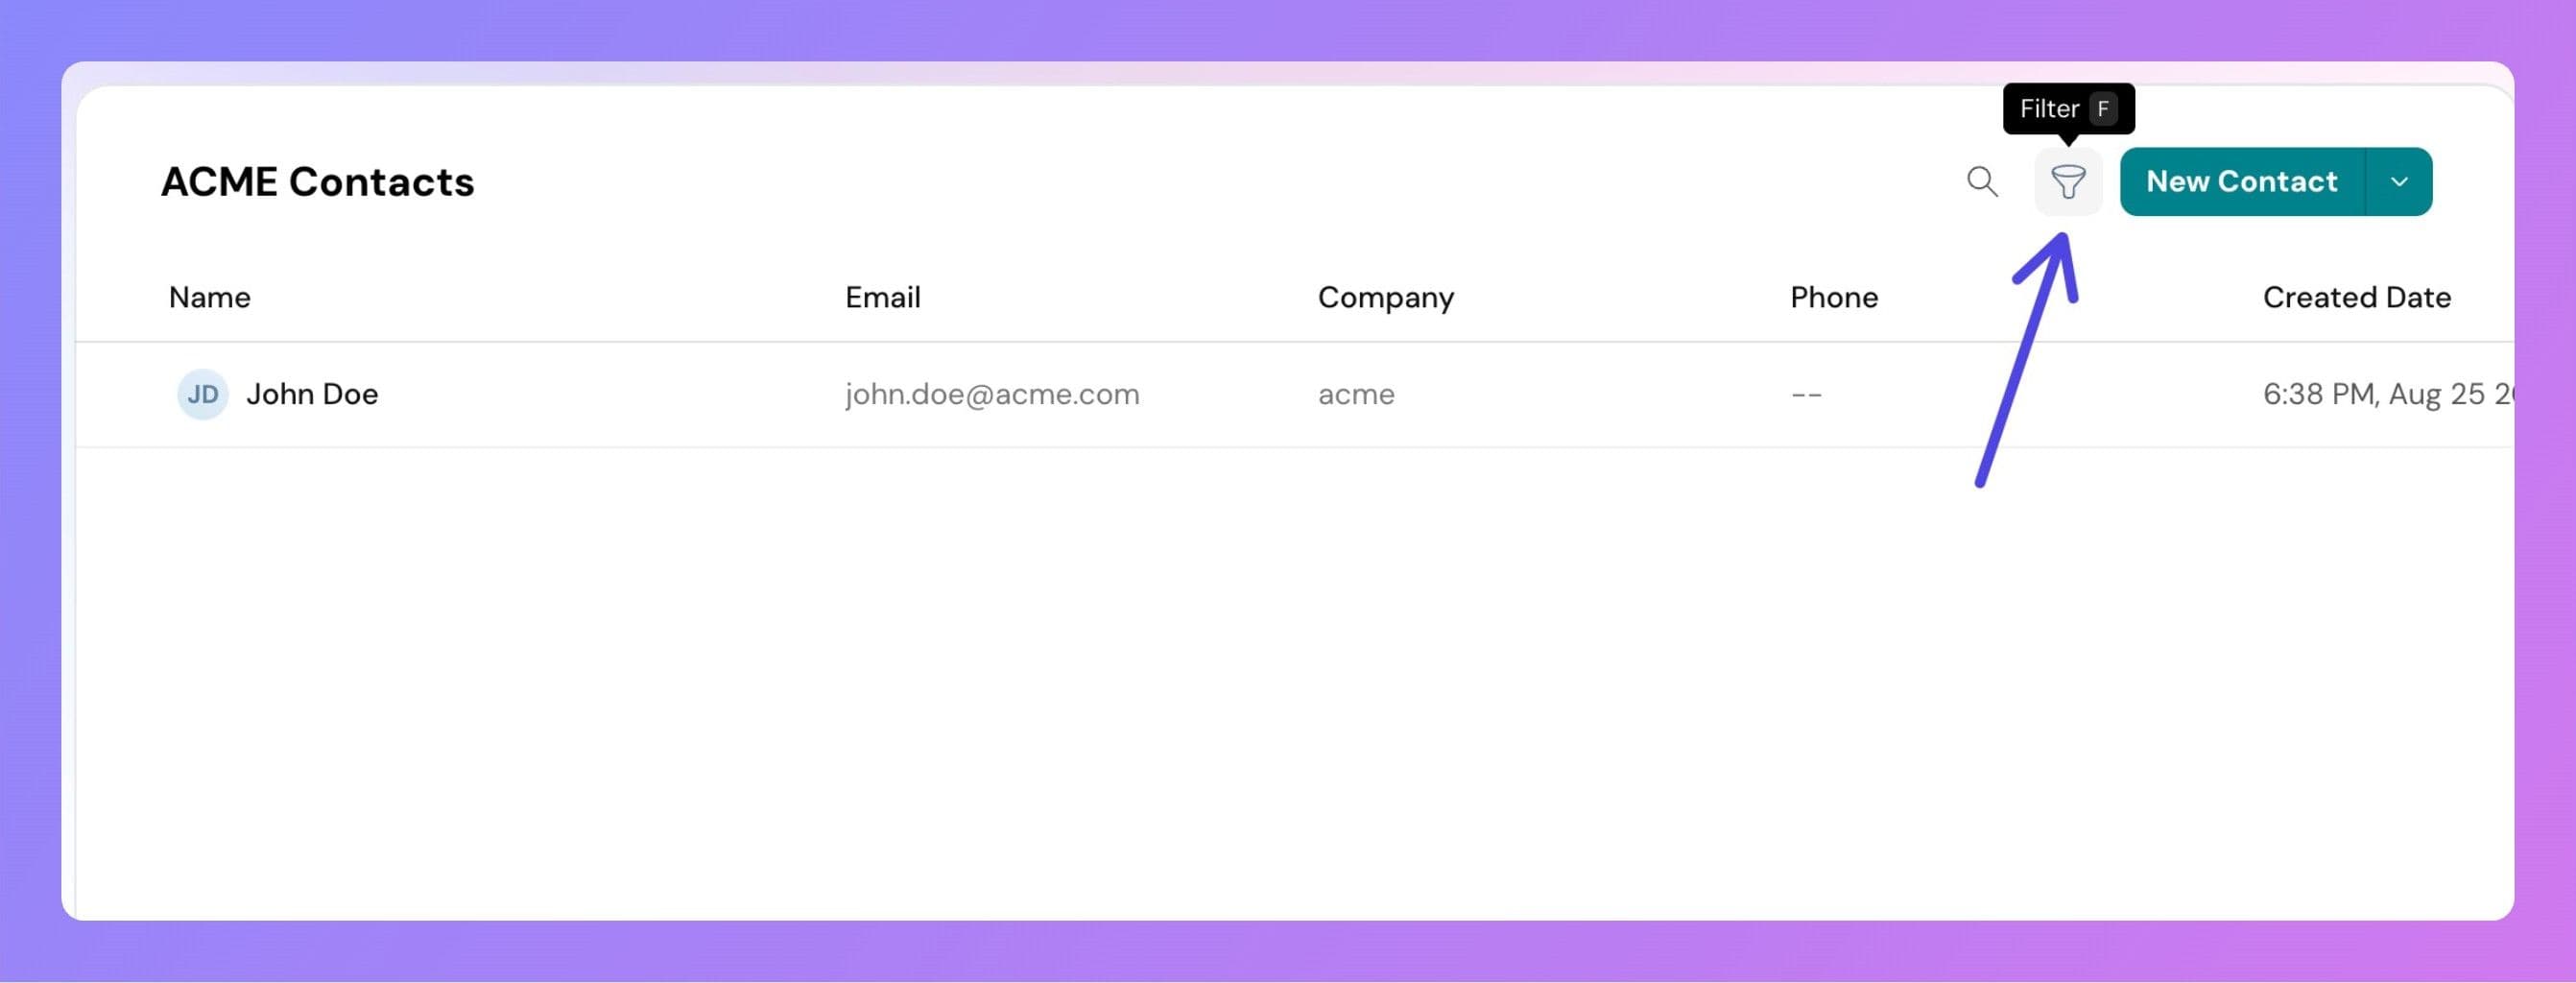
Step 2: Open Filter Panel

Click on the Filter button. Or, press F on your keyboard to quickly bring up the filter panel.

contacts-filter-button.jpg

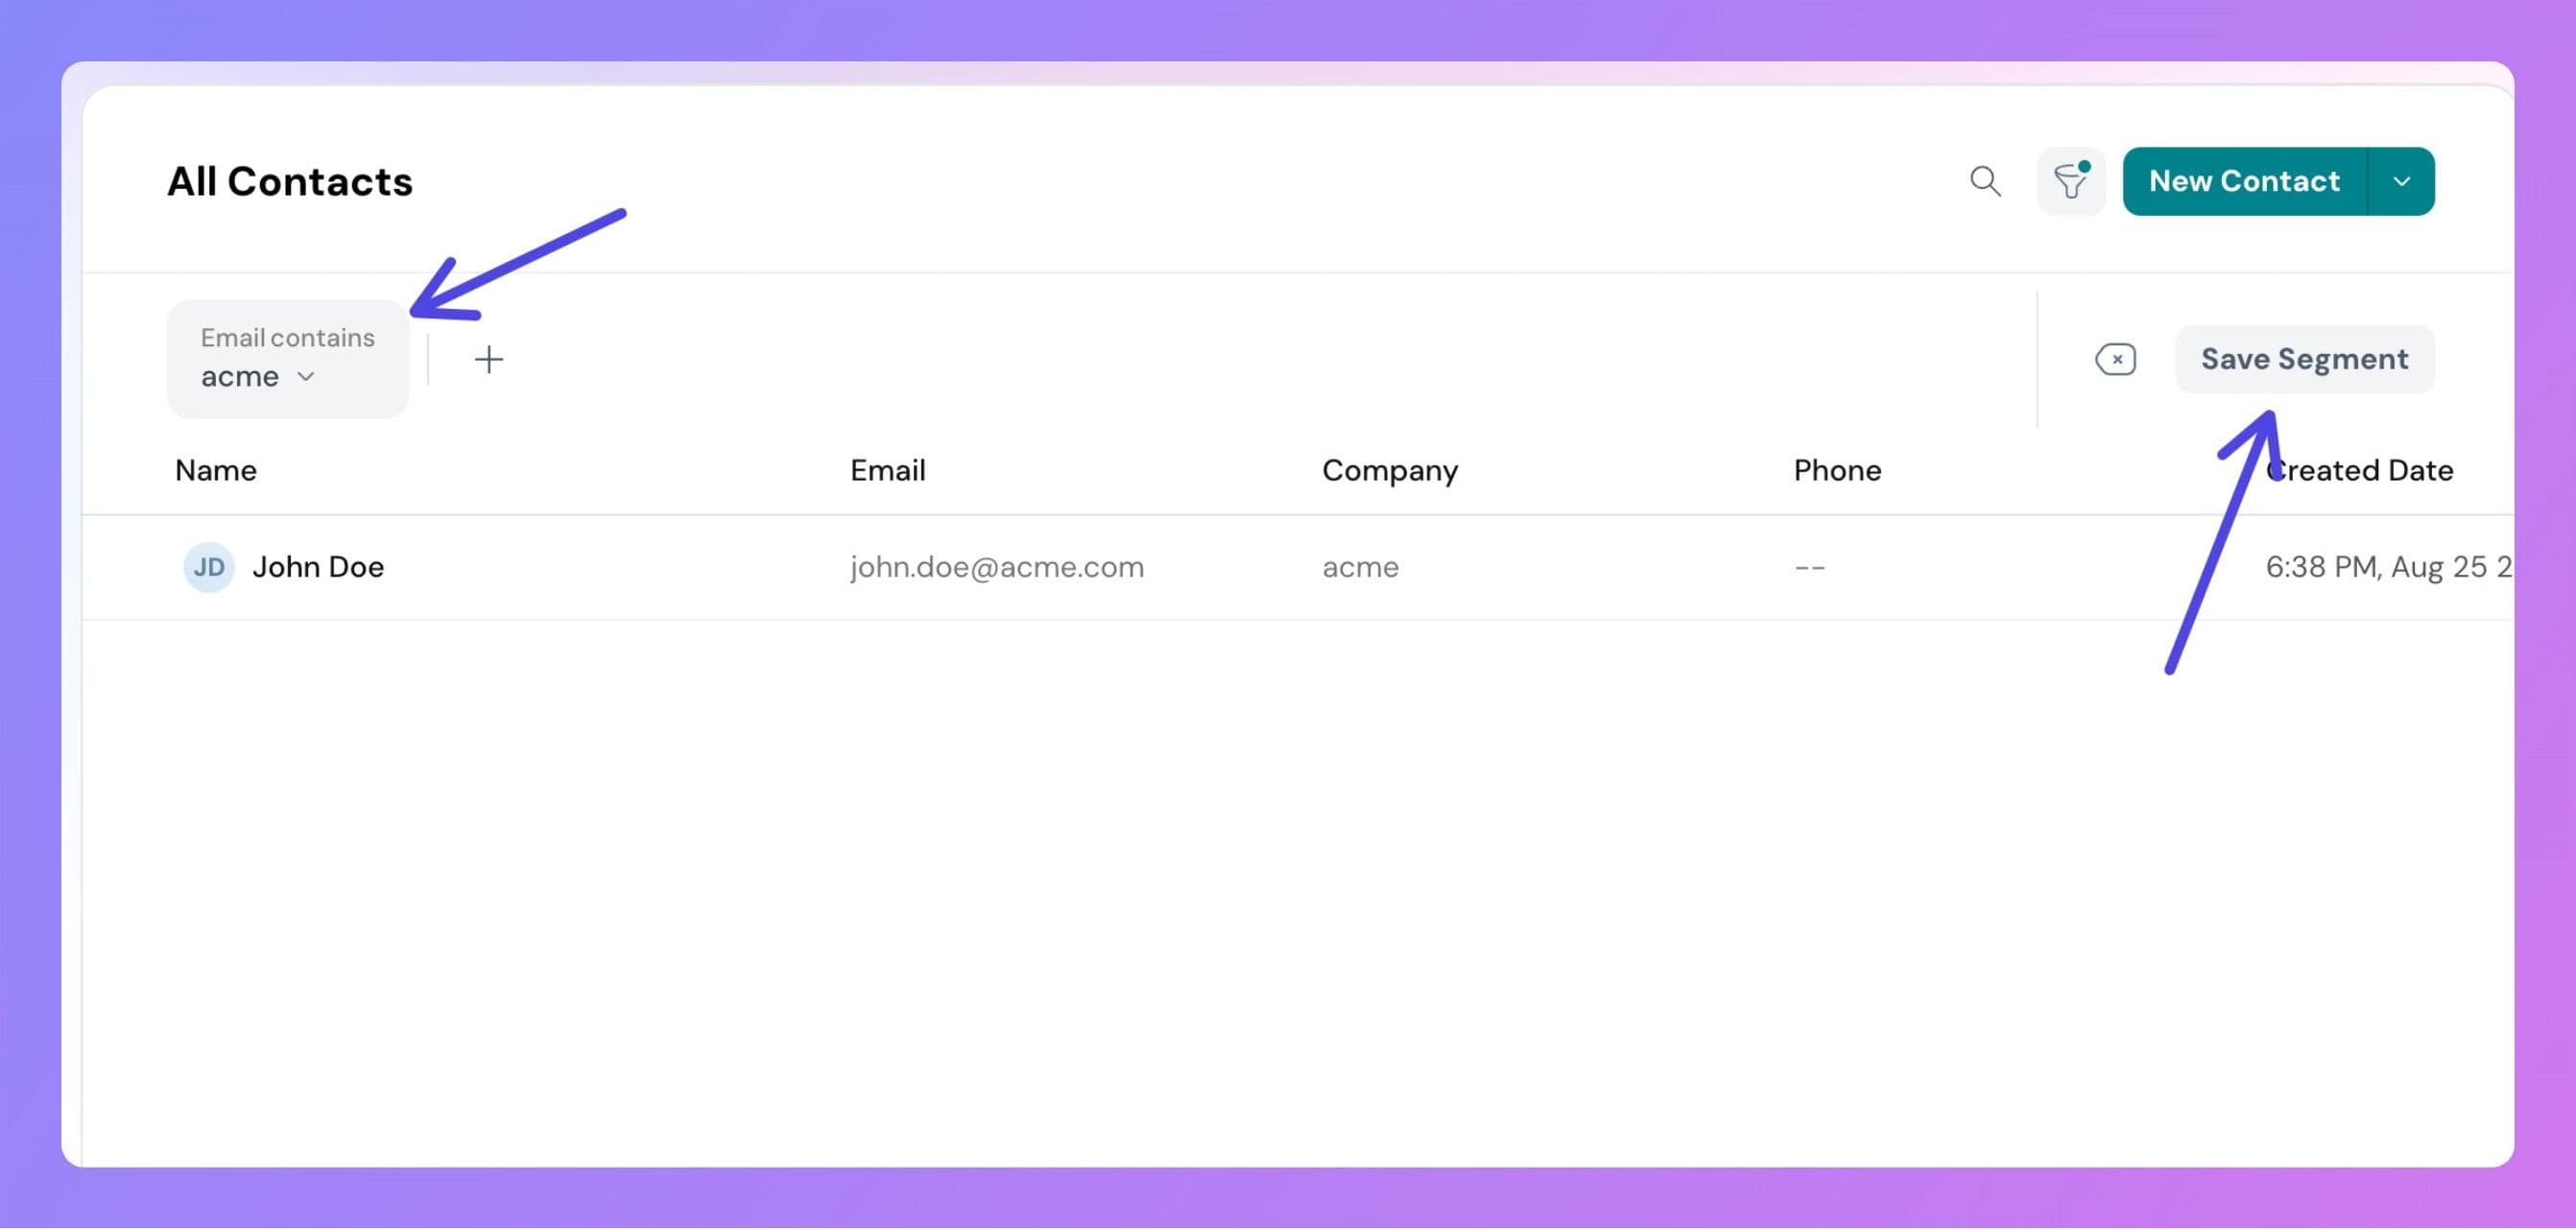
Step 3: Add Filter Conditions:

Choose from default or custom contact properties.

Example filters include: Email contains "@gmail.com", Status is "Active", Created date is after "1st July 2025". Currently, all filters use AND logic. We do not support OR conditions.

Step 4: Save the Segment

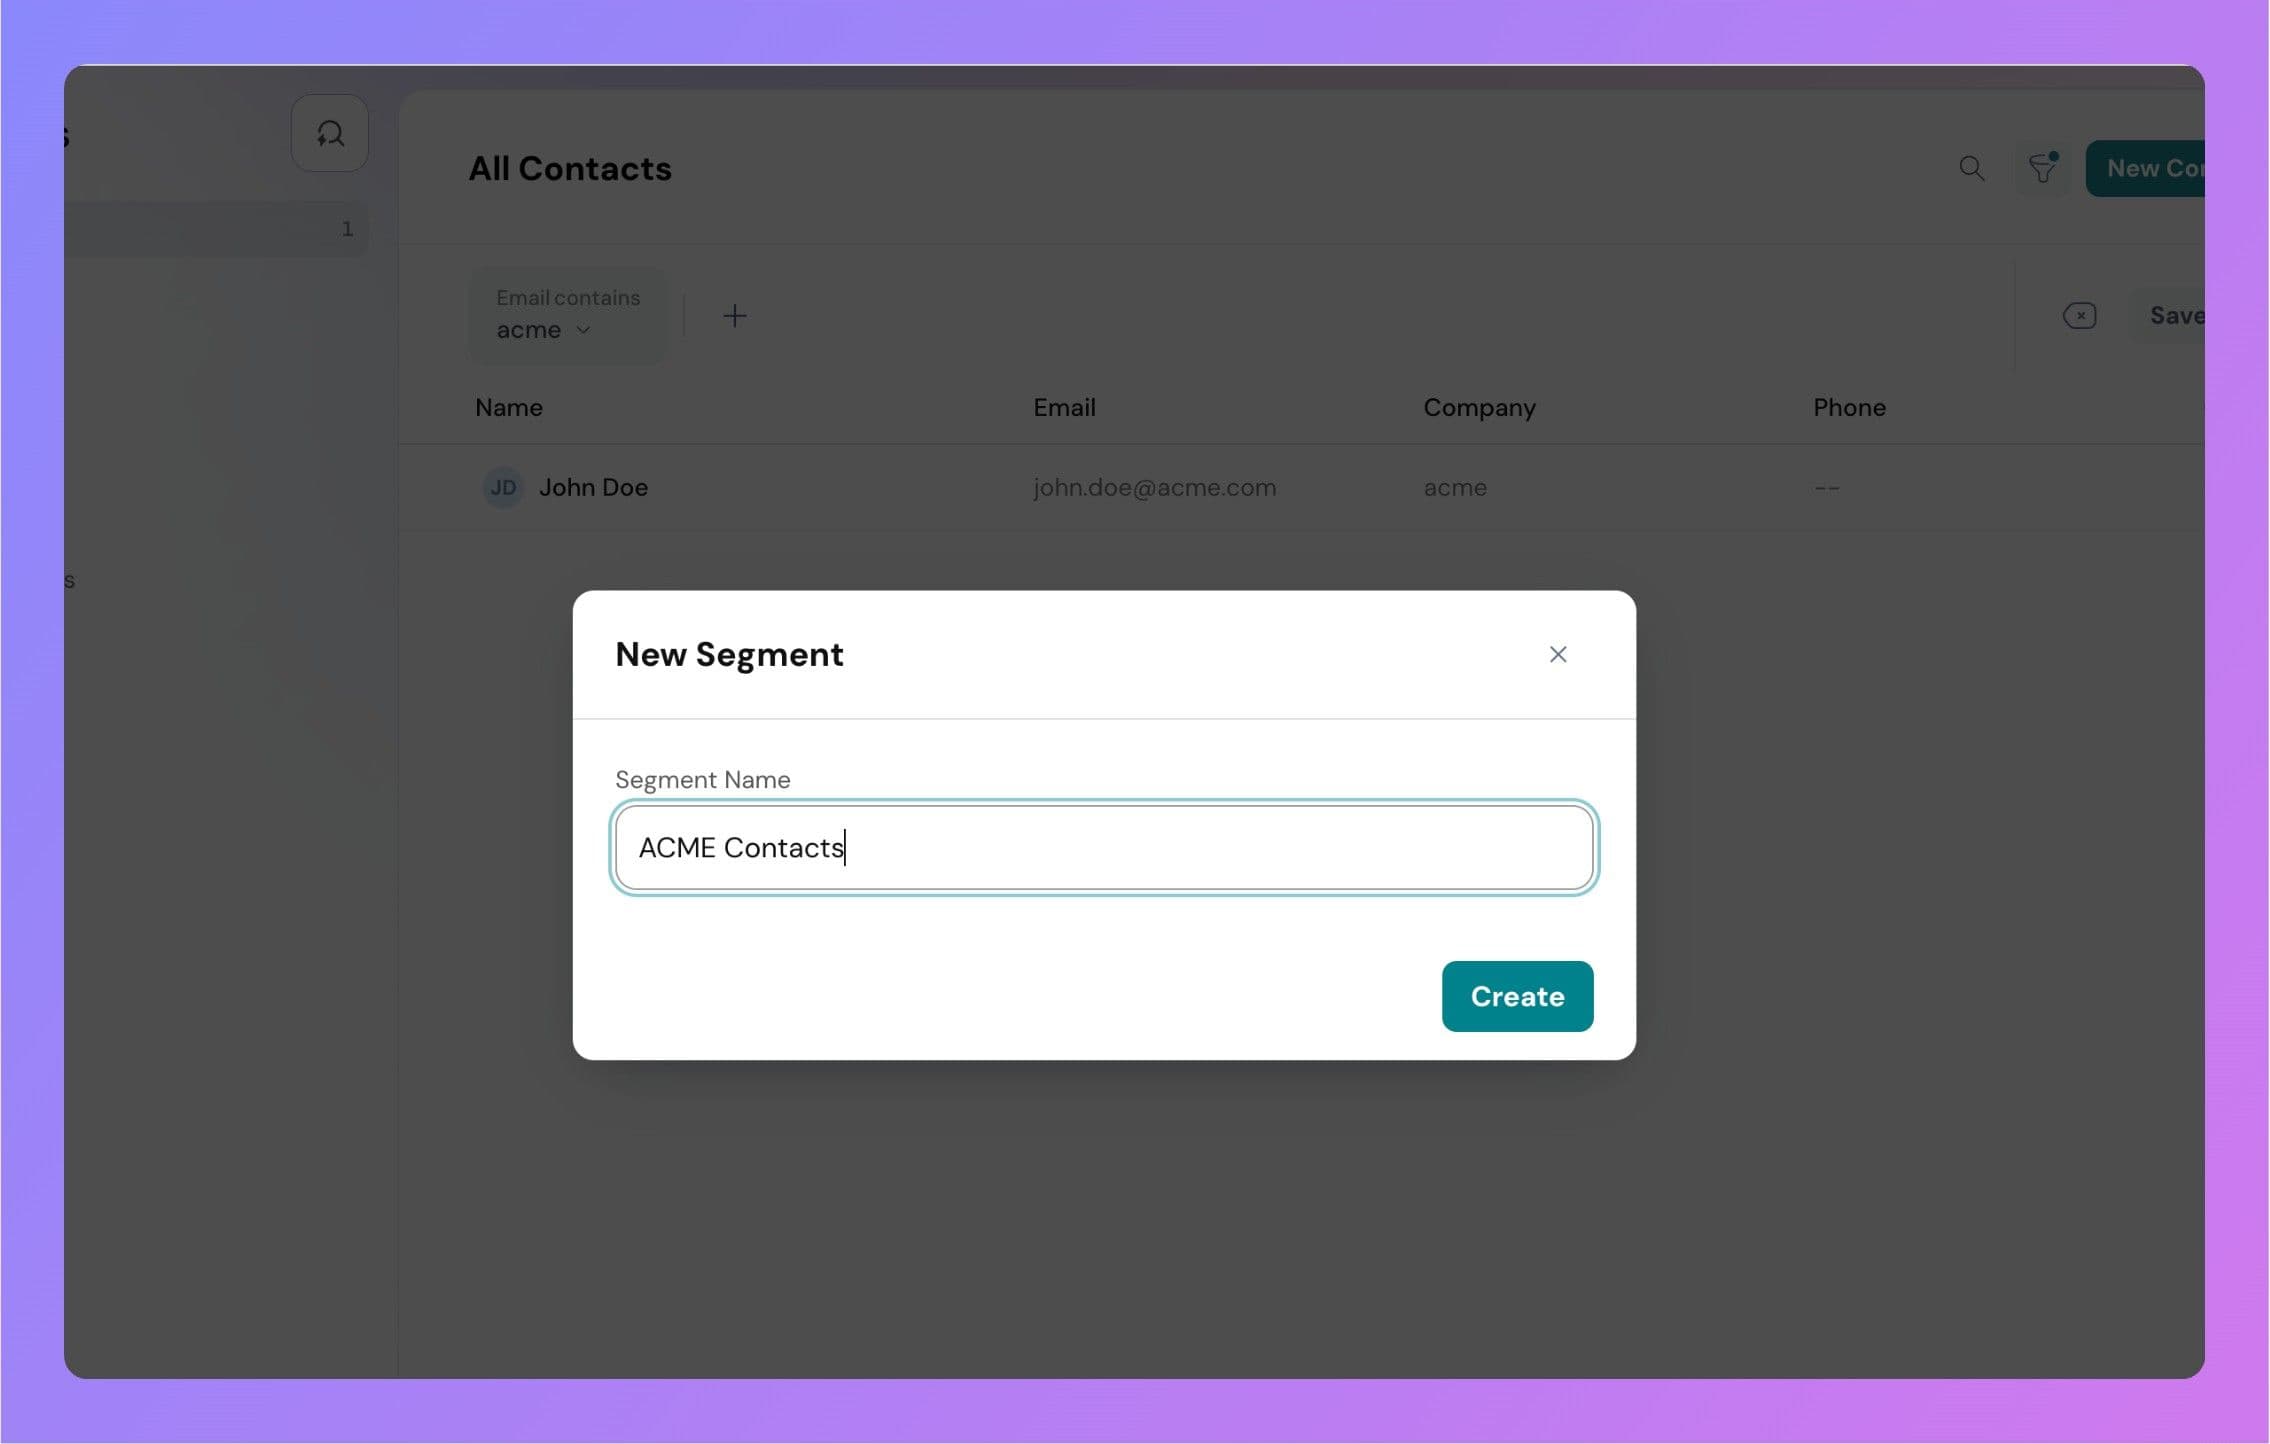
After applying the relevant filters, click the Save Segment button on the top-right corner.

contacts-filter-applied.jpg

  • Give your segment a unique name.
  • Click Save Segment.

contacts-filter-save-modal.jpg

Saved segments appear in the left panel under the default views.

contacts-segment-saved.jpg


Editing a Segment

Step 1: Hover over the segment name in the left panel.

Step 2: Click on the More Options (three-dot) button.

contact-edit-segment.jpg
Step 3: Select Edit Segment

contact-segment-update.jpg

Step 4: Enter a new name and click Save.


Deleting a Segment

Step 1: Hover over the segment name.

contact-edit-segment.jpg

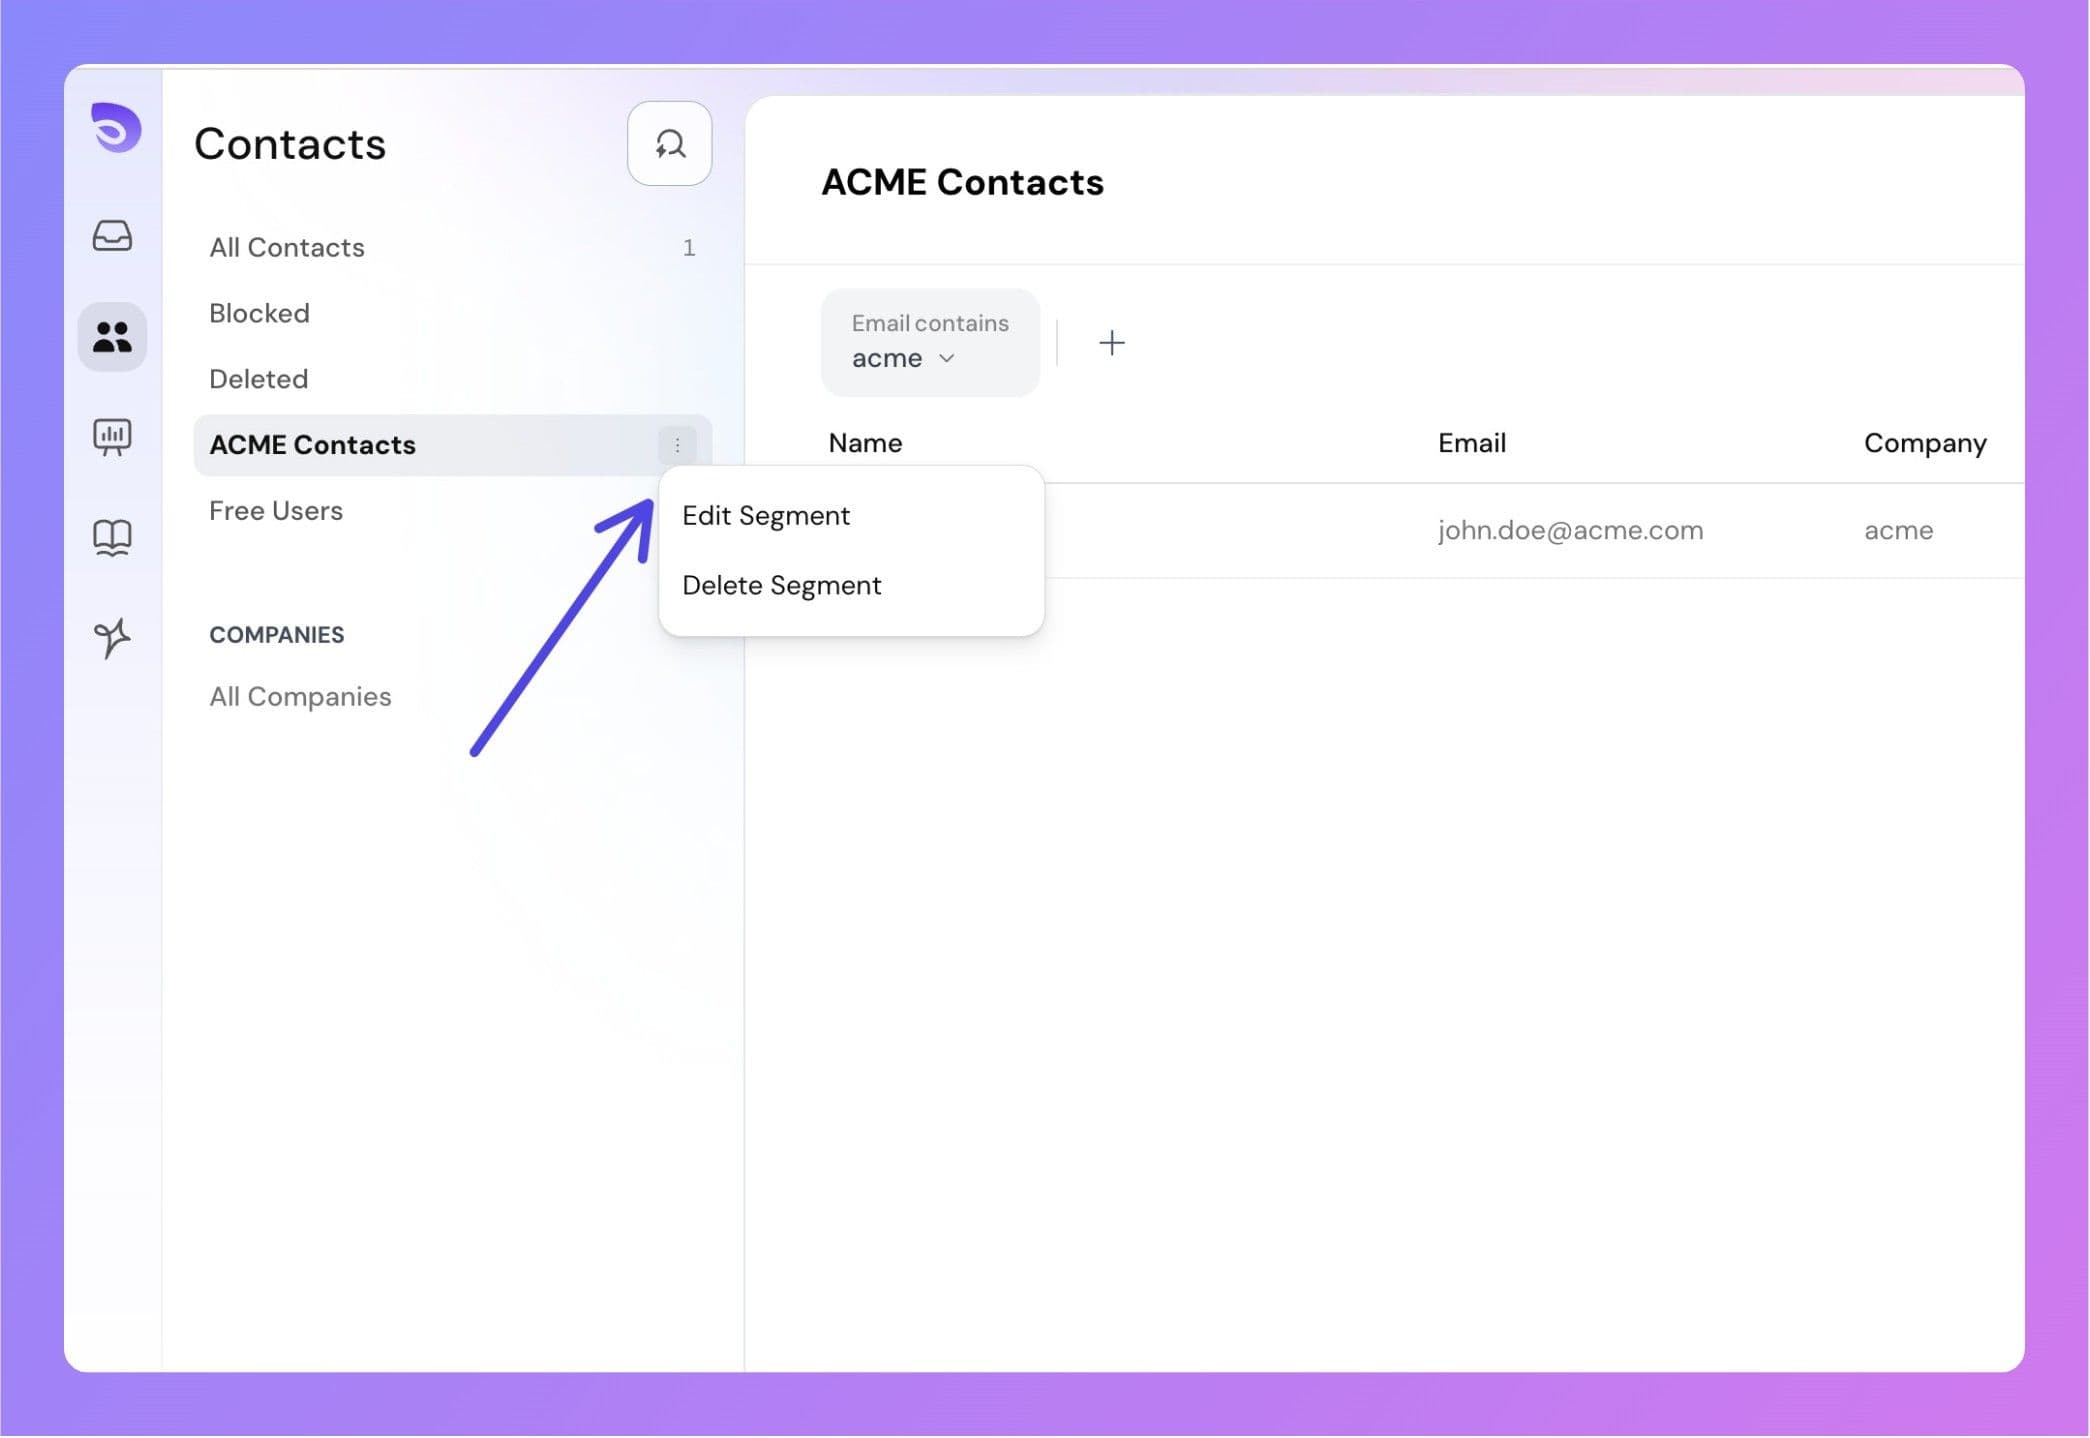
Step 2: Click on the More Options button.

Step 3: Select Delete Segment.

Step 4: Confirm deletion.

Once a segment is deleted, it cannot be recovered. However, you can always recreate the segment by applying the same filters again from the contact list.

Powered By SparrowDesk

Table of ContentsOn this page