
Chat Widget Installation on WordPress
Adding the SparrowDesk chat widget to your WordPress site lets your customers reach your support team directly from any page. This article walks you through installing the widget on your WordPress site in a few simple steps.
Setting up the chat widget can be a slightly technical- connect with the technical person in your company if you need help.
Find and Copy Your Chat Widget Code
First, grab your widget code from SparrowDesk:
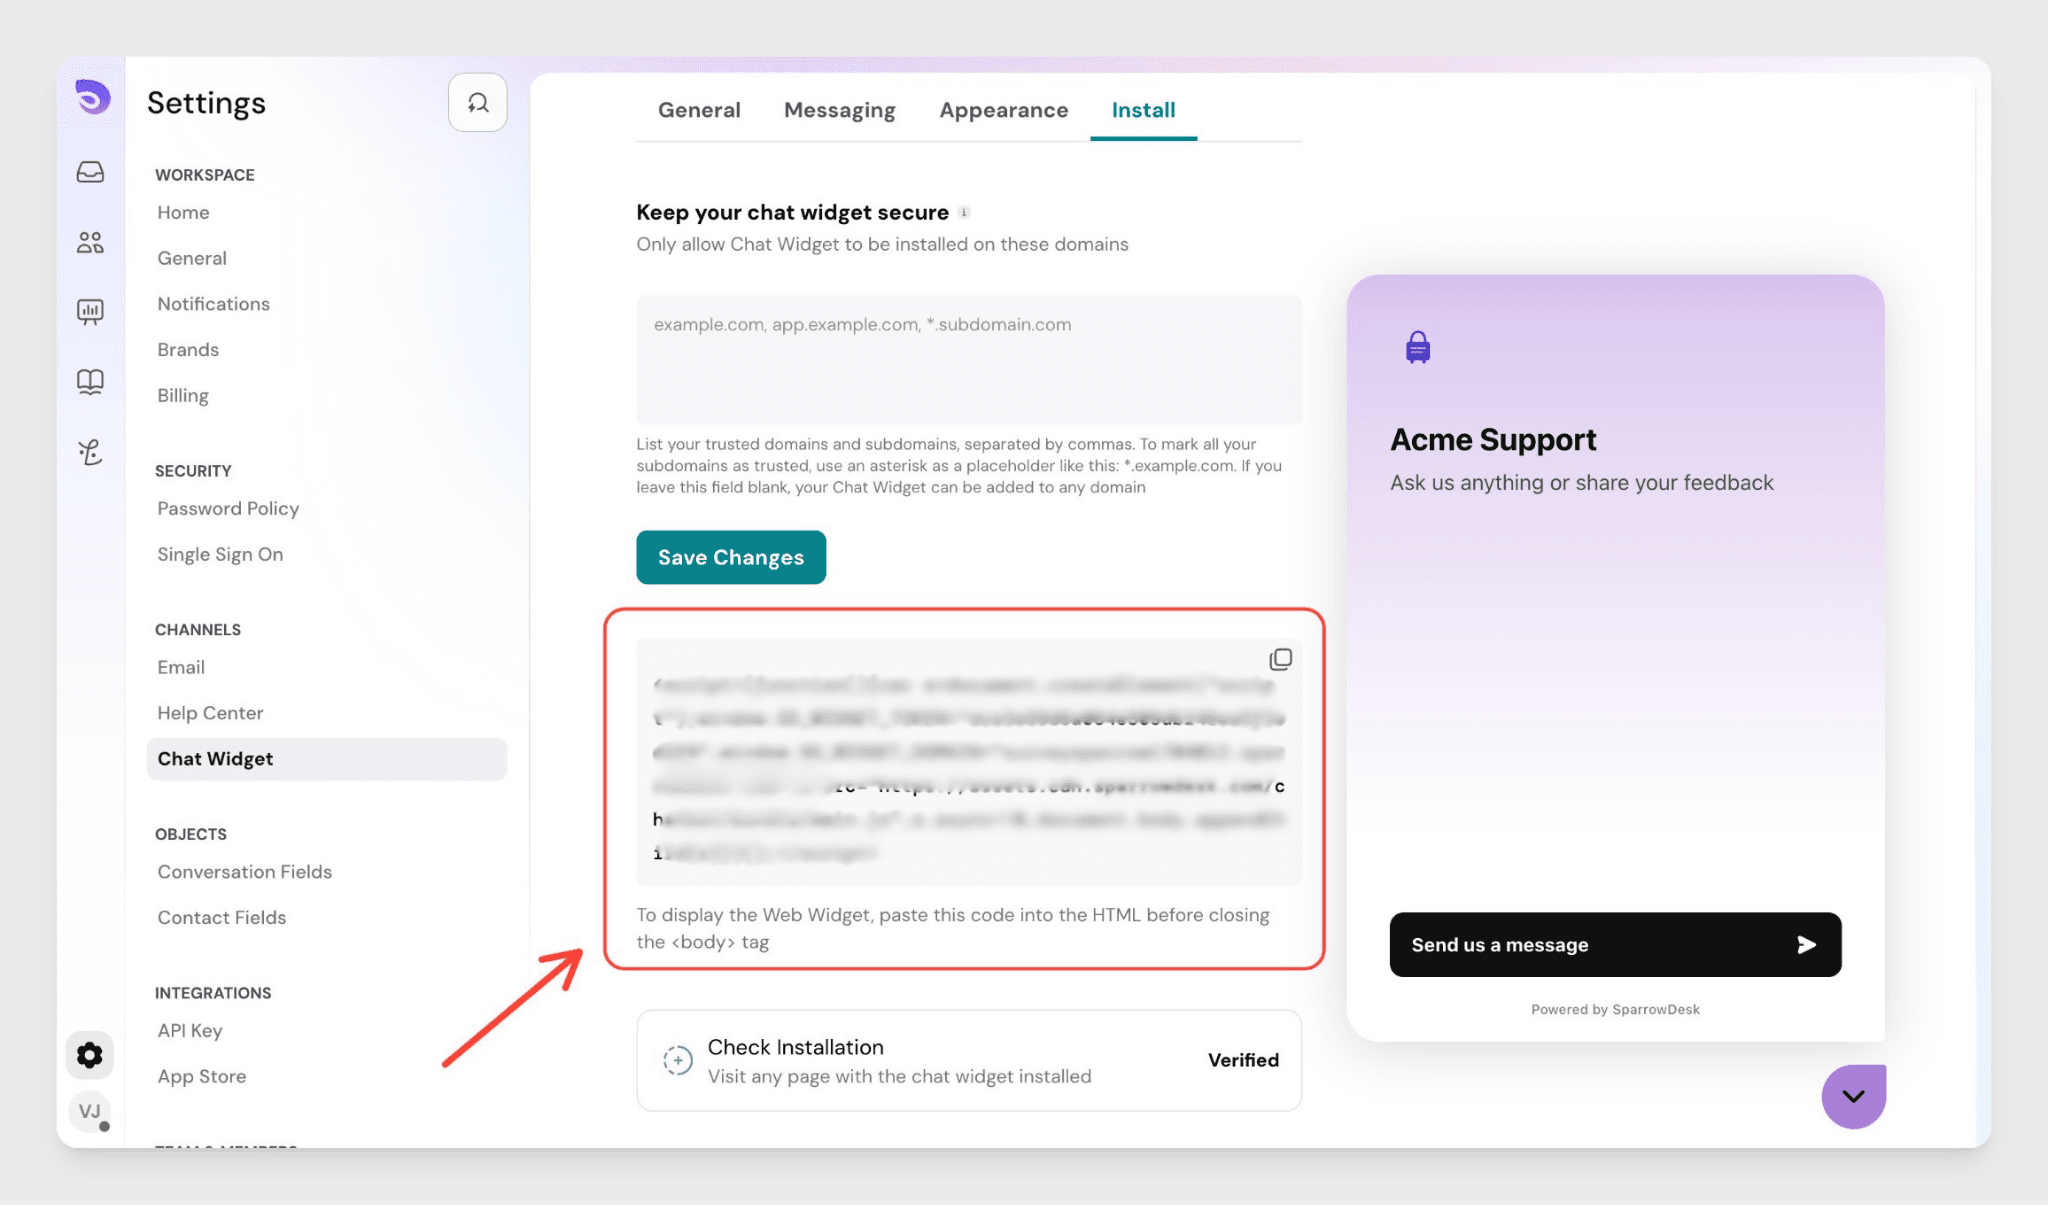
- Go to Settings → Chat Widget → Installation
- Click "Copy Code" to copy the JavaScript snippet to your clipboard
Add the Code to Your WordPress Site
There are two ways to add the widget code to WordPress. Use whichever method suits your setup.
Option A- Using a Plugin (Recommended, No Coding Required)
This is the easiest method and doesn't require editing any theme files.
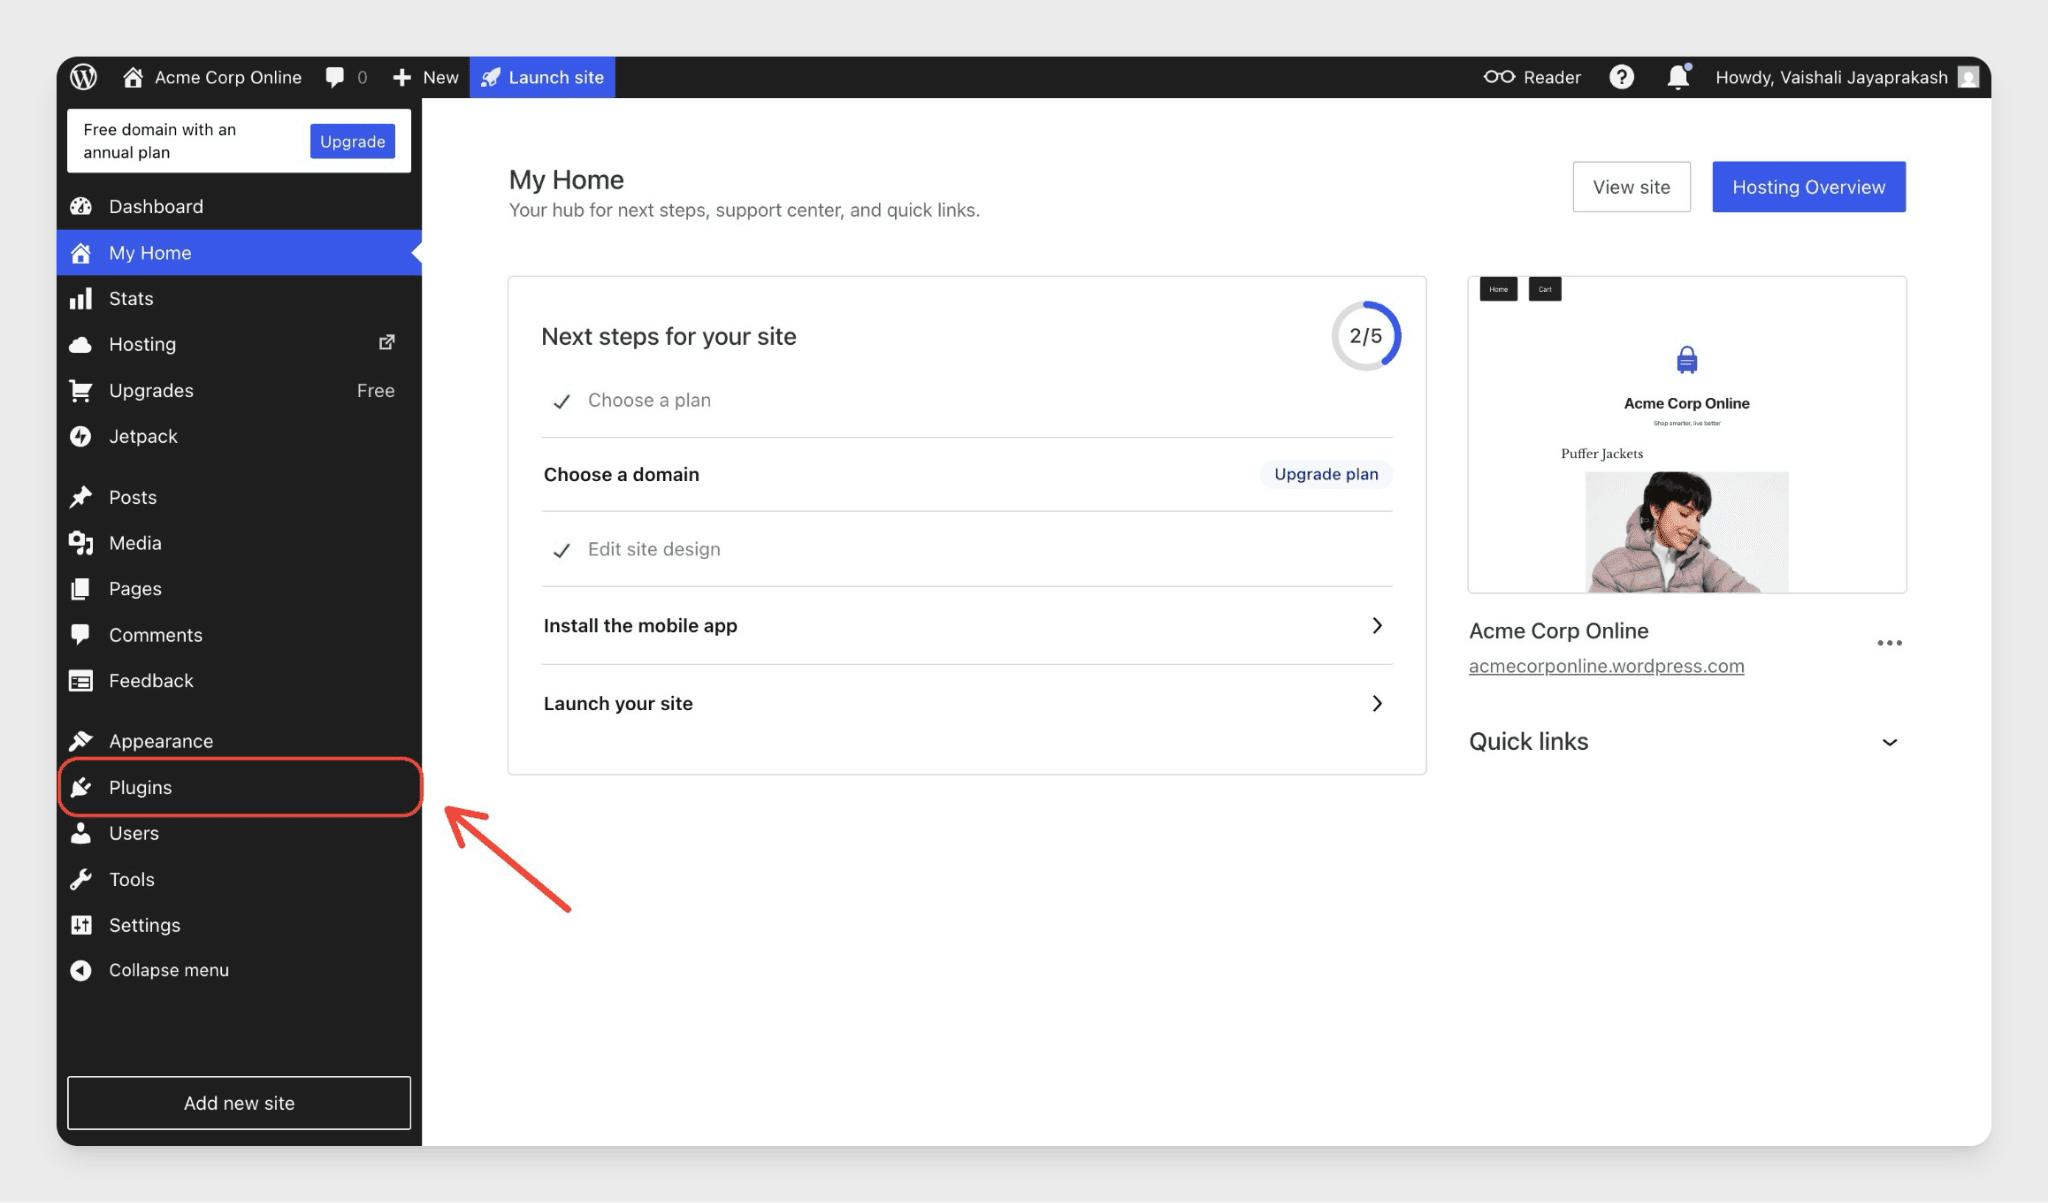
- In your WordPress Admin, go to Plugins → Add New
- Search for "Insert Headers and Footers" and install and activate it
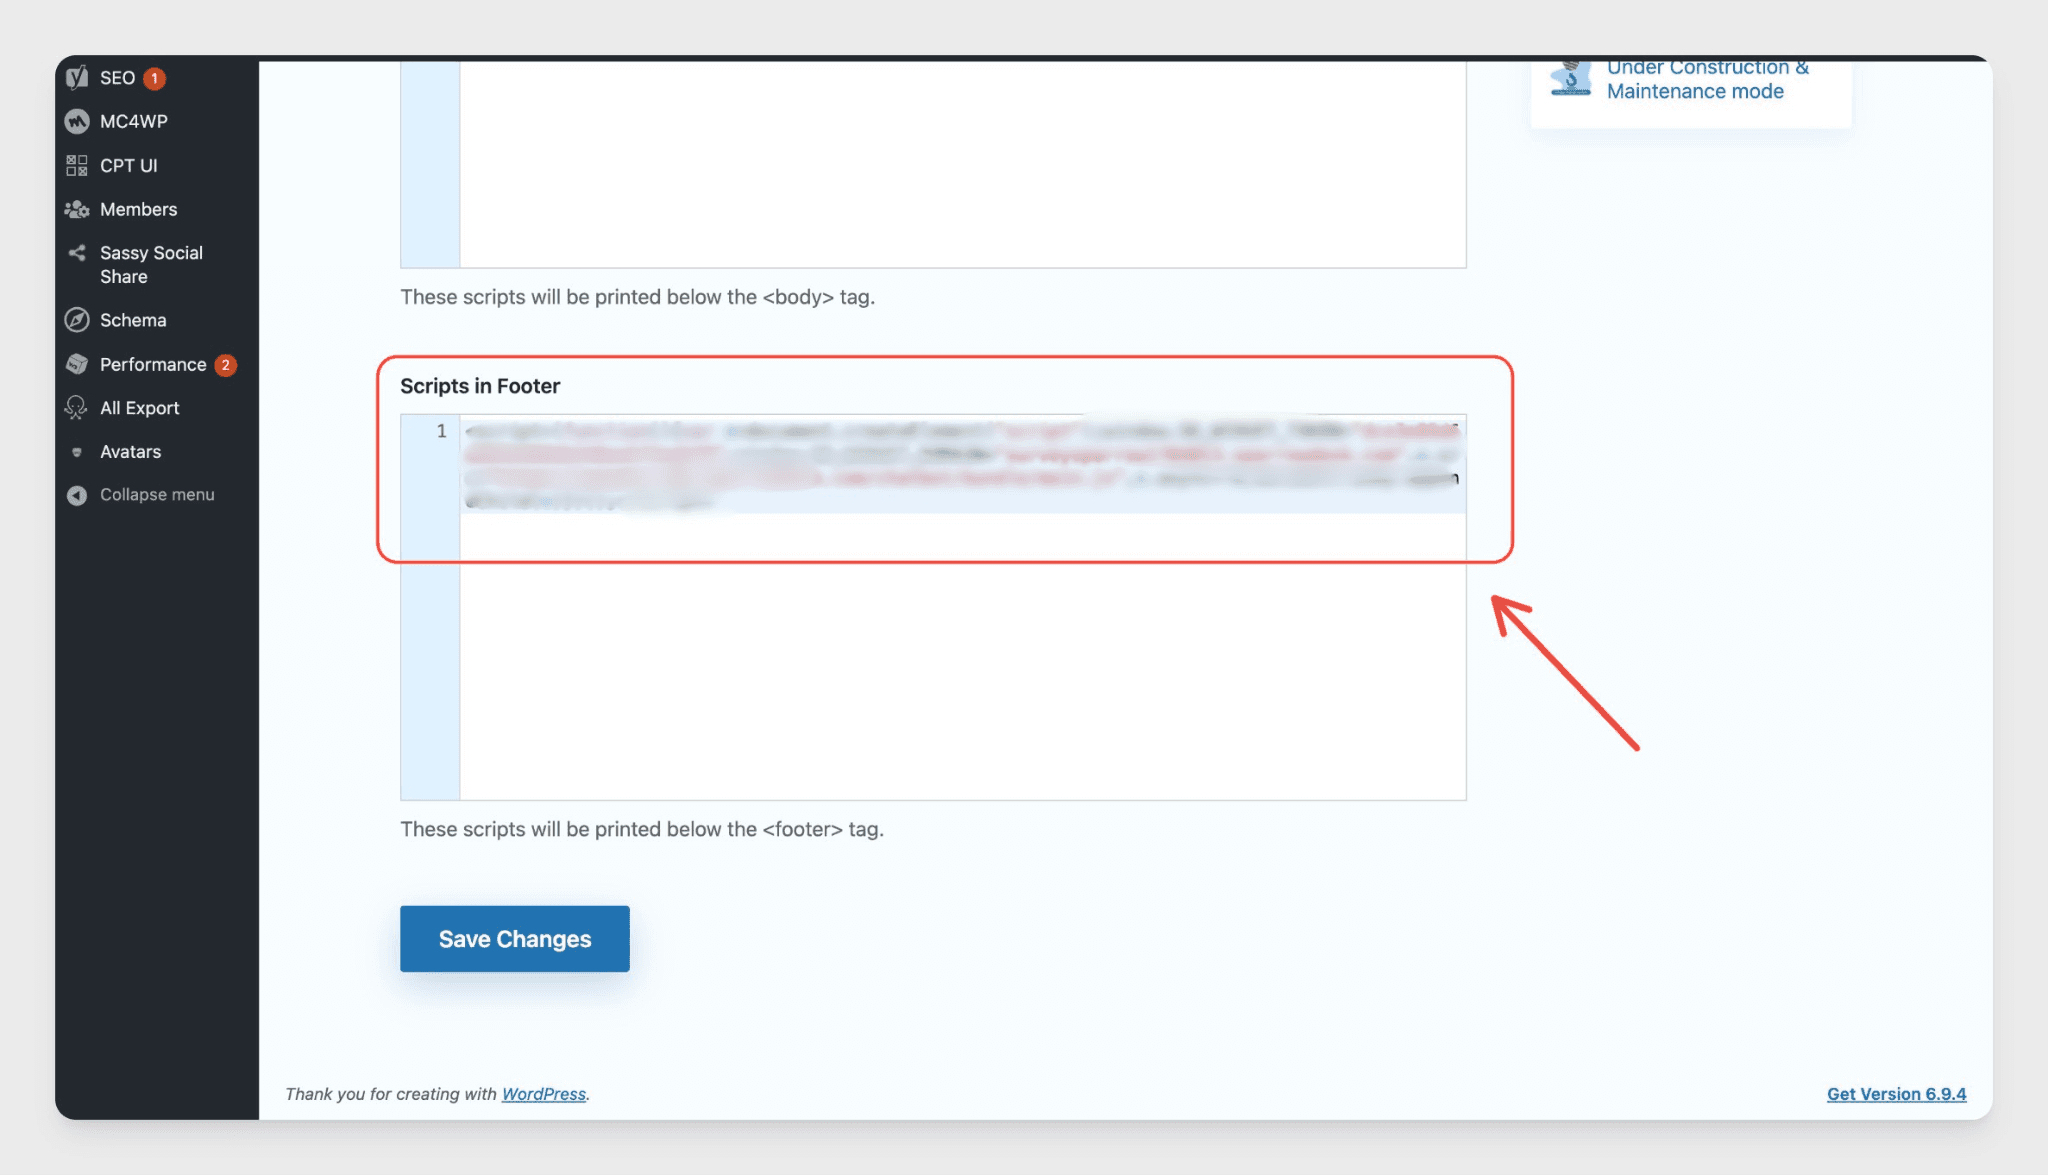
- Go to Settings → Insert Headers and Footers
- Paste the SparrowDesk code in the Scripts in Footer section
- Click Save
Option B- Editing Your Theme Directly
If you're comfortable editing theme files:
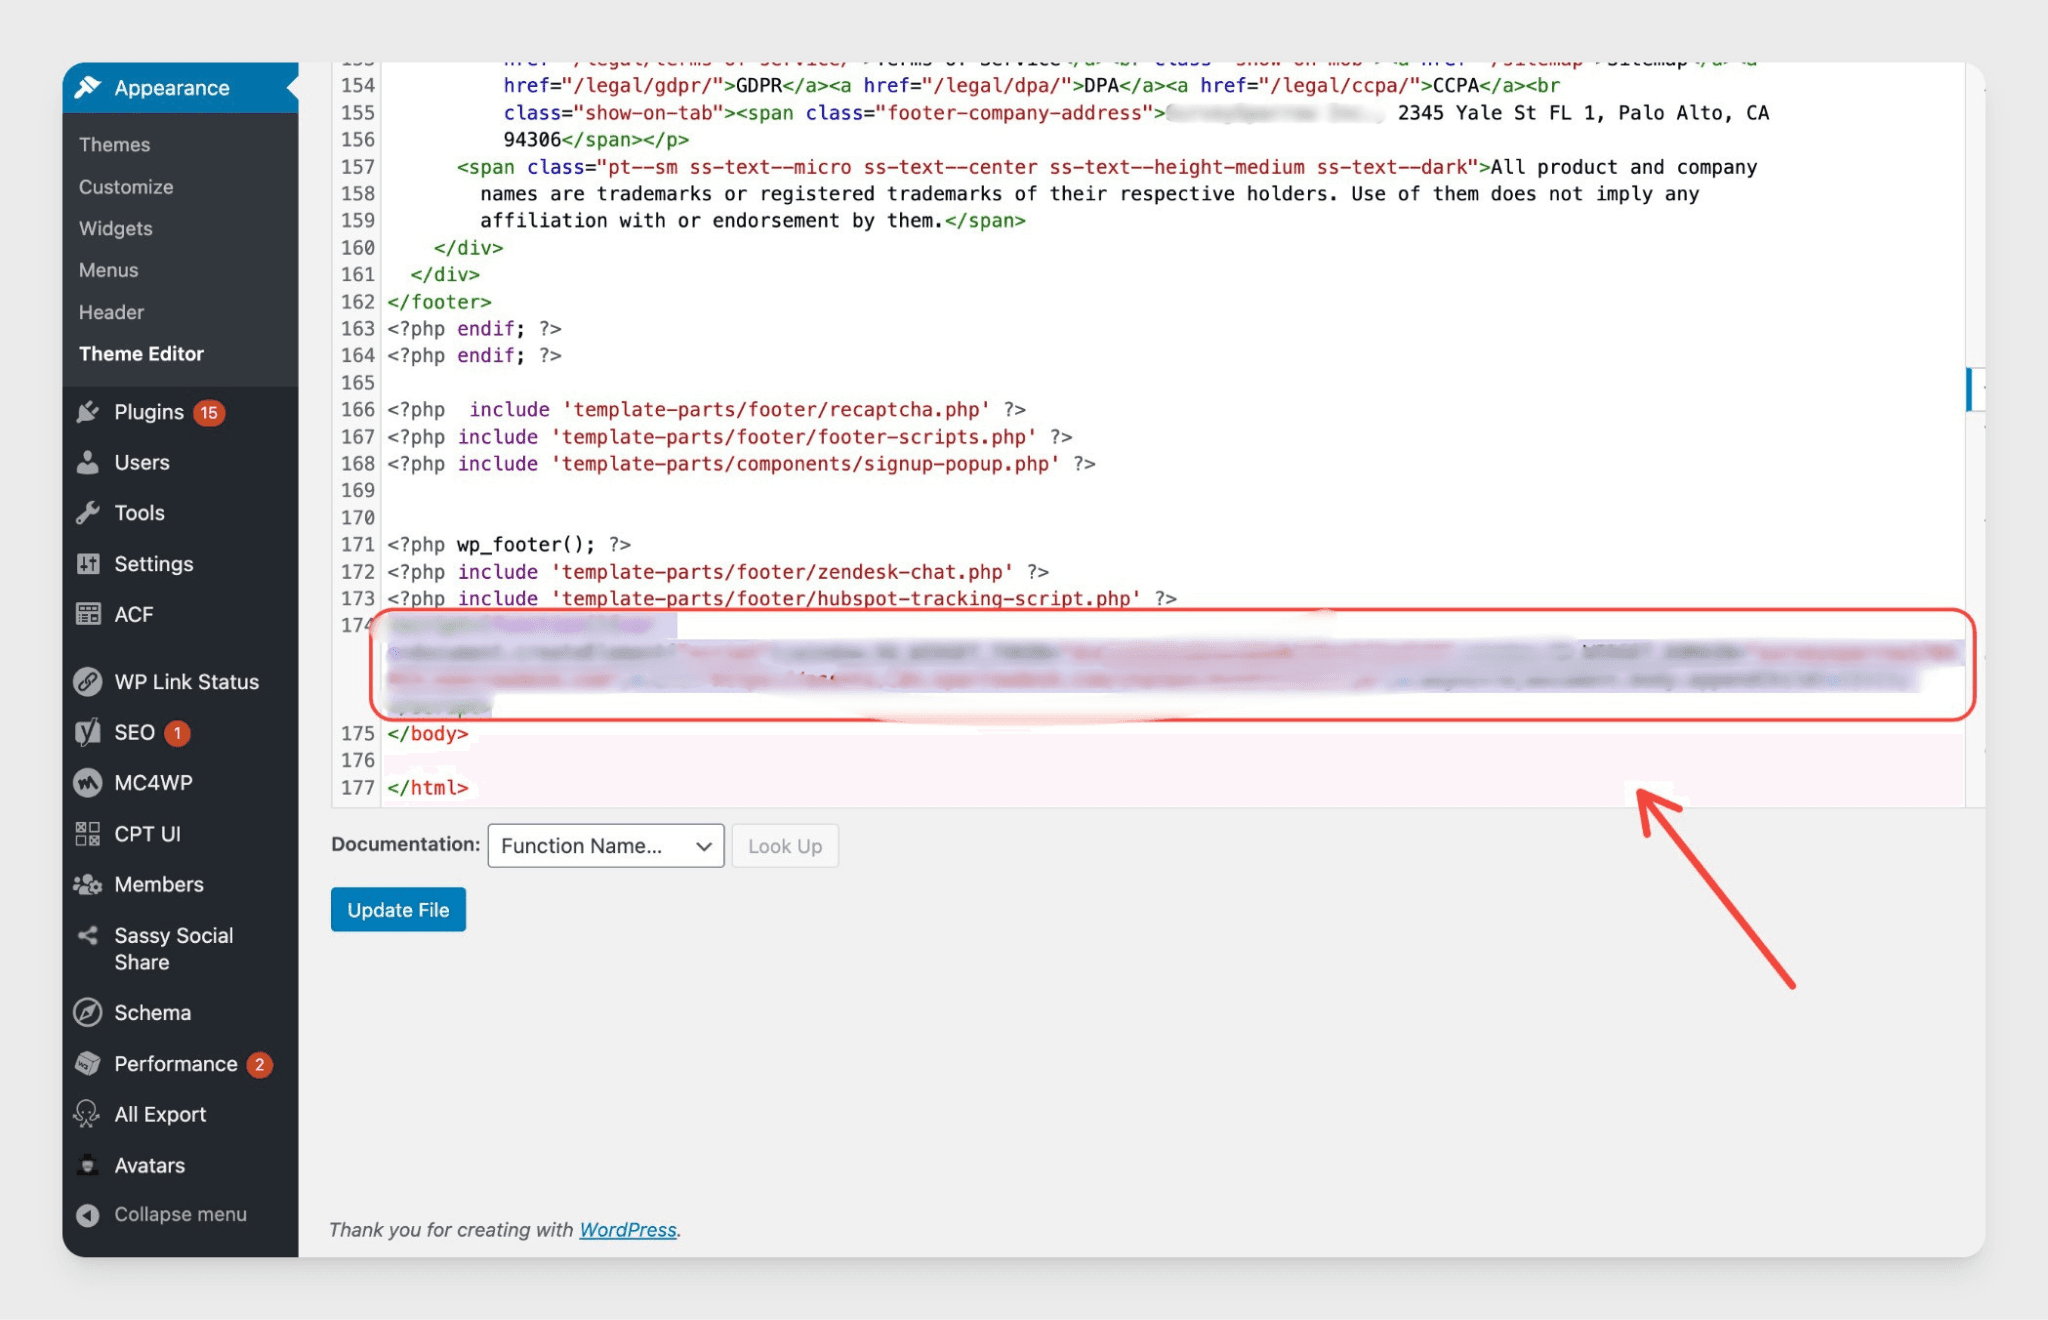
- In your WordPress Admin, go to Appearance → Theme File Editor
- In the right panel, open footer.php
- Paste the SparrowDesk code just before the closing </body> tag
- Click Update File
The widget will now appear on every page of your WordPress site.
Verify the Installation
Once you've added the code:
- Visit your site in a browser- you should see the chat widget appear in the corner of the page
- Return to Settings → Chat Widget → Installation in SparrowDesk
- If the widget is detected, you'll see "Widget Installed"

Allowlist Your WordPress Domain (Recommended)
To make sure your widget code can only be used on your site, restrict it to your WordPress domain:
- Go to Settings → Chat Widget → Make your Chat Widget Secure
- Add your site's domain, e.g. www.yoursite.com
- Click Save
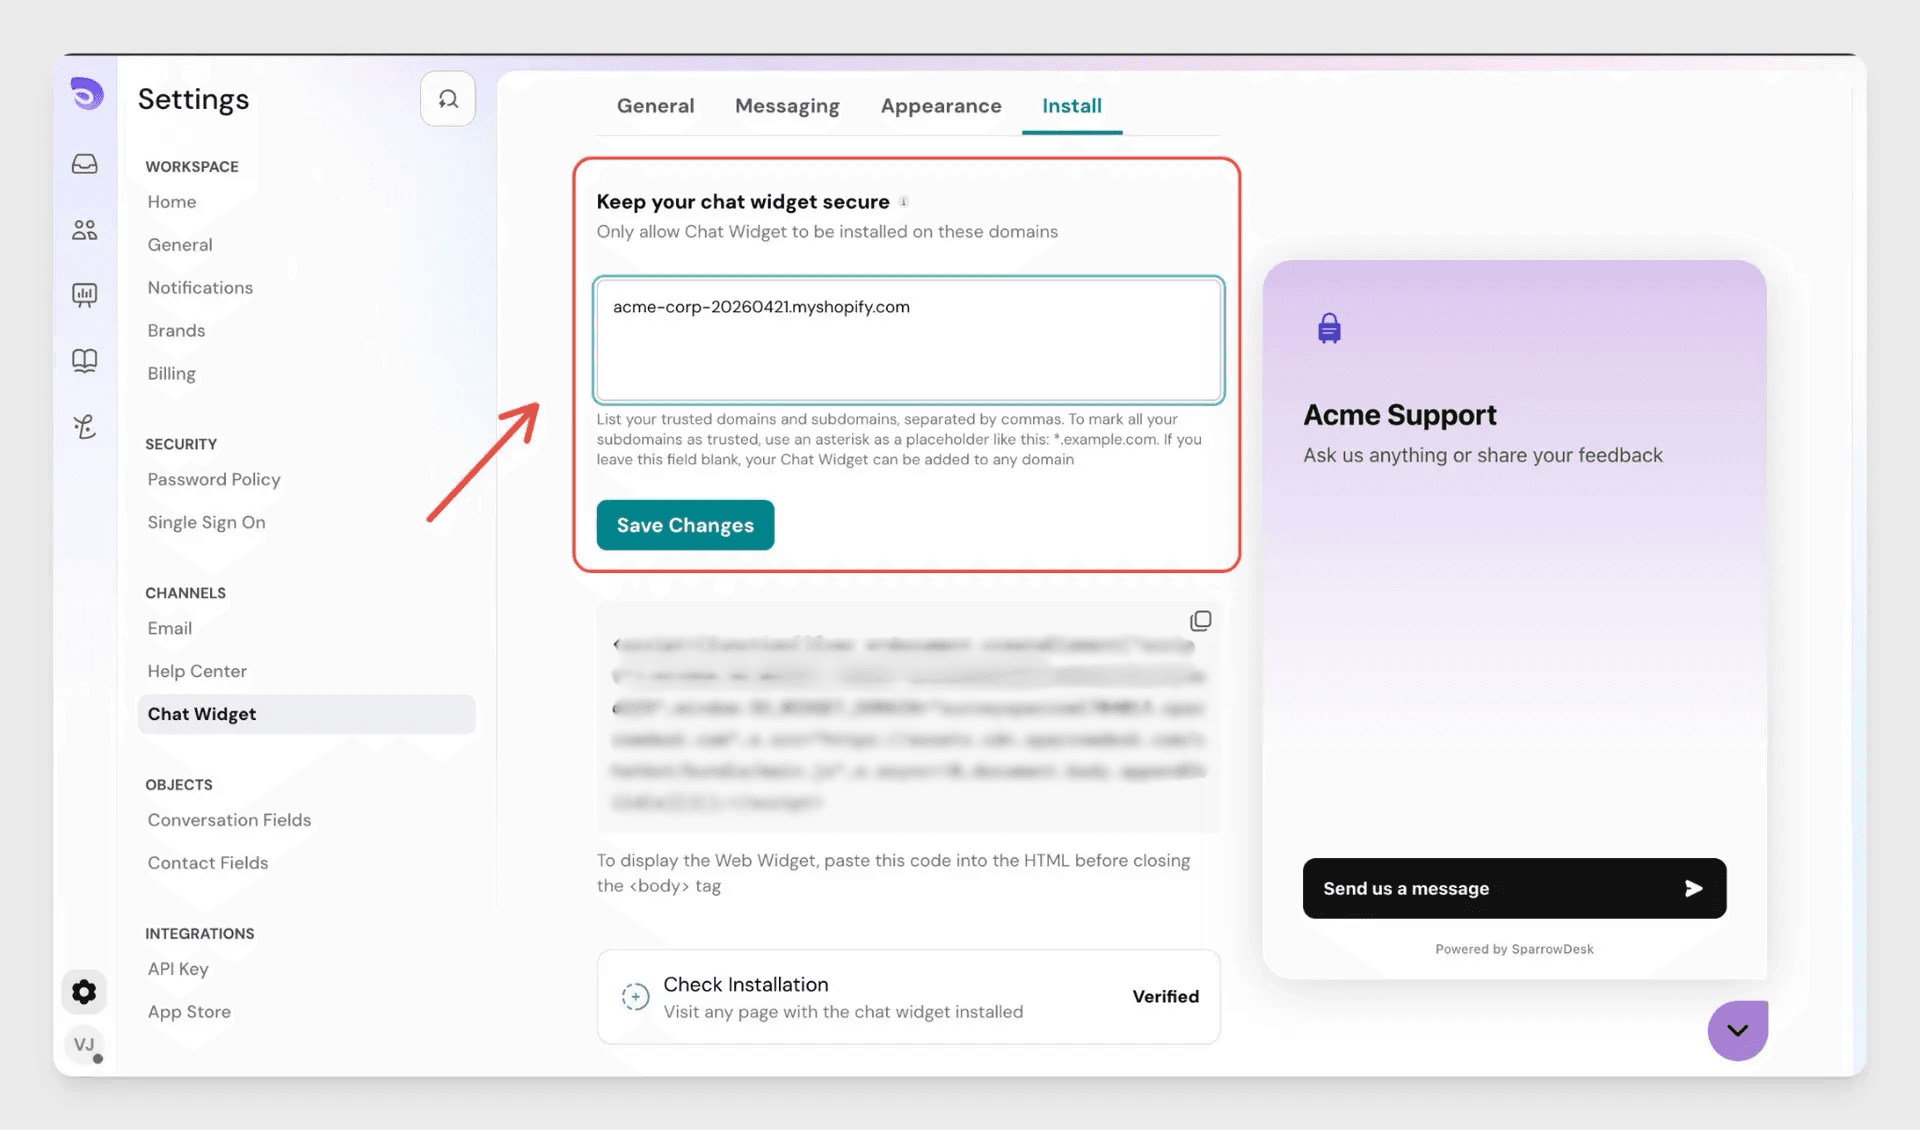
What to know:
- You don't need to include https:// or a trailing slash
- If no domain is added, your widget will be usable on any website- we strongly recommend allowlisting your site's domain
- There is no limit to the number of domains you can add
Troubleshooting
- Widget not showing? Make sure the code is placed before the </body> tag and that the file has been saved correctly.
- Using Option A but the widget still not appearing? Check that the plugin is activated and that the snippet is in the Footer section, not the Header.
- Using a page builder like Elementor or Divi? These builders sometimes manage their own footer- refer to your page builder's documentation for adding custom scripts, or use Option A instead.
FAQ
- Do I need a developer to do this?
Not if you use Option A. The plugin method requires no coding- just install, paste, and save. - Will this slow down my site?
The widget script loads asynchronously, so it doesn't block your pages from loading. Your site speed is not affected. - I switched themes- why did the widget disappear?
If you used Option B, the code was added to your previous theme's files. Switching themes replaces those files. Use Option A to avoid this, or re-add the snippet to your new theme's footer.php. - Can I use the same widget code on another site too?
Yes. The same code works across multiple sites. If you've allowlisted domains, add the new domain to your list in Settings → Chat Widget → Make your Chat Widget Secure. - What's the difference between the Header and Footer sections in the plugin?
The SparrowDesk snippet should always go in the Footer section. Scripts in the header load before the page content, which can slow things down- footer placement is faster and is what SparrowDesk recommends.