
AI Agent - Deploying on chat

Configure how your Zoona AI Agent behaves on the Chat channel -who it replies to, how it greets customers, and what happens when it can't resolve an issue.
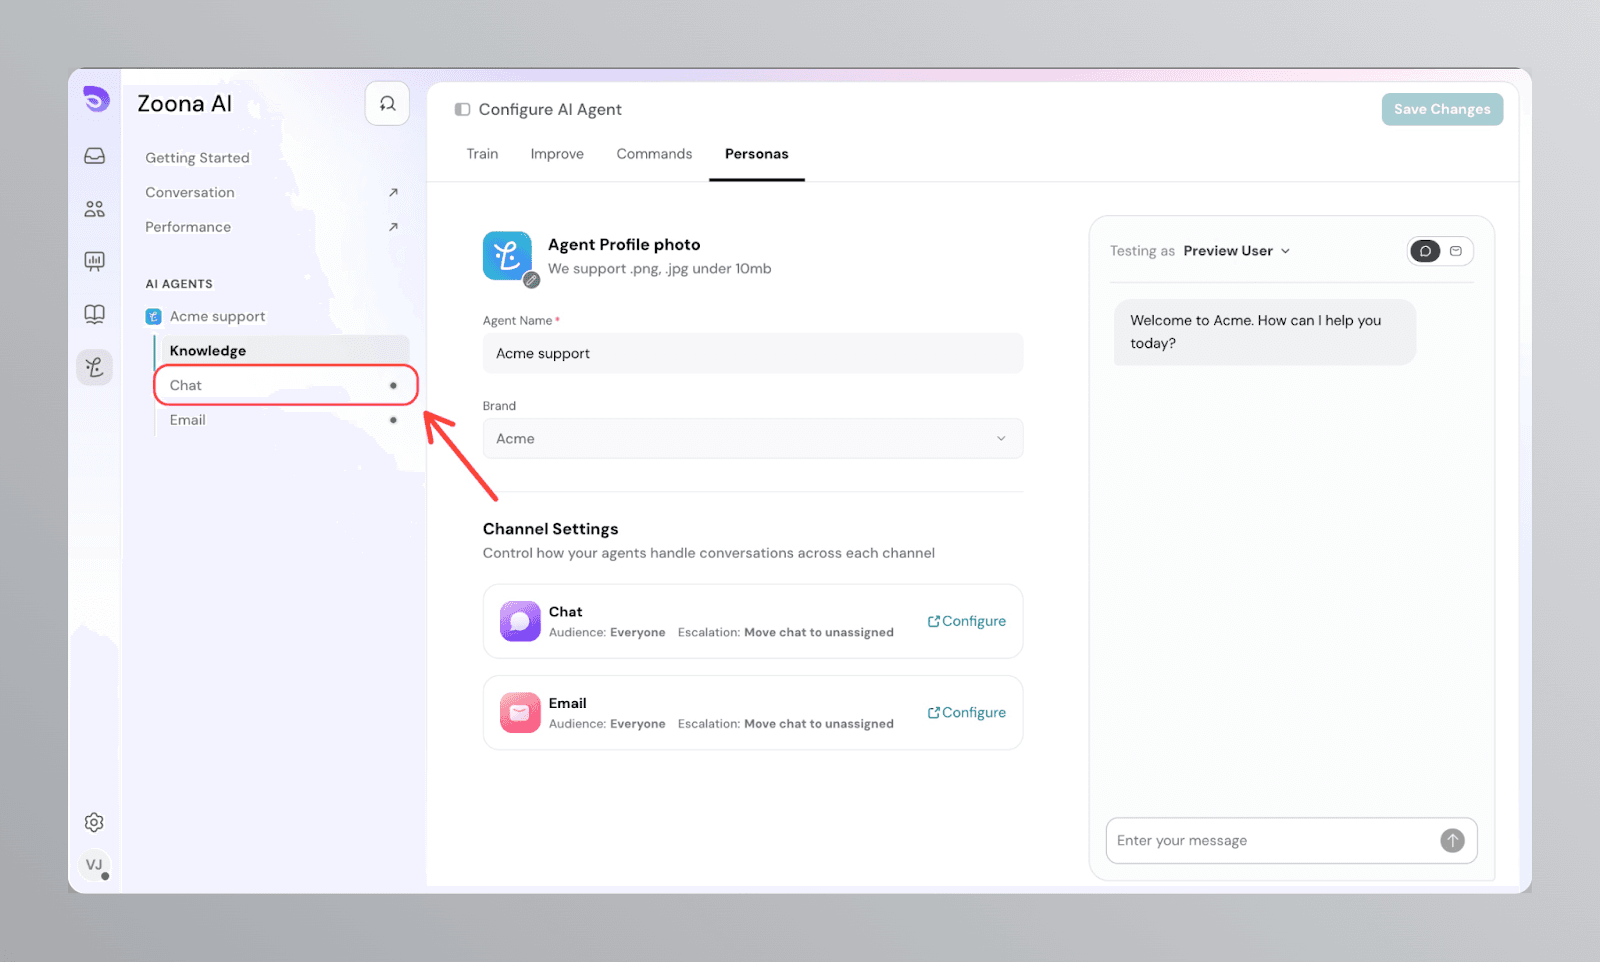
Open chat Settings
- Select your AI Agent from the left sidebar.
- Click Chat under the agent name.
Who the AI Agent can reply to
Choose which contacts the AI Agent responds to on Chat.
- Everyone — The AI Agent replies to all incoming chats.
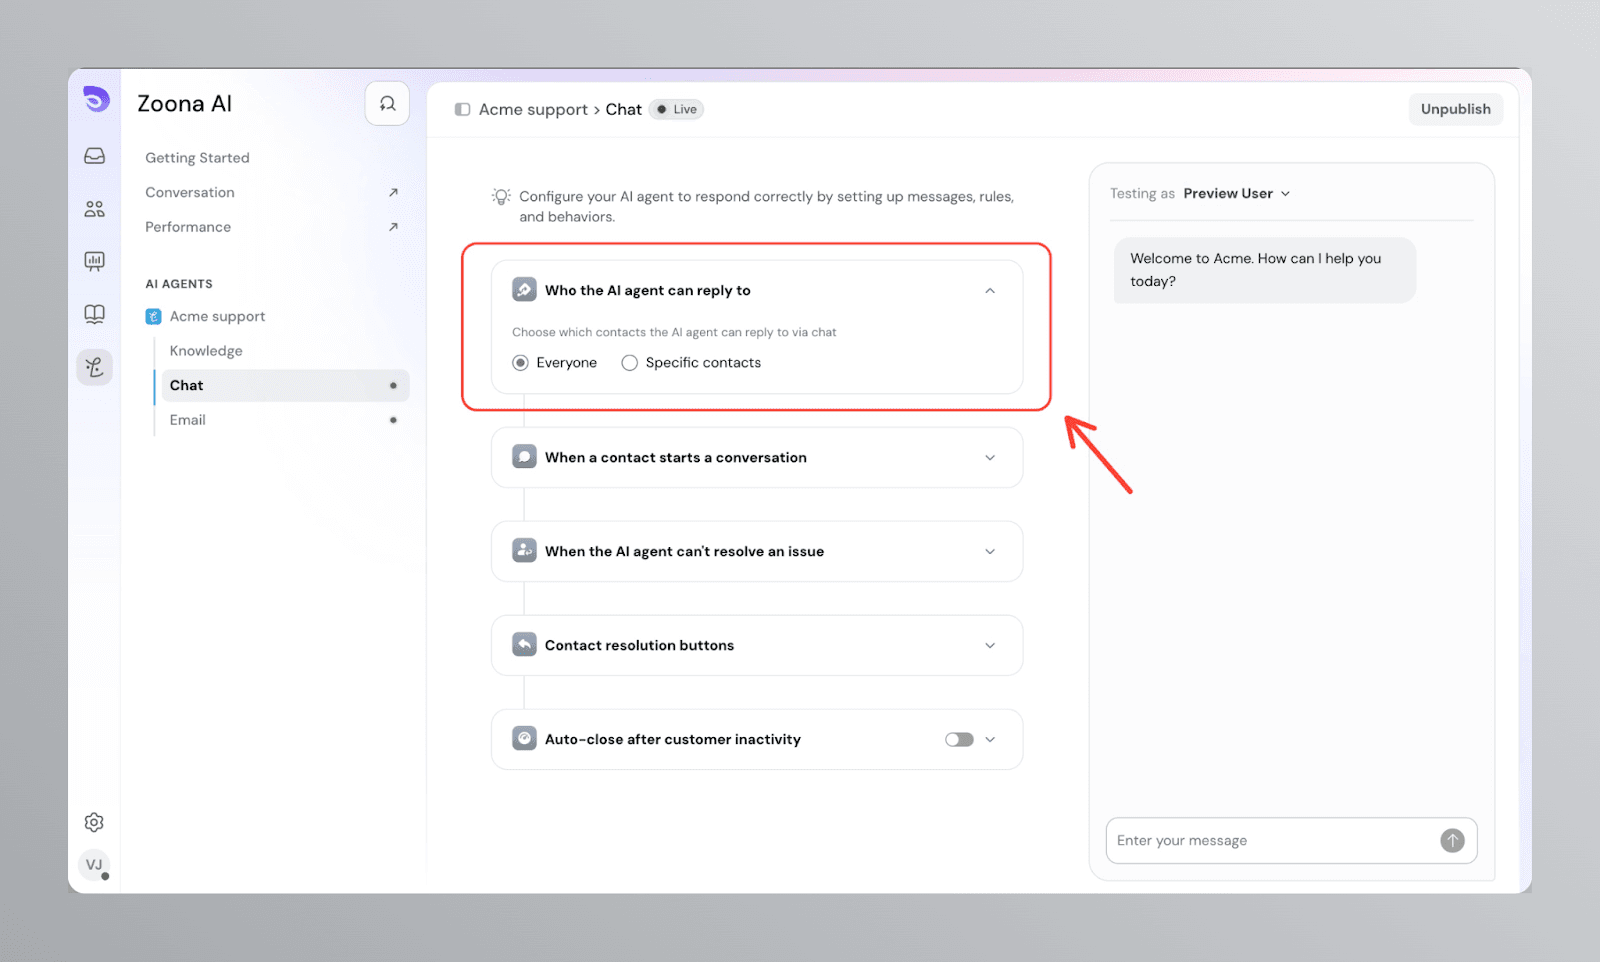
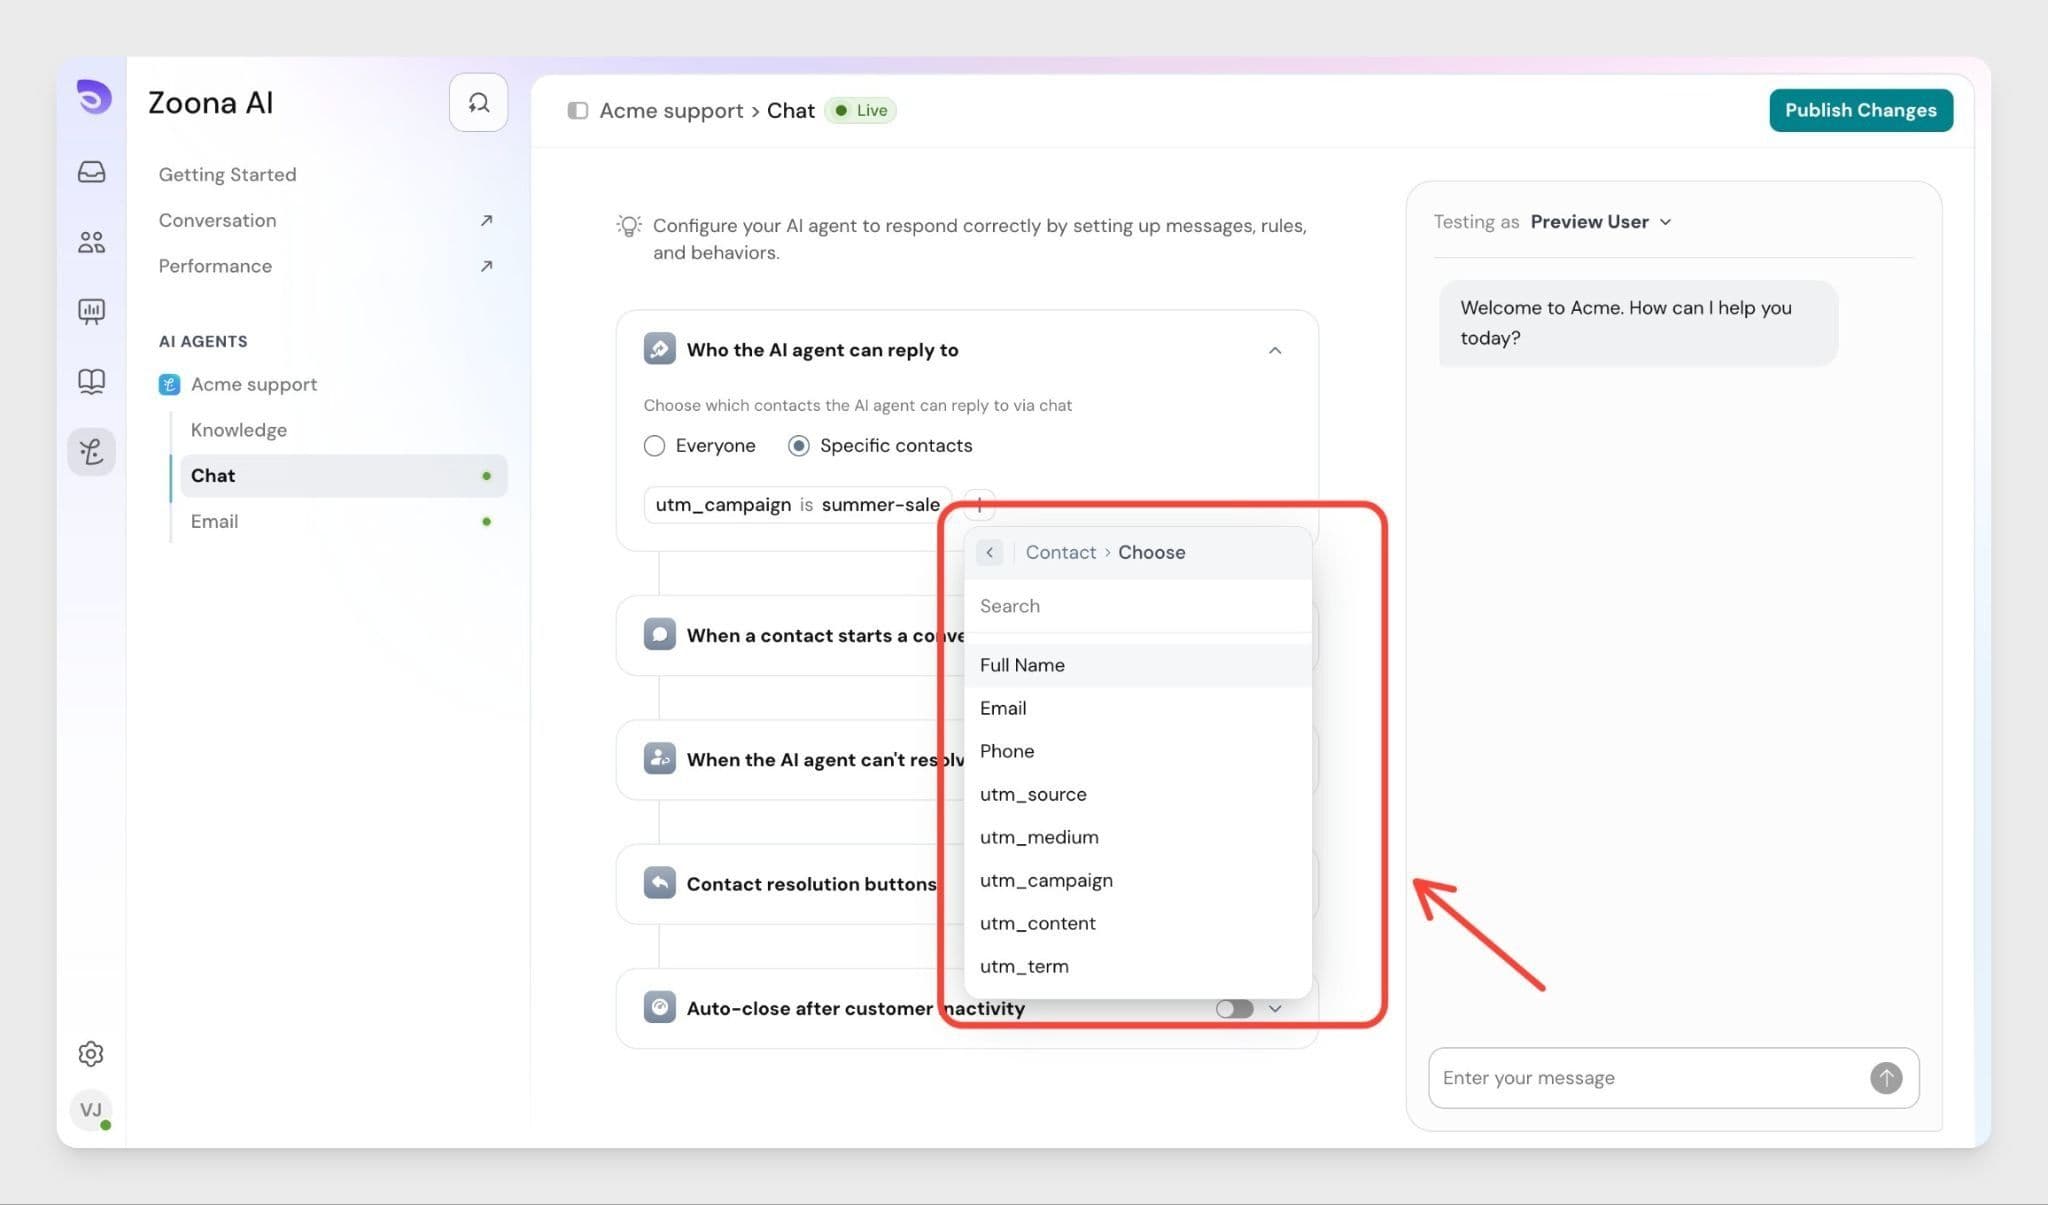
- Specific contacts — The AI Agent only replies to contacts that match the criteria you define.
Setting up conditions for Specific contacts
- Select Specific contacts.
- Click + Add condition.
- Choose a contact attribute to filter by. Available attributes include:
- Full Name
- Phone
- utm_source, utm_medium, utm_campaign, utm_content, utm_term
- Any custom contact property you've set up
- Set the match value for that attribute.
- Add more conditions to narrow the audience further.
Use this when you want the AI Agent to handle only a subset of your audience — for example, only contacts who landed from a specific campaign (utm_campaign is summer-sale), or only contacts from a specific email domain.
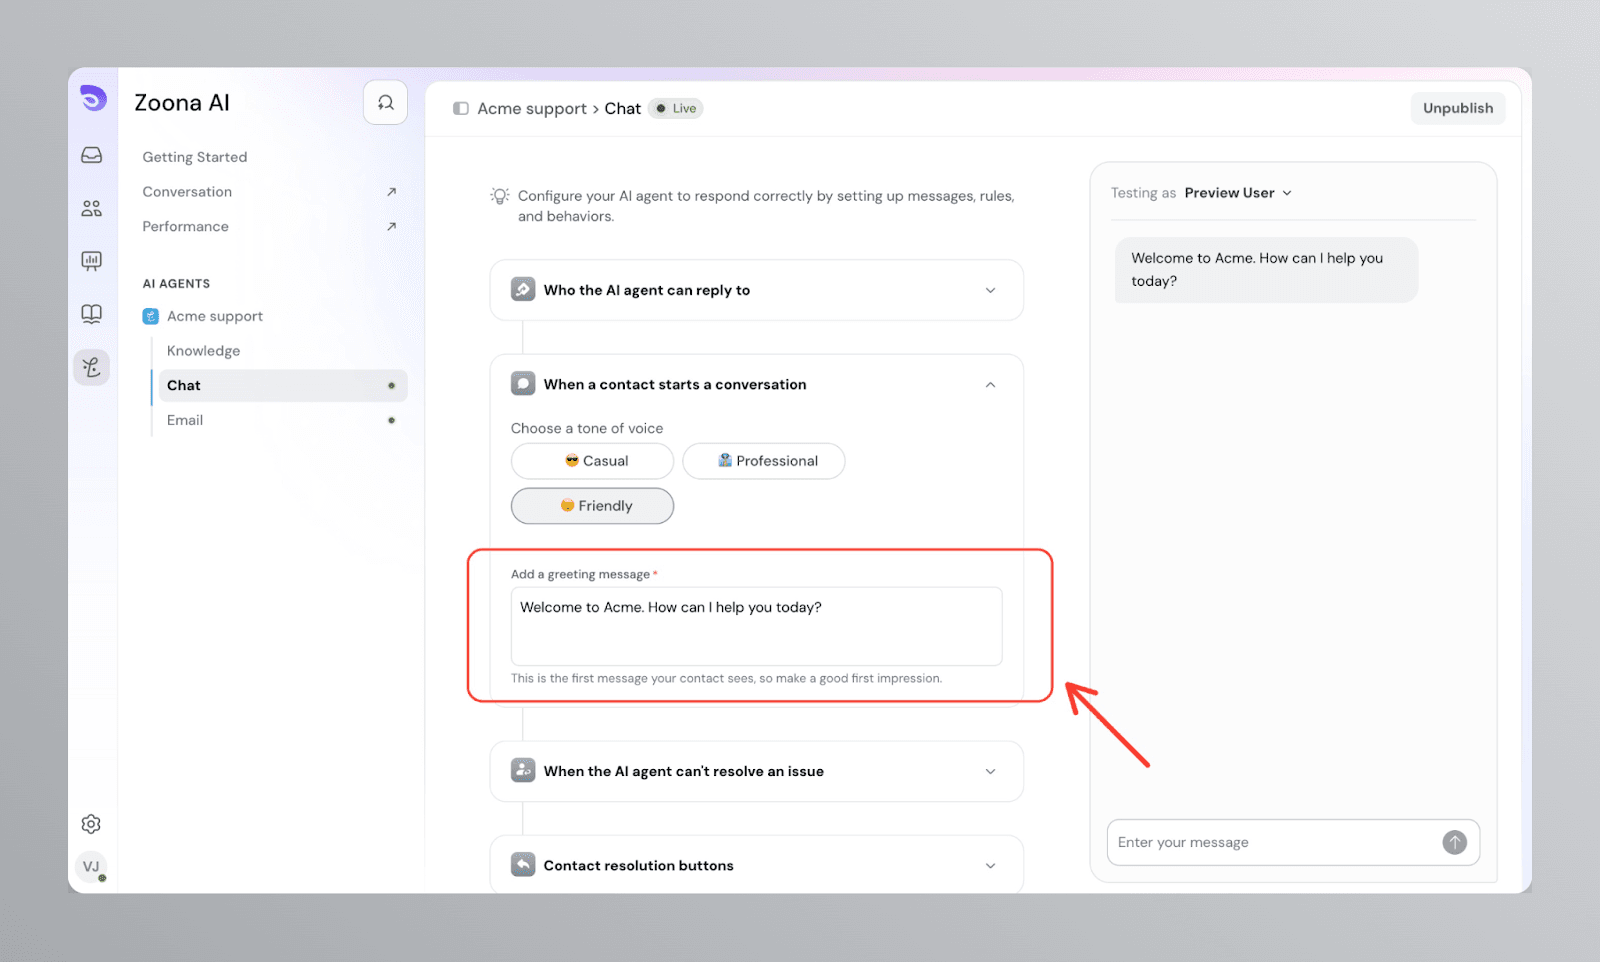
When a contact starts a conversation
This section controls the first impression your customer gets on Chat.
Choose a tone of voice:
- 😎 Casual- Relaxed and easygoing, suitable for informal brands.
- 👔 Professional- Clear, polite, and business-like.
- 🤗 Friendly- Warm, conversational, and approachable.
Add a greeting message:
This is the first message your customer sees when they start a chat. Keep it short and brand-consistent.
Example: "Welcome to Acme. How can I help you today?"
When the AI Agent can't resolve an issue
Set what happens when the AI Agent can't answer a customer's question.
- Assign the conversation to a team or agent — The chat is routed to a specific agent or team for follow-up.
- Offer other ways to get help — The AI Agent points the customer to other support options directly inside the conversation.
Reply buttons in AI Agent responses
The AI Agent can include reply buttons in its chat responses, so a customer taps an option instead of typing it out. When the AI Agent can't resolve an issue, it can offer other ways to get help as buttons right in the conversation, rather than only as a text message.
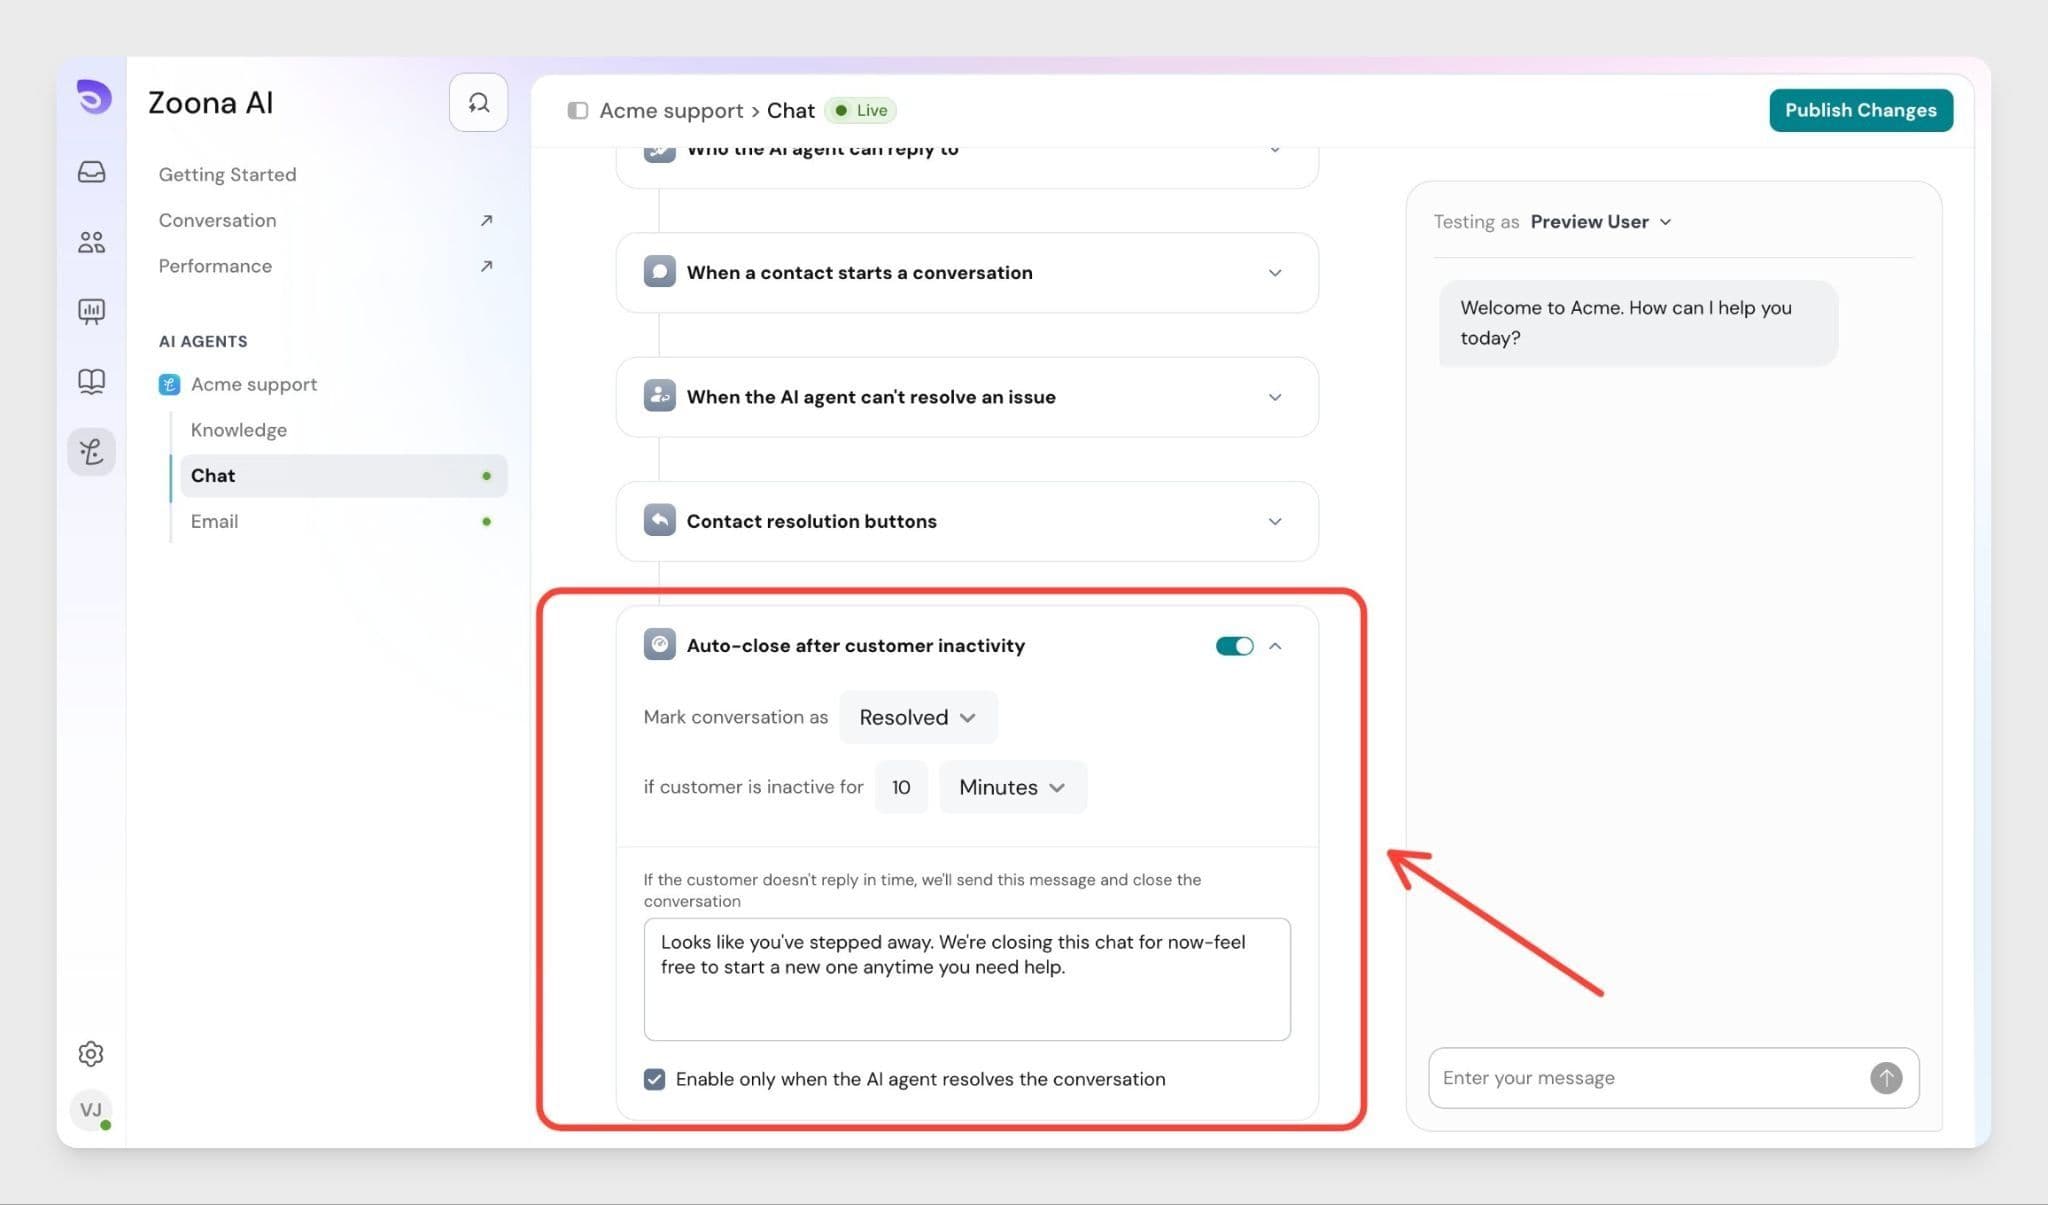
Auto-close after customer inactivity
Enable this to close a chat automatically after the customer has been inactive for a set period. This keeps your Inbox clean and prevents chats from staying open indefinitely.
This setting is off by default. When enabled, you can:
- Set the status the conversation is marked as (e.g., Resolved).
- Set the inactivity duration (e.g., 10 minutes).
- Add a closing message — If the customer doesn't reply in time, this message is sent before the chat closes. Leave it blank to close without a message.
- Enable only when the AI Agent resolves the conversation — Tick this to limit auto-close to chats the AI Agent resolved on its own. Leave unticked to auto-close any inactive chat, including those handled by human agents.
Publish your changes
Once you've configured the Chat channel, click Publish in the top-right corner. The AI Agent starts handling chats based on your settings immediately.
FAQs
- What tone should I pick for Chat?
Match it to your brand. Use Casual for consumer or lifestyle brands, Friendly for most customer support use cases, and Professional for regulated industries like finance or healthcare. - Can I set different greeting messages for different audiences?
No. The greeting message applies to every contact the AI Agent replies to on Chat. Specific contacts only controls who the AI Agent responds to — it doesn't let you send different greetings to different groups. - Should I assign to a team or offer other ways to get help?
Use Assign to a team or agent if you have a support team ready to take over unresolved chats. Offer other ways to get help if you'd rather point customers to a help centre article, a contact form, or business-hours info — useful for teams without 24/7 coverage. - Does auto-close affect conversations handled by human agents?
It depends on the Enable only when the AI Agent resolves the conversation checkbox. If ticked, auto-close applies only to AI-resolved chats. If unticked, any inactive chat will close after the set duration-including ones assigned to human agents. - Do Chat settings apply to Email too?
No. Chat and Email are configured independently. Settings you change on Chat do not carry over to Email.