sparrowdesk-logo-transparent-1.png
Go to sparrowdesk.com
Home
SparrowDesk Overview
  • Overview of SparrowDesk
  • Feature Overview in SparrowDesk
  • SparrowDesk Glossary
Getting Started
  • Setting Up Account Details
  • Default Business Hours
  • Understanding and Creating Teams
  • Inviting Members to the Platform
  • Roles and Permissions
  • Single Sign-On
  • Brands in SparrowDesk
  • Getting Started FAQs
  • Use a custom domain for your support portal
Inbox
  • Understanding the Inbox in SparrowDesk
  • Managing Custom Views in Inbox
  • Live Chats in Inbox
  • Staying on Top of New Messages from Customers
  • Conversation Fields in SparrowDesk
  • Merging Conversations in SparrowDesk
  • Adding Watchers to a conversation
  • Round Robin assignment explained
  • Export Conversations as CSV
  • Bulk update fields
  • Forward a Conversation to an External Contact
  • Common Email Delivery Errors
Channels
  • Setting Up Email as a Support ChannelConnect your custom email address How do I send and receive emails via SMTP and IMAP ? How do I find my SMTP/IMAP server address and port number? Common Errors while Connecting through SMTP/IMAPHow to Prevent Emails From Going to Spam Email Signatures
  • Installing Chat Widget Chat Widget Installation on WordPressInstall the Chat Widget on ShopifyCustomising Chat WidgetEmbedding and Configuring the SparrowDesk Chat WidgetChat Widget SettingsWhy End Users Don’t Always See Their Chat HistoryTrack page visits in SparrowDesk
Contacts
  • Contacts in SparrowDesk
  • How to manage contact segments
  • Deleting and Blocking Contacts in SparrowDesk
  • Contact Fields in SparrowDesk
Reports
  • Conversation Report
  • Team Performance Report
  • Understanding the AI Agent Report in SparrowDesk
  • Viewing CSAT reports in SparrowDesk
  • Reports FAQ
  • Exporting Reports as PDF
Automation
  • Macros
  • Business Hours
  • Service-Level Agreements (SLAs)
  • Setting up CSAT (Customer Satisfaction) in SparrowDesk
Zoona AI
  • AI Suggested replies in your Inbox
  • AI-Generated Chat Subjects
  • Zoona AI Knowledge Improvements
  • Introduction to AI AgentAI Agent - Configure PersonaTraining your AI AgentZoona AI Agent CommandsAI Agent - Deploying on chatAI Agent - Deploying on EmailHow to Create a Command Zoona AI Agent - FAQUnderstanding AI resolutions in SparrowDesk
Workflows
  • Automate repetitive tasks through Workflows
  • How to Create a Workflow
  • Workflow Blocks Library
Help Centre
  • Write Knowledge Articles for your Help Centre and AI Agents
  • Setting Up and Customizing Your Help Center
  • Use a Custom Domain for Your Help Center
  • Make Your Help Centre Discoverable in Search results
  • Adding Google Tag Manager to your Help Center
  • Creating a Ticket Form Setting up Customer Portal
Billing
  • How does SparrowDesk pricing work?
  • What is Seat ?
  • Manage your Billing and Invoices
  • About Sales Tax
  • How to cancel your subscription
  • Frequently Asked Questions
  • AI Co-pilot and AI Resolution billing
  • SparrowDesk Startup Program
Apps and Integrations
  • Okta Single Sign on setup for SparrowDesk
  • Integrating HubSpot with SparrowDesk
  • Integrating SurveySparrow with SparrowDesk
  • Integrating SparrowDesk with Zapier
  • Connecting SparrowDesk with Attio
  • Connecting SparrowDesk with Linear
  • Integrating SparrowDesk with Jira
  • Connecting SparrowDesk for Gmail
  • Integrating SparrowDesk with Notion
  • Integrating SparrowDesk with Slack
  • Integrating SparrowDesk with Shopify

Inviting Members to the Platform

Timer2 min read
JustinJustin

Inviting new members to your SparrowDesk account is simple and ensures your whole team can collaborate effectively. You can manage invitations, assign roles, and set team memberships directly from the platform.

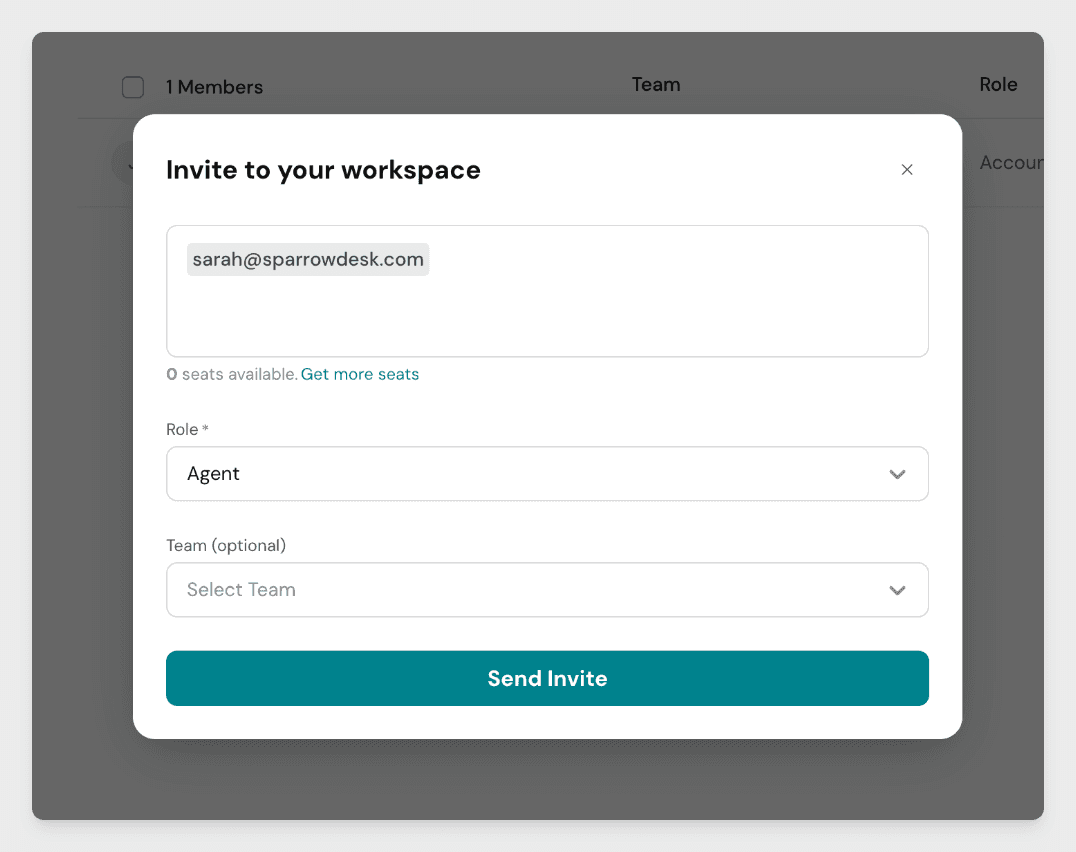
How to Invite Members

  • Navigate to Settings → Members.
  • Click on Invite Member.

member-new.jpg
Fill in the details for the new member:

  • Email address: The invite will be sent to this email.
  • Name: Helps identify the member inside the platform.
  • Teams: Choose the teams this member should be part of (optional).
  • Role: Assign their role (e.g., agent, admin, etc.).

members-form.jpg
Click Send Invite.


What Happens Next

  • The invited member will receive an email containing a Verify Email button.
  • By clicking the button, they can confirm their email and join your account.

If the member does not receive the invite:

  • Ask them to check their Spam or Junk folder.
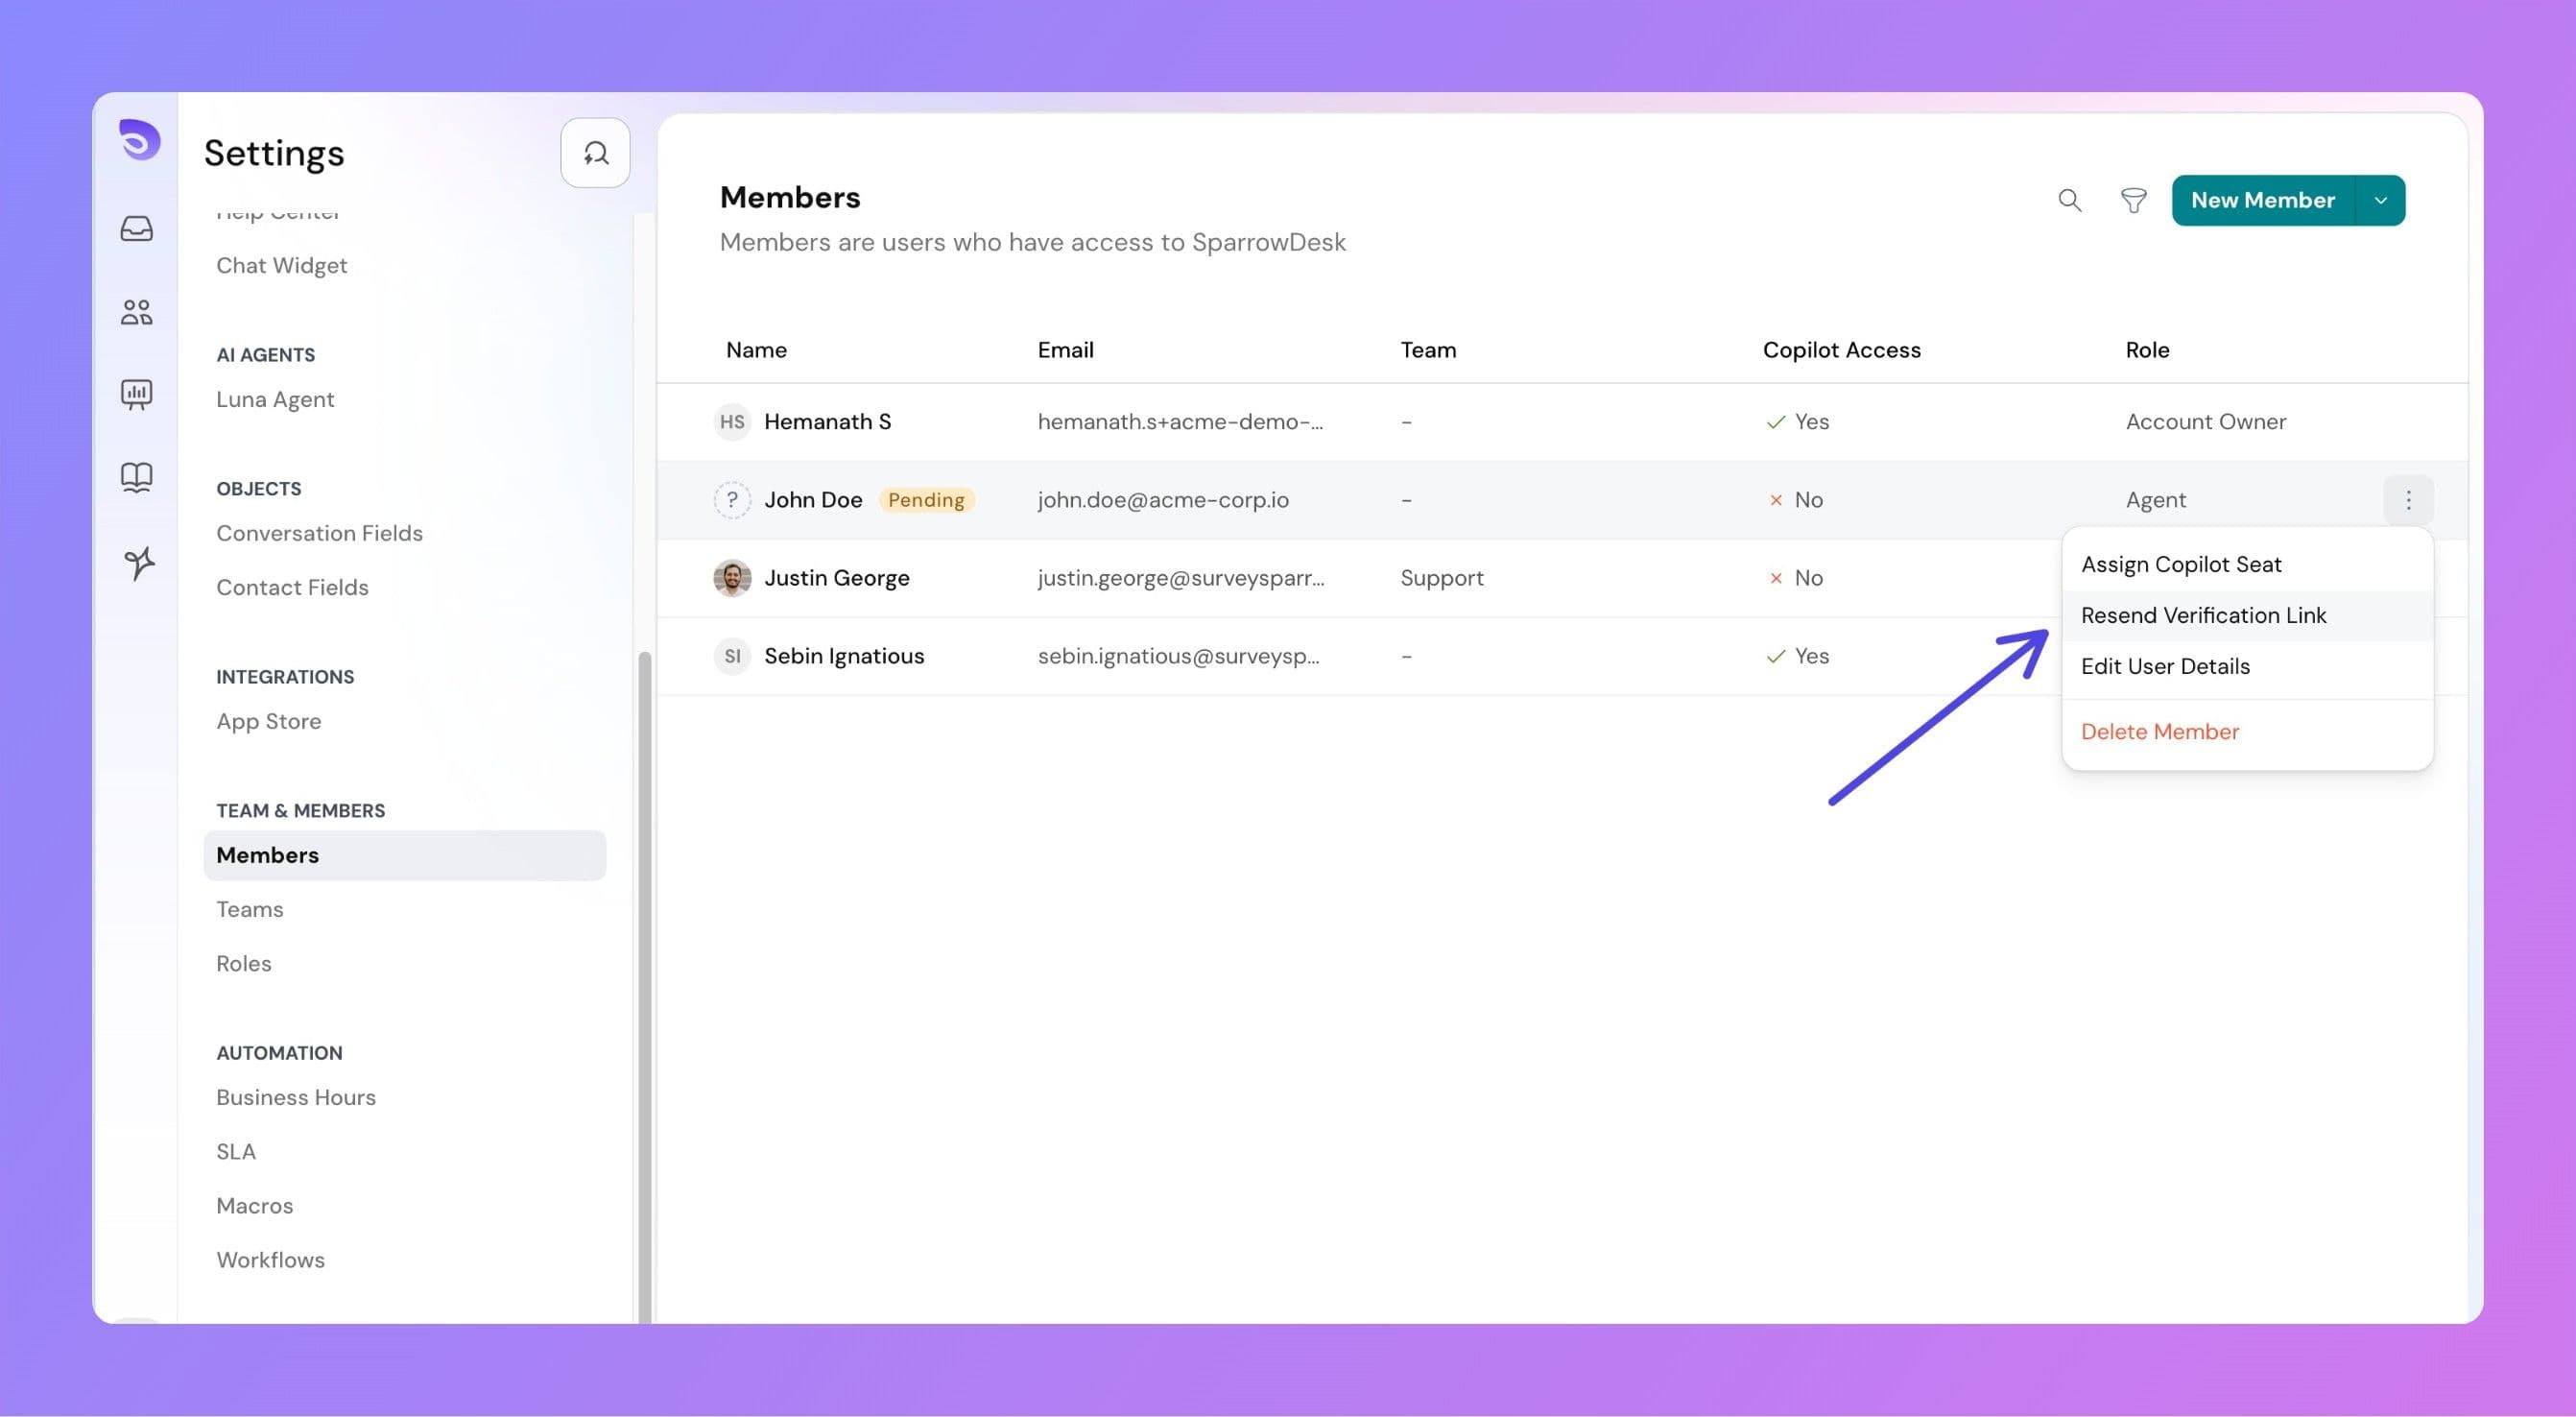
  • If still not found, you can re-send the invite from the Members page.

members-reverify.jpg


Seat Limits

The number of members you can add depends on your subscription plan.

Example: If your plan includes 10 seats and you already have 1 member (yourself), you can invite up to 9 more members.

Once you reach your seat limit:

  • New members cannot be invited.
  • To add more, you can remove an existing member and reuse that seat.


Frequently Asked Questions (FAQ)

What if the invited member does not get the email?
Ask them to check their Spam or Junk folder. If still not found, you can re-send the invitation from the Members page.

What happens if I reach my seat limit?
You won’t be able to invite new members. To add someone else, you need to remove an existing member and reuse that seat.

Do invited members need to verify their email before joining?
Yes. Each invited member must verify their email by clicking the Verify Email button in the invitation to access your SparrowDesk account.

Can I change a member’s role after inviting them?
Yes. Roles can be modified anytime from the Members settings page once the member has joined.

Powered By SparrowDesk

Table of ContentsOn this page