
Understanding and Creating Teams
Overview
Teams in SparrowDesk help you group agents together based on department, expertise, or any structure that works for your business. This makes it easier to:
- Manage conversations efficiently
- Assign work fairly
- Operate on different business hours
- Track performance through team-specific reports
Whether you’re running multiple support departments or just want to keep work organized, Teams provide the flexibility and control you need.
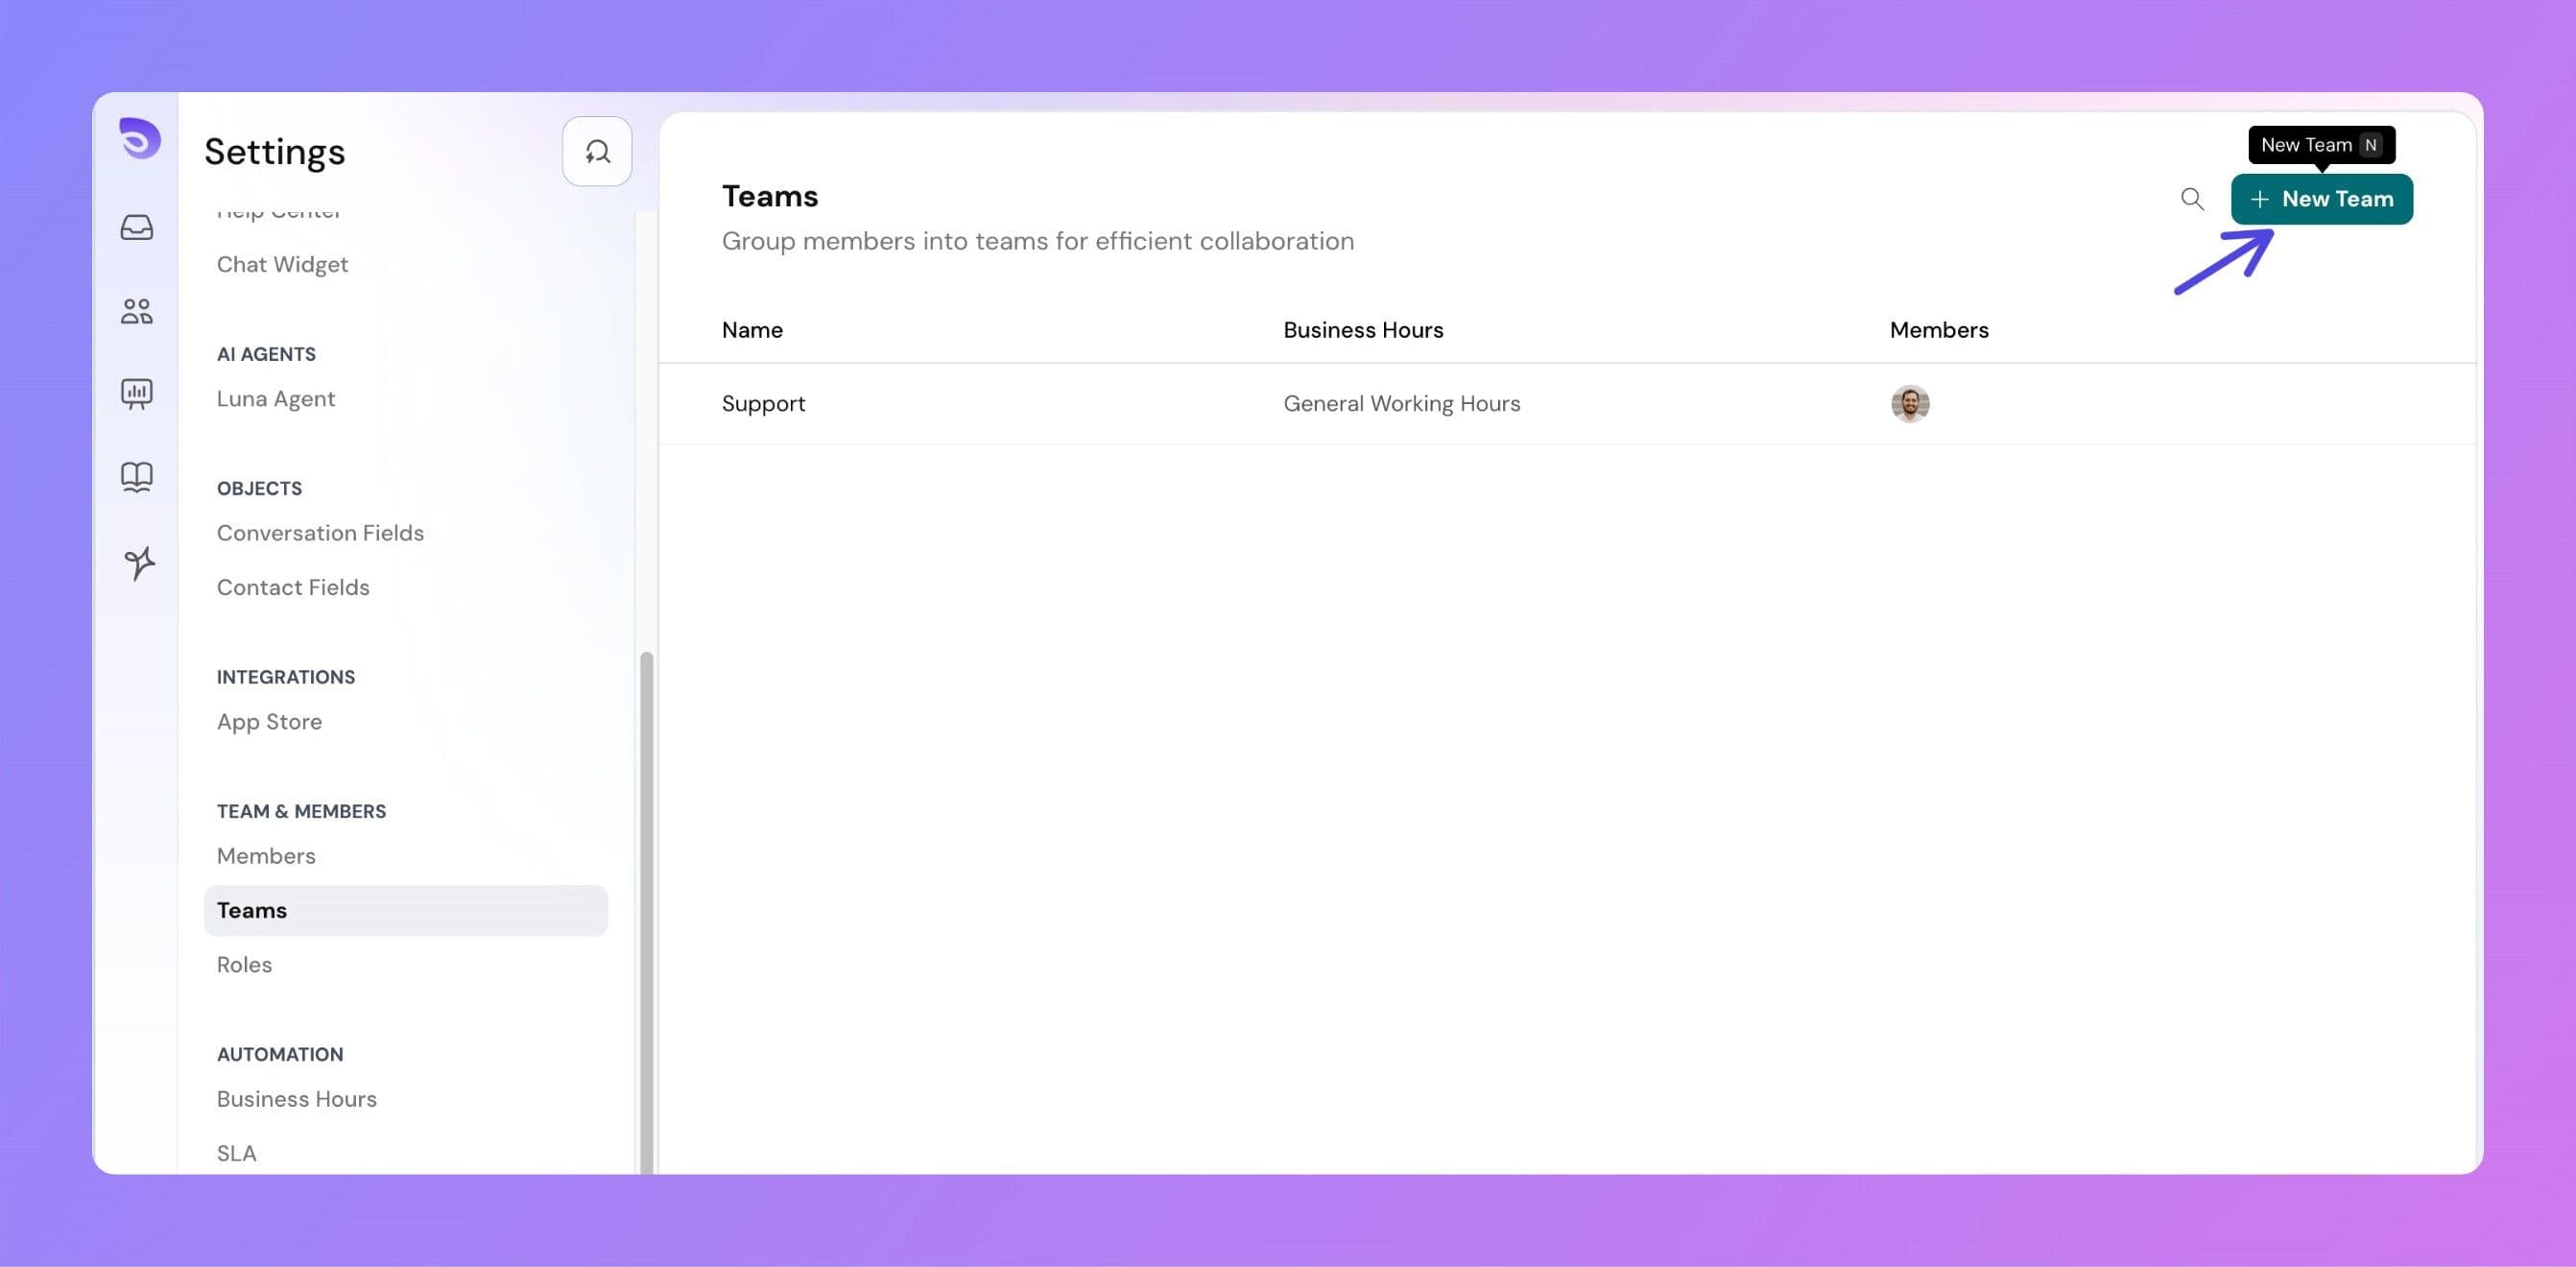
Creating a Team
Go to Settings → Teams and Click New Team
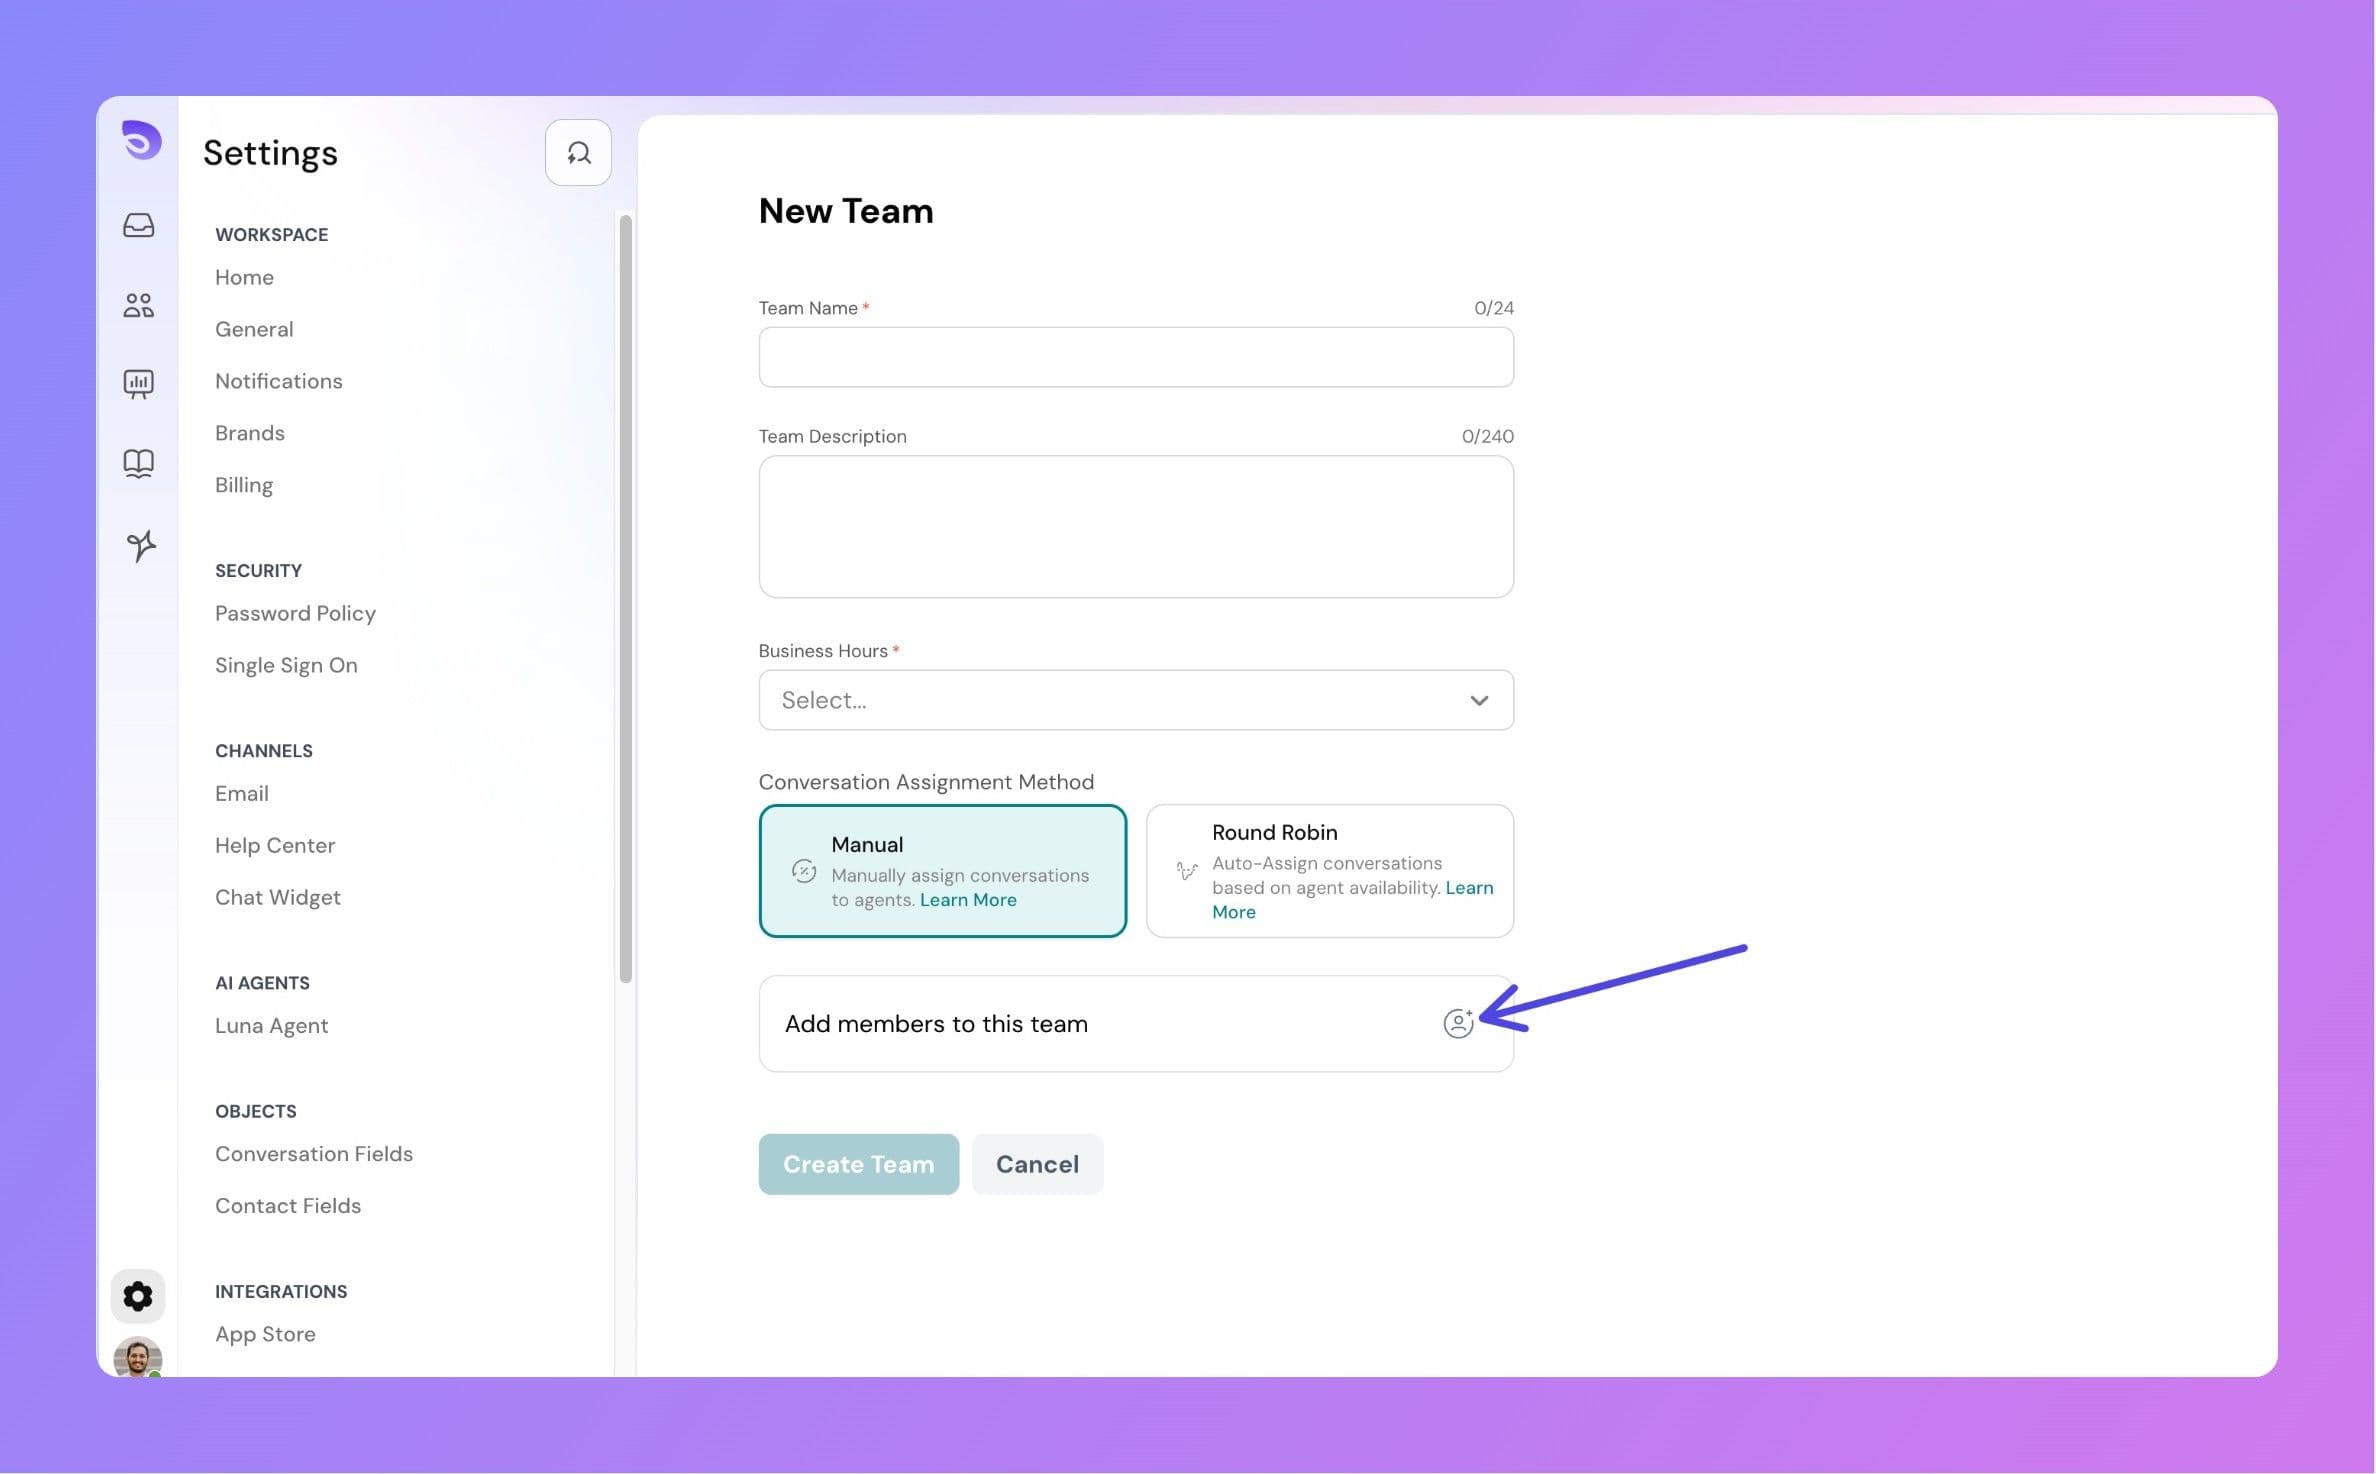
- Team Name – The display name for your team (max 24 characters)
- Team Description – Optional notes about the team’s role or focus (max 240 characters)
- Business Hours – Select the schedule this team will follow
Choose a conversation assignment method:
- Manual – Conversations must be assigned by an admin or agent
- Round Robin – Conversations are automatically assigned in sequence to available agents
Add members to the team by selecting from existing agents.
It is optional to add members while creating team. After creating teams, you can always come back and add members to it.
Click Create Team to save
Key Features
1. Team Management
- Unlimited Teams – Create as many as needed
- Business Hours per Team – Each team can have its own schedule
- Dedicated Members – Assign agents to the teams they should work in
2. Ticket Assignment Methods
- Manual Assignment – Gives admins complete control over who handles each conversation
- Round Robin – Ensures workload is evenly spread among available team members
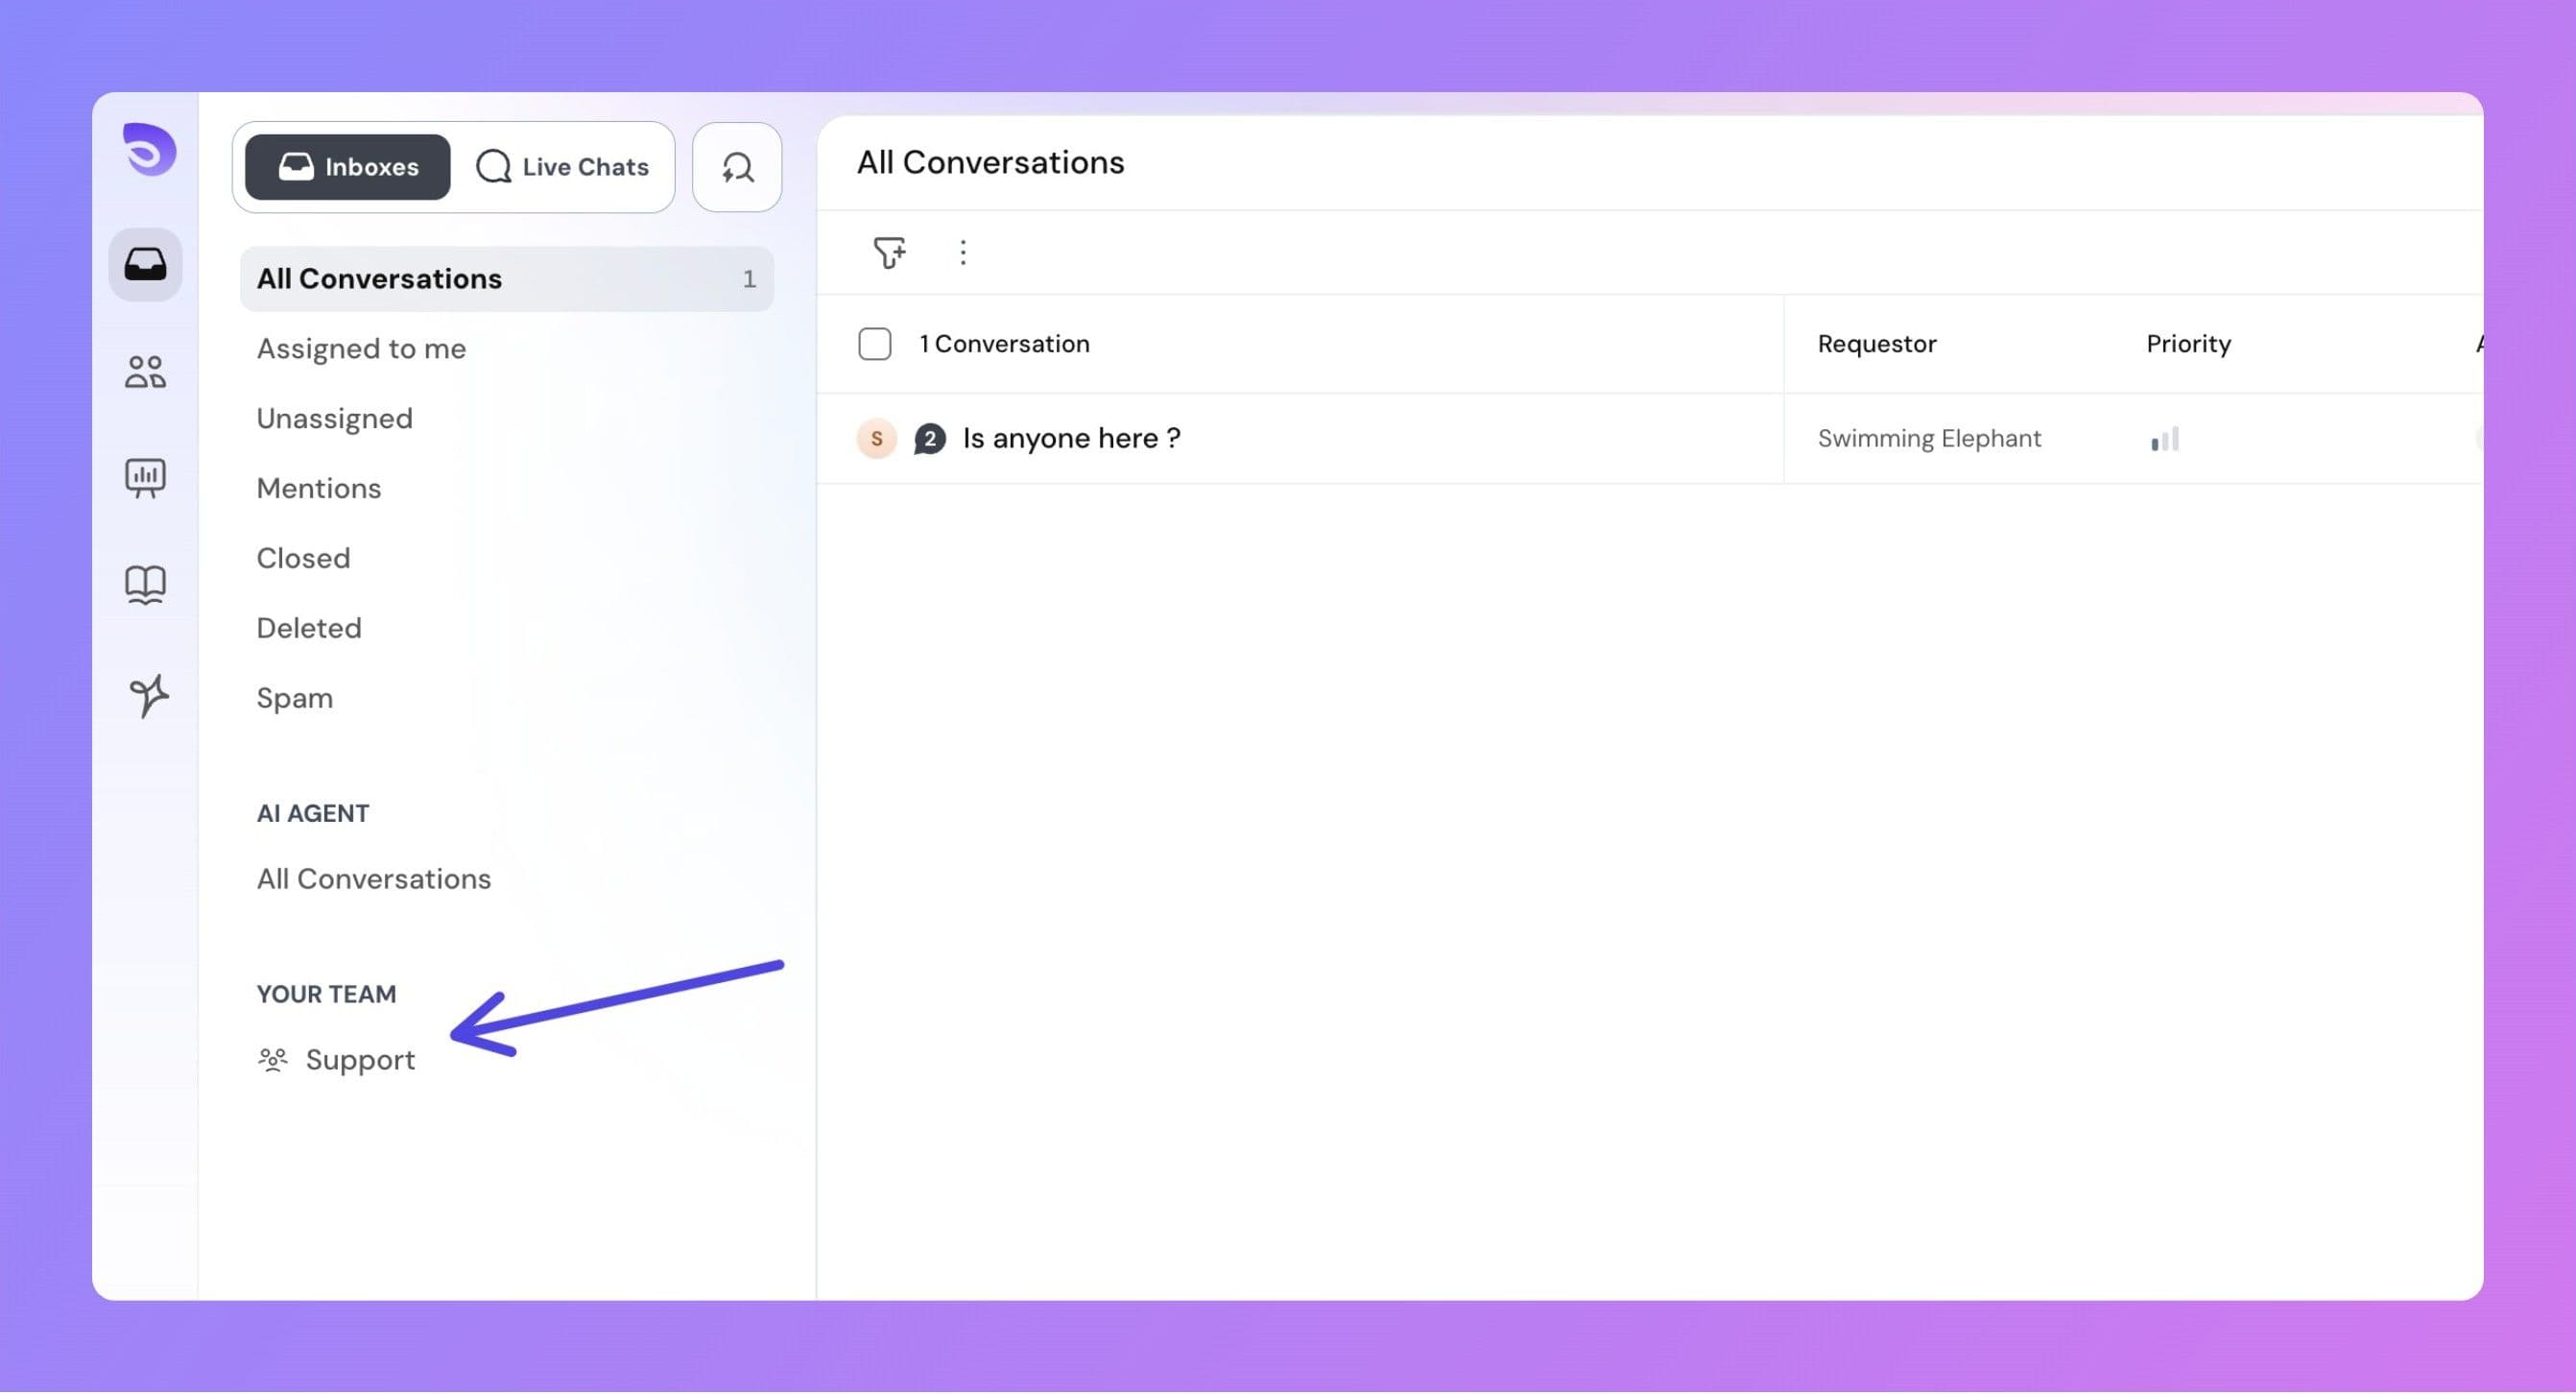
3. Team Views in Inbox
Once created, each team gets its own view in the inbox, showing all conversations assigned to that team.
Agents only see team views for teams they belong to.
4. Flexible Assignment
Conversations can be assigned in a variety of ways depending on your operational needs and the level of control you want to maintain over workload distribution:
- To an individual agent – Use this when you know that a specific agent has the right skill set, product knowledge, or prior customer history to handle the matter efficiently.
- To an entire team – Ideal for high‑volume or shared‑responsibility queues. Any available team member can pick up the conversation from the team inbox, ensuring responsiveness.
- To a specific agent within a team – Combines the visibility of team context with individual accountability. This keeps the conversation accessible to the whole team but ensures one person owns its resolution from start to finish.
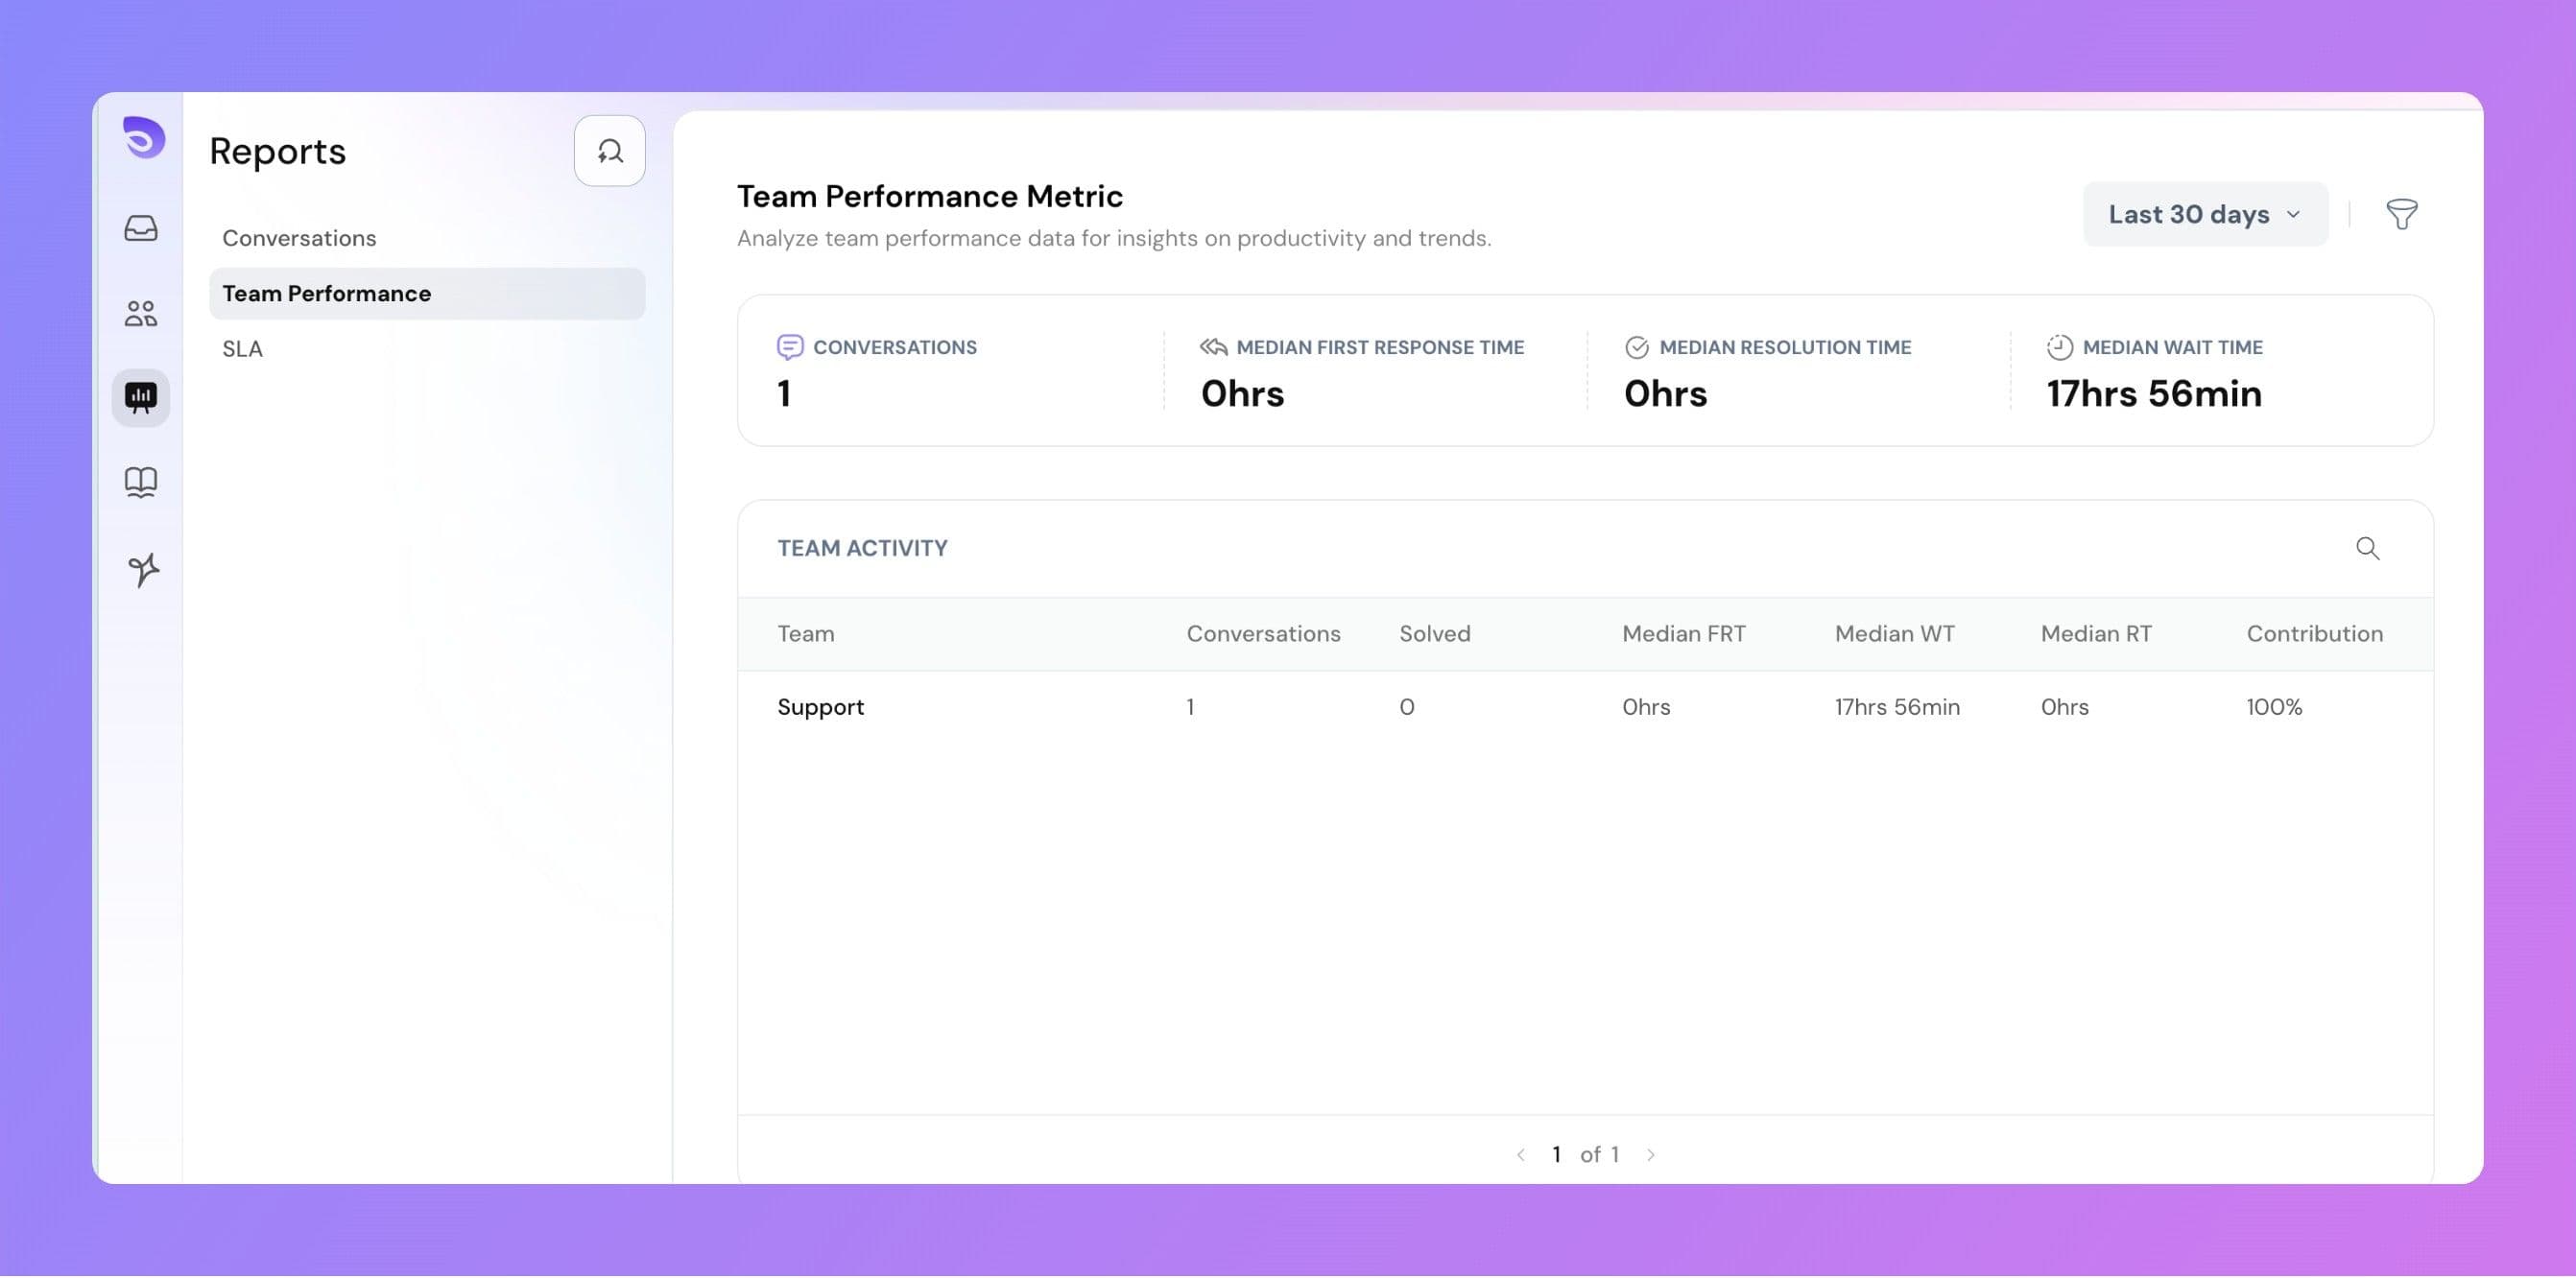
5. Reporting
Use the Reports module to gain deeper insights into how each team is performing and where adjustments might be needed. Reports can help you:
- Track conversation volume per team – See exactly how many conversations each team is handling within a selected date range. This helps identify workload spikes or underutilized capacity.
- Measure response times – Monitor how quickly teams are responding to new conversations, both for first replies and follow‑ups, so you can ensure service level agreements are being met.
- Evaluate resolution times – Understand how long it takes teams to fully resolve conversations from start to finish, allowing you to spot efficiency improvements.
- Analyze workload distribution and team efficiency – Compare how work is shared across team members and how effectively they manage their assigned conversations, ensuring no one is overloaded.
FAQ
Do I need to add members while creating a team?
No, adding members at the time of team creation is optional. You can always add members later.
Is there a limit to the number of teams I can create?
No, there is no limit. You can create as many teams as your organization requires.
Can I add members who are not yet part of the platform?
Yes, you can invite new members by adding their email addresses. They will receive an invitation to join. However, they must verify their email and join the platform before becoming active members of the team.
Best Practices
- Organize by expertise to improve first-contact resolution
- Use round robin for evenly skilled teams to balance workloads
- Set realistic business hours to manage customer expectations
- Review performance reports regularly to adjust team structures
- Encourage cross-team collaboration for better knowledge sharing