
Set Up a Service Catalogue

A service catalogue is a list of things employees can request from your teams, such as a new laptop, software access or a leave of absence. Employees sign in to your help centre, find the service they need, fill in a short form, and submit it. Each request arrives in your Inbox as a conversation, with everything your team needs to get started.
What You Need First
- Admin access. Only admins can create and publish services.
- The service catalogue turned on for your account.
- Signed-in employees. Services are only visible to contacts who are logged in to your help centre.
How the Service Catalogue Works
- An admin creates a service, adds the form fields it needs, and publishes it.
- An employee signs in to the help centre, searches or browses for the service, fills in the form and submits it.
- SparrowDesk creates a conversation named Service name | Requester name, for example "New laptop | Sarah Chen". The employee's answers are saved on the conversation as a snapshot.
- Your team works on it like any other conversation: assign it, reply, add internal notes, and solve it.
- If the service needs approval, the request is sent for approval, either automatically when the employee submits it or by an agent from the conversation. See Approvals for Service Requests.
Create a Service
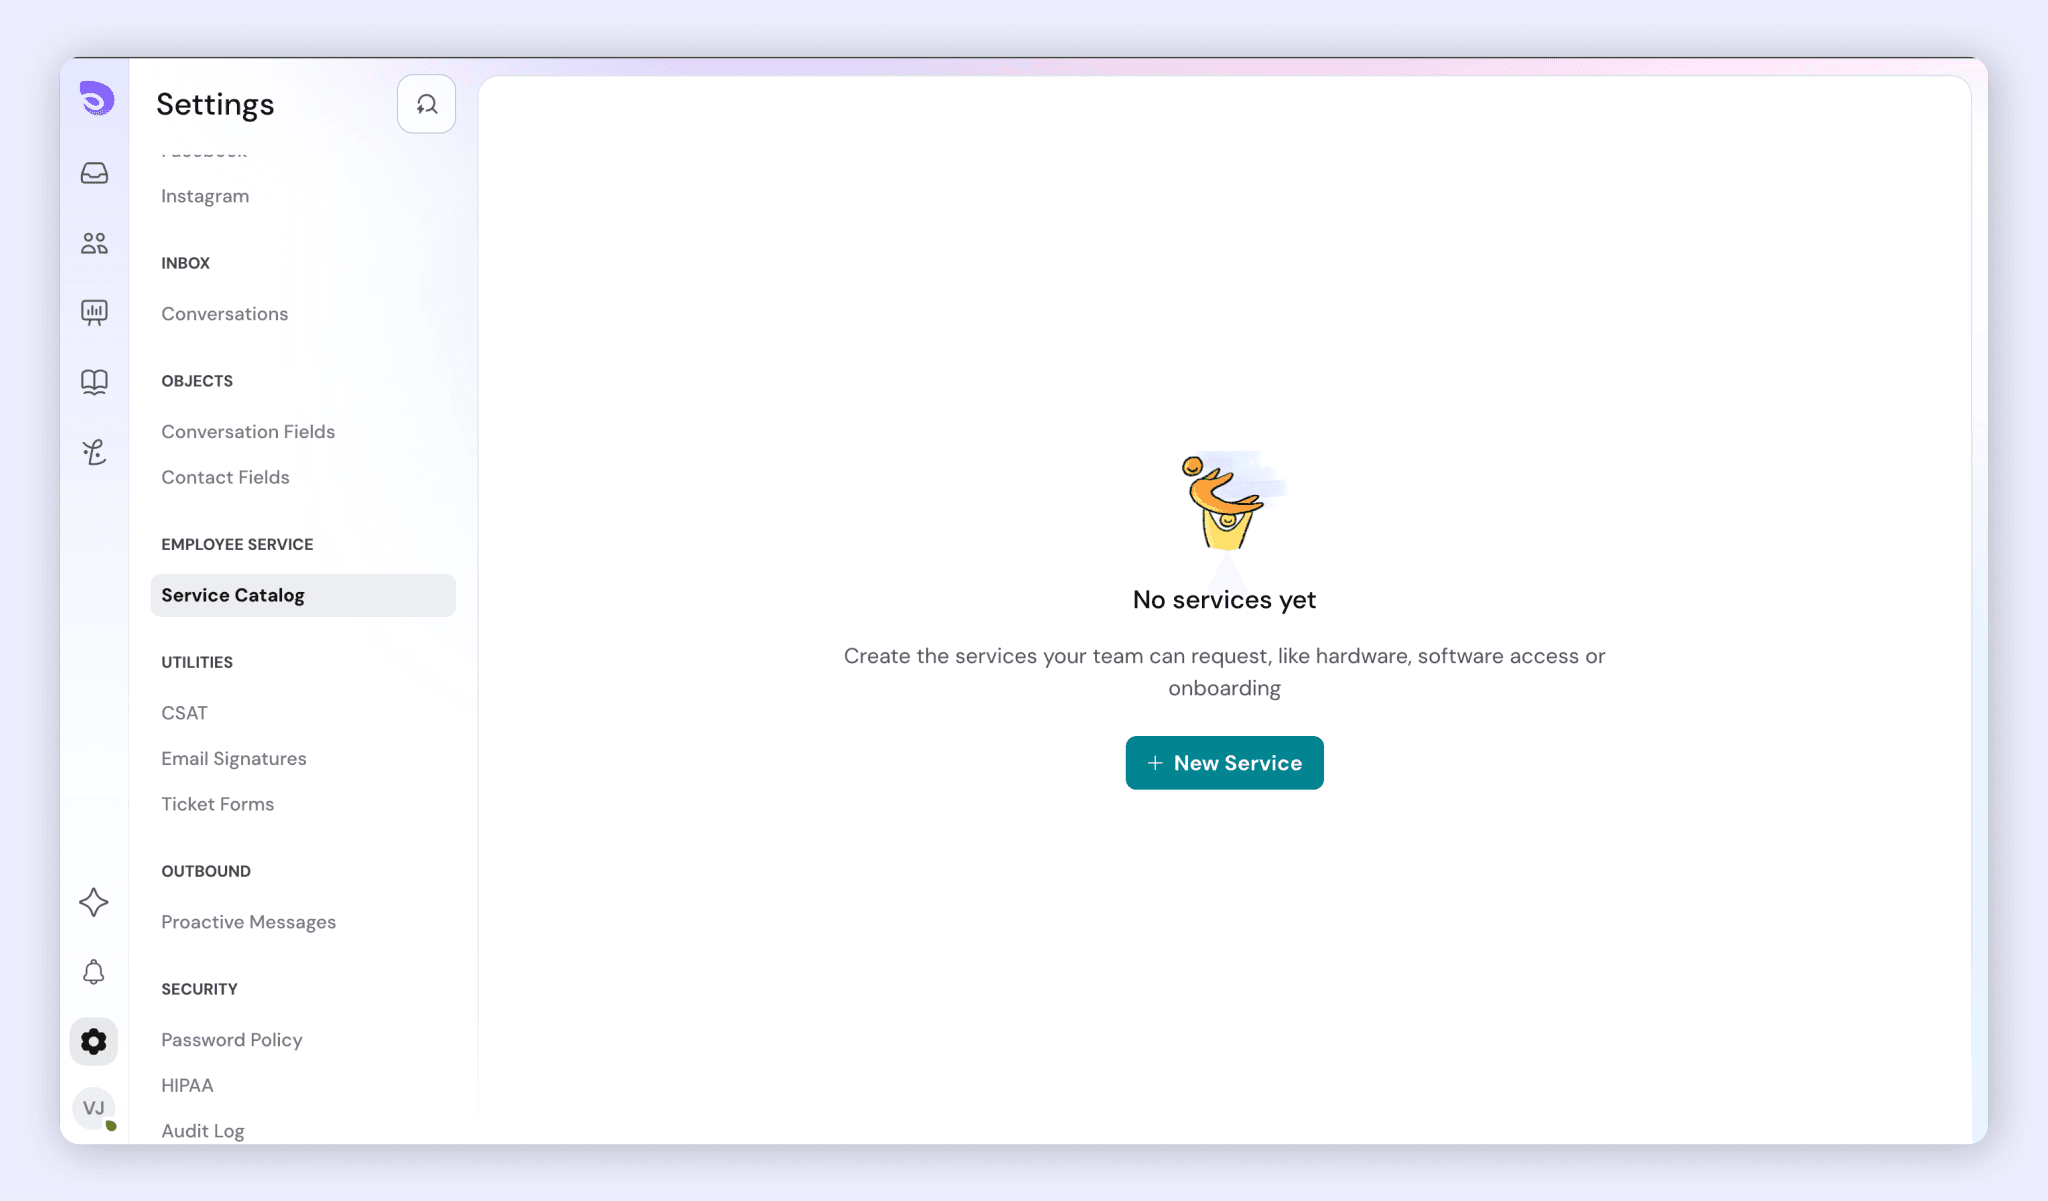
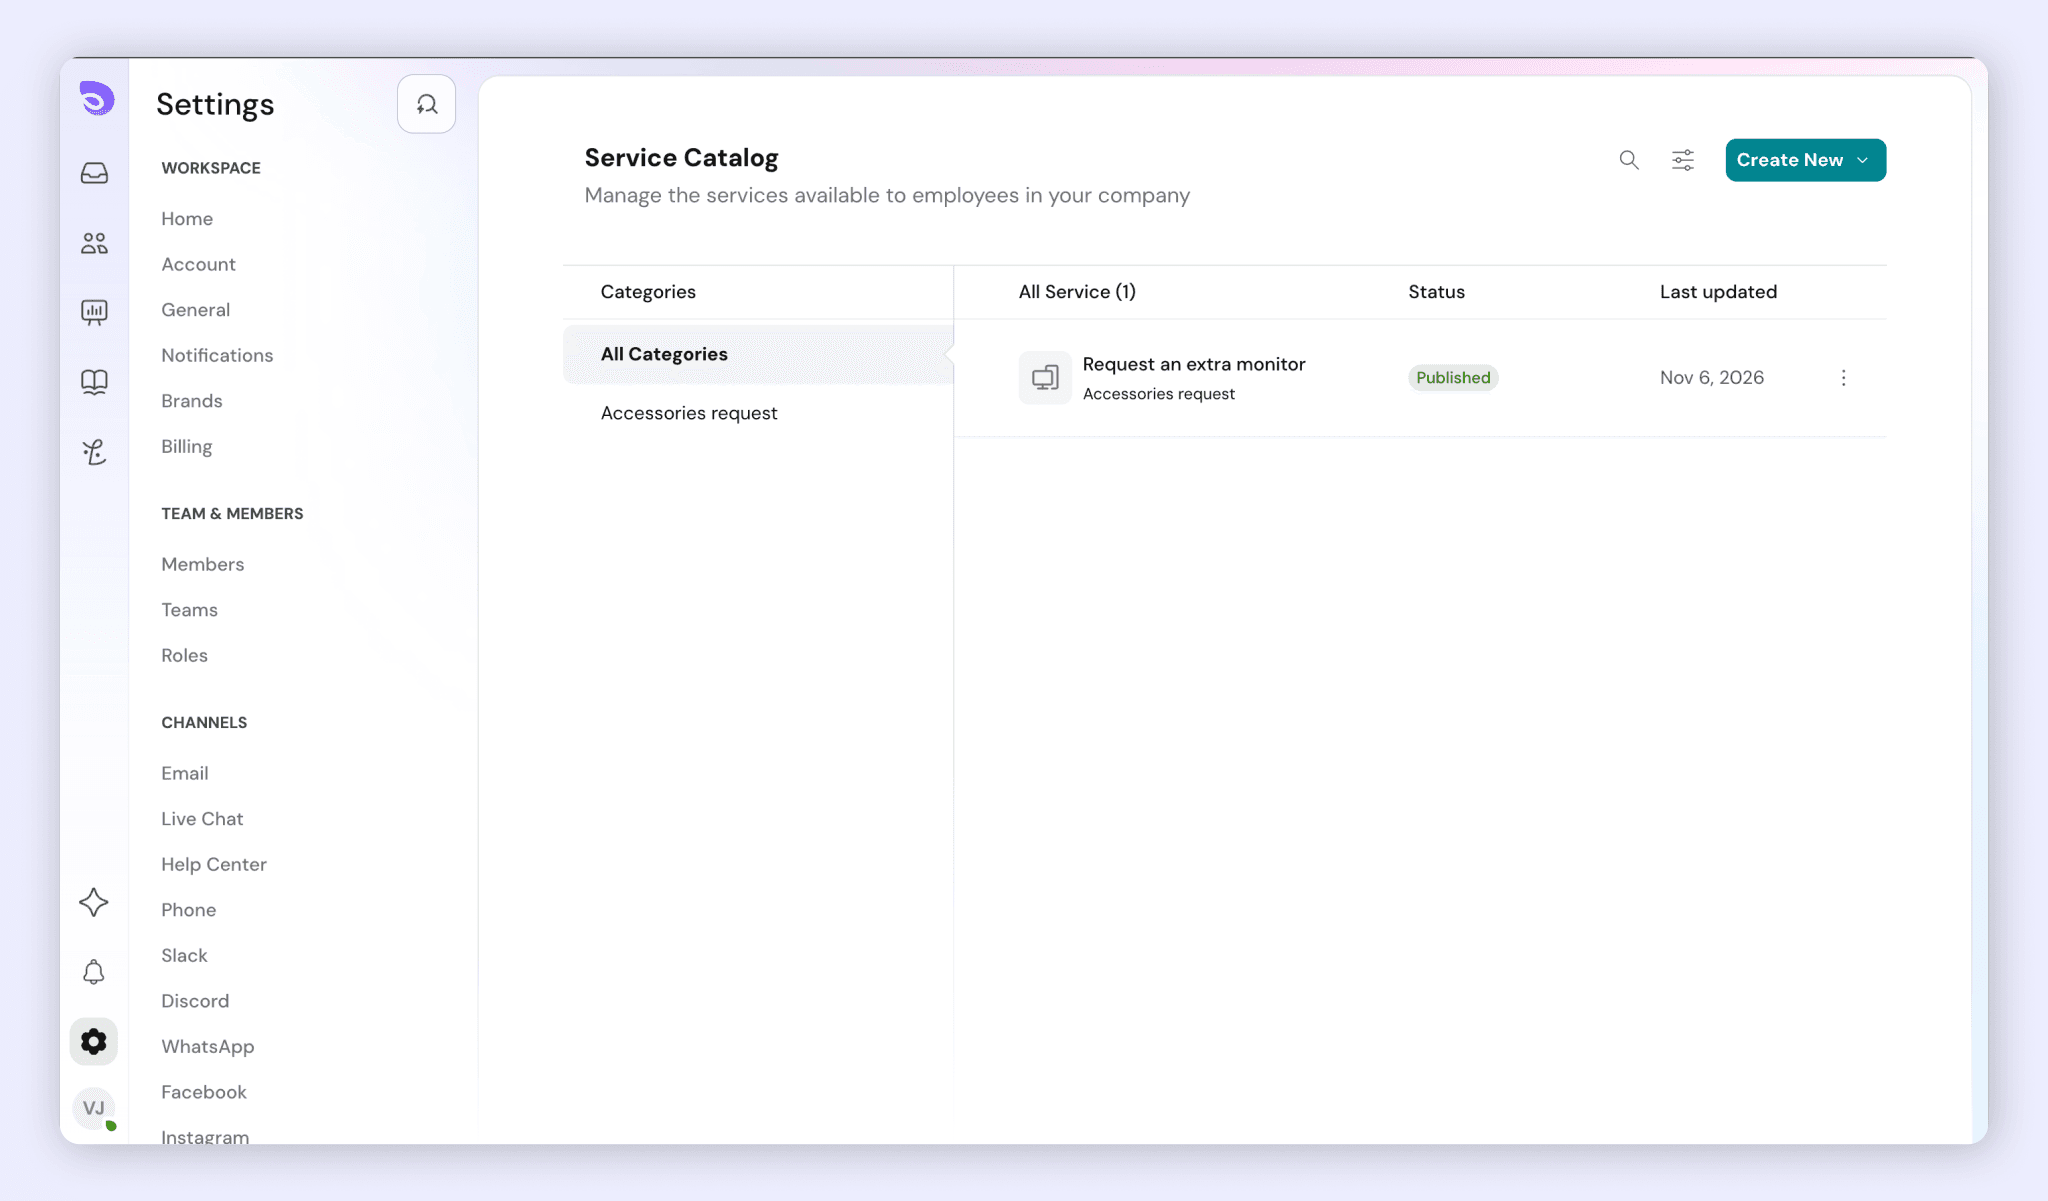
- Go to Settings → Employee Service → Service Catalog.
- Click New Service. The setup page opens.
- Create a category for the service. Every service must belong to one.
- Enter a Name. This is what employees see in search and lists. Name it the way employees would ask for it: "New laptop", not "Hardware provisioning".
- Enter a Short summary. This one line appears under the name in search results and lists, so employees can tell similar services apart.
- Optionally, add Details. This is the fuller introduction at the top of the service page: what's included, what isn't, how long it usually takes, and any useful links.
- Check the preview panel beside the fields. It shows how the service looks in a list and on its own page, and updates as you type.
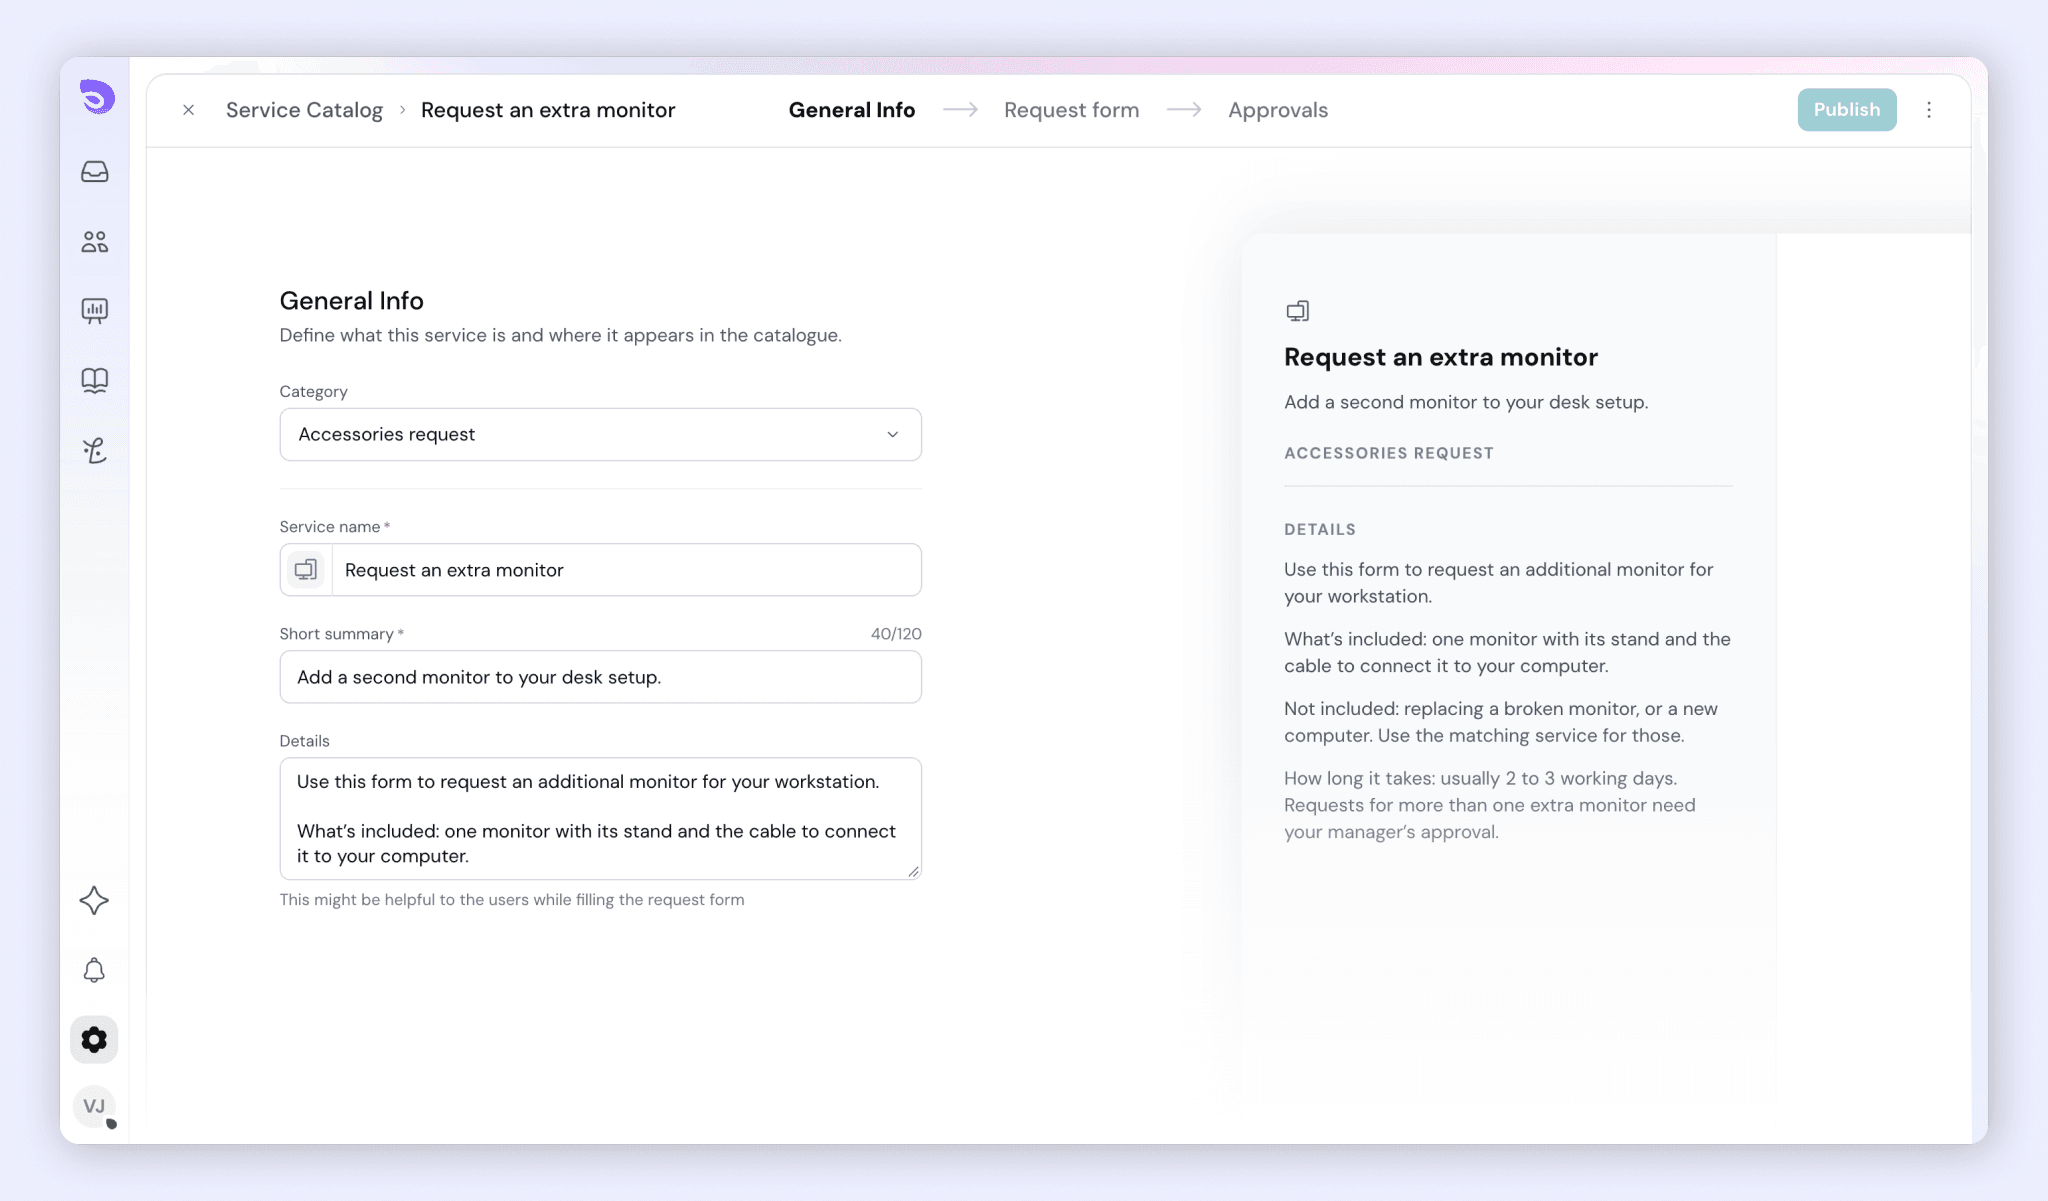
New services are saved as a draft automatically. Employees can't see a service until you publish it.
Tip: There's no separate keywords field. To help employees find a service however they phrase it, add the words they'd use, such as "laptop, computer, MacBook", to the summary or details.
Organise Services Into Categories
Categories help employees browse when they're not sure what they can ask for.
- Categories can be up to 3 levels deep, for example IT → Hardware → Laptops.
- Service categories are separate from your knowledge base categories. Articles and services are organised independently.
- Every service must belong to a category, so create at least one category before you add your first service.
Add Form Fields to a Service
The form asks for exactly what your team needs to fulfil the request, so the employee can submit once without follow-up questions.
- In the service, add the fields you need. The field types are:
- Single line
- Multi line
- Number
- Date
- Dropdown
- Multi-select
- Attachment
- For each field, enter a label in plain language. Add optional help text where it helps, for example "You'll find the asset tag on the bottom of your laptop."
- Mark the fields that are required.
- Drag fields to reorder them.
- To keep the form short for simple cases, add conditions so a field only appears based on an earlier answer.
The preview panel shows the form below the service's introduction, exactly as the employee will see it.
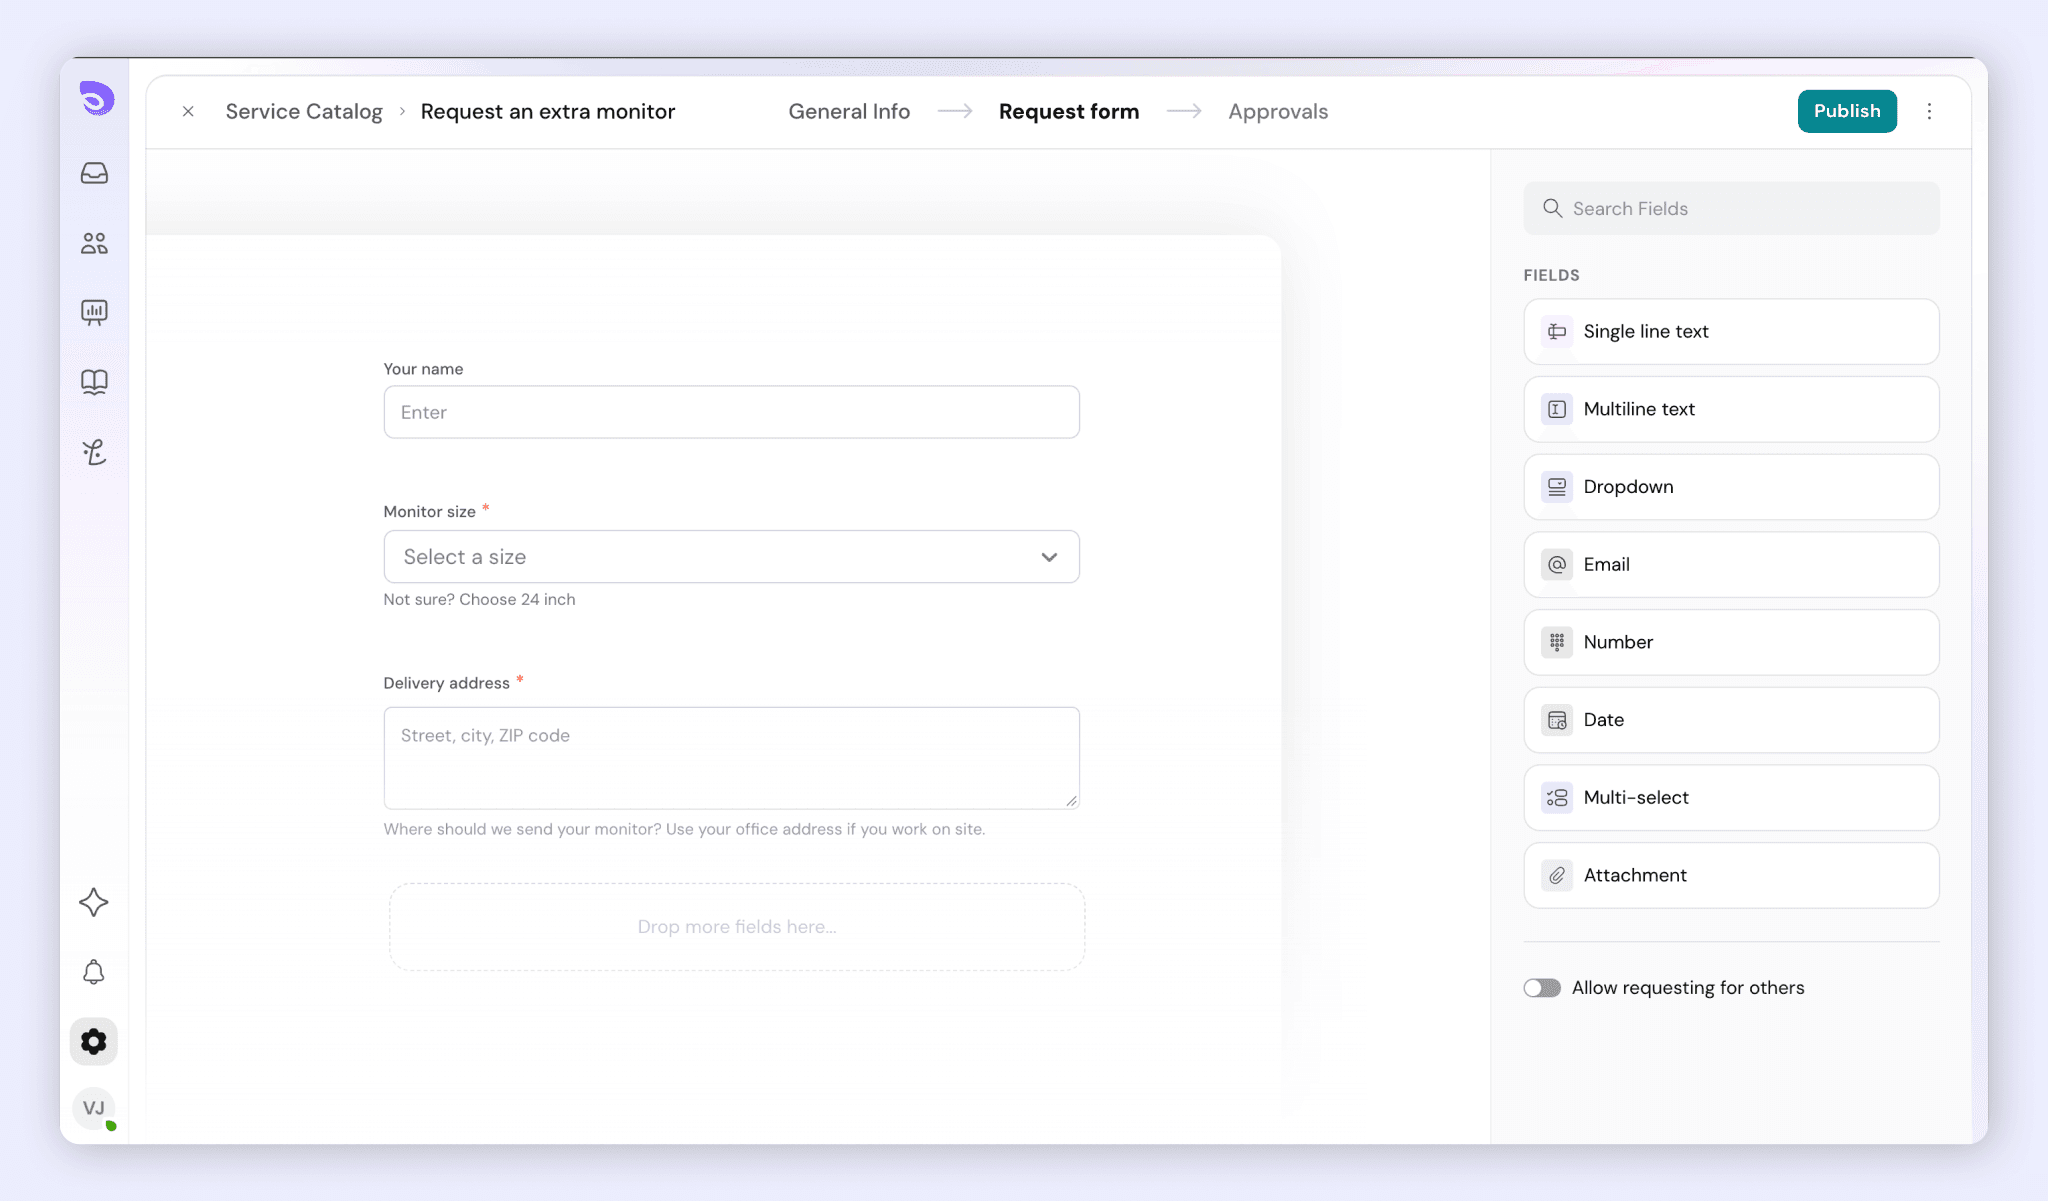
The employee's email is filled in automatically, because they're signed in.
Require Approval for a Service
New services require approval by default. You set it up in the service’s Approvals step.
- Choose who approves:
- Specific people: up to 20 agents or contacts.
- An approval process: a saved set of approvers you can reuse across services. A process can have several stages.
- If you chose more than one person, choose the rule:
- Any one approver: the first decision counts.
- Everyone: every approver must approve.
- One after another: approvers decide in order, one at a time.
- Choose how approval is sent:
- Send automatically: the request goes for approval as soon as the employee submits it.
- Send manually: an agent sends the request for approval from the conversation.
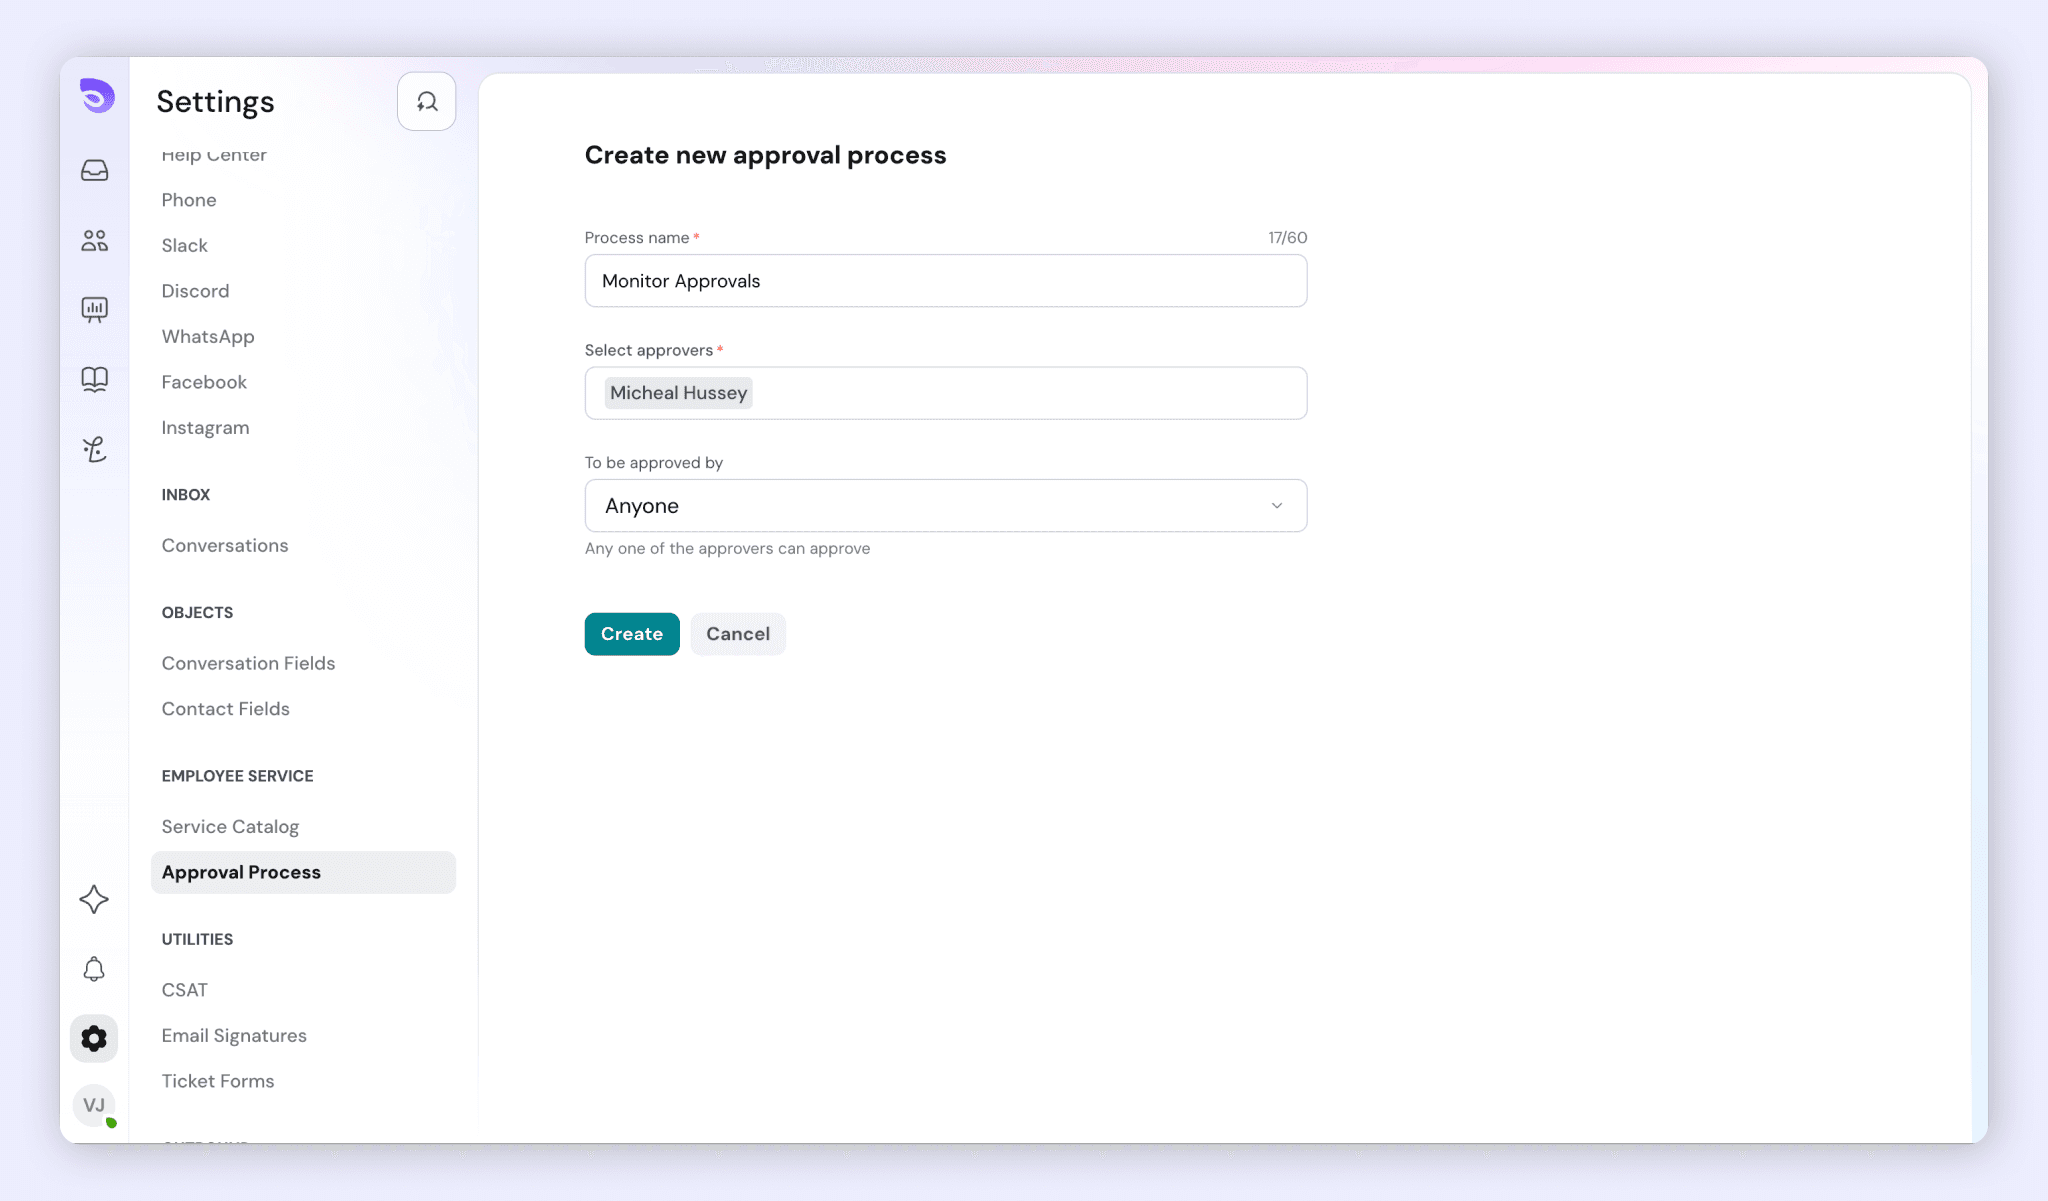
When a request is sent for approval, the conversation moves to the Waiting for Approval status.
Reuse approvers with an approval process. If several services need the same approvers, create an approval process once and pick it on each service. You can’t delete a process while a service uses it.
For how approvers decide and what everyone sees, see Approvals for Service Requests.
Publish a Service
When the service is ready, click Publish. It becomes visible to signed-in employees in your help centre straight away.
Control Who Can See Services
Services are visible only to contacts who are logged in to your help centre. There's no way to limit a service to a department, location or role in this version.
To make sure only your employees can sign in:
- Use single sign-on (SSO), so employees sign in with your company account. See Single Sign-On.
- Or, without SSO, turn off sign-up for your help centre, create a contact for each employee, and send them the account activation link.
What Employees See
Finding a service
- Employees search by typing what they need. Search matches the service name and description, shows results as they type, and tolerates small typos.
- They can also browse services by category.
- If nothing matches, they see a link to your default ticket form, so they can still raise a request.
Requesting for someone else
An employee can request a service on behalf of a colleague, for example to set things up for a new joiner. They choose someone else and pick the colleague by name or email. If the colleague isn't a contact yet, the employee can enter their email, and the contact is created when the request is submitted. The person who submitted the request is added as a CC, so they can follow it too.
After submitting
The employee gets the usual ticket confirmation emails. They can track the request and reply to your team from My requests in the help centre.
To cancel a request, the employee replies or emails your team. There's no cancel button in this version.
Work on Service Requests in the Inbox
Service requests arrive in the same Inbox as your other conversations.
- Find the service at a glance. The conversation is named Service name | Requester name.
- See the answers. The employee's answers are shown as a form receipt on the conversation.
- Route requests. Requests are assigned by your existing assignment rules and workflows. There's no assignee setting on the service itself.
- Filter by service. You can filter conversations by service in the Inbox and in reports, and use the service as a condition in workflow triggers.
- Ask the employee a question. Reply on the conversation and set it to Pending. In the help centre, the employee sees Awaiting your reply.
- Hand off. When the request is done, reply with anything the employee needs, such as a link or pickup instructions, and set the conversation to Solved.
The requester's department, manager and location show in the conversation sidebar if you store them as contact fields.
Edit, Clone, Unpublish, or Retire a Service
Services follow the same lifecycle as knowledge base articles.
- Edit a published service. Your changes are saved as unpublished changes. Click Publish to make them live, or discard them. Open requests aren't affected: each one keeps a snapshot of what the employee submitted.
- Unpublish a service to hide it from employees without deleting it.
- Retire a service you no longer offer. Its past requests keep their full history.
- Clone a service to start a new one from a copy, for example a similar hardware request. Change what you need, then publish it.
FAQ
- Who can see the service catalogue?
Only contacts who are logged in to your help centre. To make sure only employees can sign in, use SSO, or turn off sign-up and create a contact for each employee. - Can I limit a service to one department or location?
Not in this version. Every signed-in contact can see every published service. - Who gets assigned a service request?
Your existing assignment rules and workflows decide. There's no assignee setting on the service. - If I edit a service, do open requests change?
No. Each request keeps a snapshot of the form as the employee filled it in. - Can employees cancel a request?
Not from the help centre in this version. They can reply to the request or email your team. - What if an employee can't find the right service?
When a search finds nothing, they see a link to your default ticket form, so they can still raise a request. - Do approvers have to sign in?
By default, approvers can approve from the link in the email. To make them sign in first, turn off anyone with the link in your help centre’s approval settings. This is always off for HIPAA accounts.
Was this helpful?